 Version 1.0.0 · Laravel 13 · Flutter · Bangla, English & Arabic
Newsifly documentation
Everything you need to install, configure and launch your news portal: the public website, the admin panel, the API and the Android and iOS app. Written for a newsroom, not for a developer.
Read the sections in this order the first time: Requirements → Install the website → After installing → the part you need. The Known limitations section lists what is not included in this version.
Overview
Newsifly lets you run a news publication of your own. Reporters write, editors publish, readers read on the website or in the app, and you run everything from one admin panel. The website, the admin panel and the app all talk to the same Laravel backend (/api/v1), so a change you make is on every screen within seconds.
AI disclosure: AI tools were used to create the code, the documentation and the graphics of this item; see the AI disclosure.
Feature highlights
Readers
Front page, categories, search, short news, videos and reels, galleries, e-paper (PDF editions), polls, comments, bookmarks, reading-size and dark mode, push alerts, and an AI summary or translation of a story.
Reporters & editors
A Markdown editor with live preview, an AI writing helper, scheduled publishing, review before publishing, breaking news picked from today's stories, translations, and a media library for big photos and videos.
Revenue
Banner, native and full-screen ads on the website and in the app, your own creatives or AdSense and AdMob, with impressions and clicks counted.
You (admin)
Branding, languages, homepage layout, staff roles, push notifications, RSS imports, analytics, backups, one-click updates, security and system health, all in one panel.
Built for any language and any country
Bangla, English and Arabic ship in full: the whole website, the admin panel and the app change at once when you switch, and Arabic turns the layout right to left. Add any other language, edit every sentence in the translation manager, and let the AI translate stories. Time zone, site name, colors and logo are all set in the admin panel.
What's in the package
Newsifly comes as two downloads. Each has a main/ folder with the code, a documentation/ folder that opens this guide and a license/ folder.
| Download | What it is | Technology |
|---|---|---|
newsifly-web | The website, the admin panel and the API in main/, including the web installer and this documentation | Laravel 13, PHP 8.4, MySQL or MariaDB |
newsifly-app | The mobile app for readers (Android and iOS) in main/ | Flutter |
This guide is part of the website: after you upload it, the guide is online at https://your-domain/docs/. Without a server you can open it from documentation/index.html in the download.
The website download does not contain vendor/ (the PHP packages) or public/build/ (the compiled styles and scripts). Marketplace rules do not allow those folders in a package, so you create them with two commands (see Install the website, step 0). composer.json, composer.lock, package.json and package-lock.json are included for exactly that.
You do not need the app to start. The website with its admin panel is the core; add the app when you are ready to publish it in the stores.
Requirements
Server (website and admin panel)
| Requirement | Minimum | Recommended |
|---|---|---|
| PHP | 8.4.1 | 8.4 or newer |
| Database | MySQL 8.0 or MariaDB 10.4 | MySQL 8.0+ or MariaDB 10.11+ |
| Web server | Apache 2.4 with mod_rewrite, or Nginx | Nginx + PHP-FPM |
| Memory / disk | 256 MB / 500 MB free | 512 MB+ / 5 GB+ (photos and videos grow) |
| HTTPS | Optional for development | Required in production (push alerts and the app need it) |
| Background jobs | One cron entry, every minute | The same |
PHP extensions
| Extension | Status | Why |
|---|---|---|
pdo_mysql | Required | Database |
mbstring, openssl, tokenizer, xml, ctype, json, fileinfo | Required | Laravel core and upload checks |
curl | Required | Push alerts, AI, sign-in providers, RSS |
gd with WebP | Required | Pictures are resized and saved as WebP |
zip | Required | Backups and updates |
bcmath | Recommended | Precise numbers |
redis | Optional | Faster cache and queue on busy sites |
The web installer needs PHP's exec() function enabled because it runs php artisan for you. Some shared hosts turn it off; if yours does, ask them to enable it or use the command-line install.
Upload limits
Big photos, long videos and PDF editions need room. Set upload_max_filesize and post_max_size to 128M or more and memory_limit to 256M or more. The package includes public/.user.ini with suggested values; the admin panel shows the limit that really applies next to every upload field.
To prepare the files
- Composer 2 and Node.js 22 LTS (or 20.19 and newer) with npm, once, to create
vendor/andpublic/build/. Run them on the server over SSH, or on your own computer and upload the result.
Accounts you may need (third-party services)
Newsifly depends on a few services run by other companies. You create and pay for your own accounts; nothing is shared with the author. Every one of them is optional and has a free tier or pay-as-you-go pricing.
| Service | Needed for | Cost |
|---|---|---|
| Firebase (Google) | Push notifications to the app | Cloud Messaging is free |
| AI provider (Google Gemini, OpenAI or xAI Grok) | Writing helper, reader summaries and translation | Billed per use by the provider; Gemini has a free tier |
| SMTP email | Password resets and notices | Your mail provider's plan |
| Google AdSense / AdMob | Ad revenue on the website and in the app | Free to join; they pay you |
| Google or Apple sign-in | "Continue with" buttons | Free; an Apple Developer account for Apple |
| Apple Developer / Google Play | Publishing the app | Annual / one-time store fees |
To build the mobile app
- Flutter 3.47 or newer (stable channel) with Dart 3.13.7 or newer. Check with
flutter --version. - Android Studio with the Android SDK (the app supports Android 7.0 and newer), and for iOS a Mac with Xcode and an Apple Developer account (iOS 15 and newer).
- A Firebase project if you want push notifications.
Install the website
You can install with the web installer (no command line needed) or from the command line. Both give the same result. The installer takes about five minutes.
Step 0: Get the packages and build the front end (once)
In the main folder, run these three commands:
cd main
composer install --no-dev --optimize-autoloader
npm ci
npm run build- They create
vendor/(the PHP packages) andpublic/build/(the styles and scripts of the website and the admin panel). Afternpm run buildyou can deletenode_modules/. - No SSH on your hosting? Run the commands on your own computer (Composer 2 and Node.js 22 LTS or 20.19+ installed), then upload the whole folder, including the new
vendor/andpublic/build/. - The web installer's first step checks both folders and tells you the command if one is missing.
Prepare your server: upload the files and create the database
The installer only exists once your files are on the server, so do this before you open it. On a VPS or with FTP, upload the contents of the main folder (with vendor/ and public/build/ from step 0), point the domain's document root at its public folder, create an empty MySQL or MariaDB database and user, and continue with the web installer below. On cPanel (shared hosting), follow these steps. Your screens may look slightly different, but the names of the tools are the same.
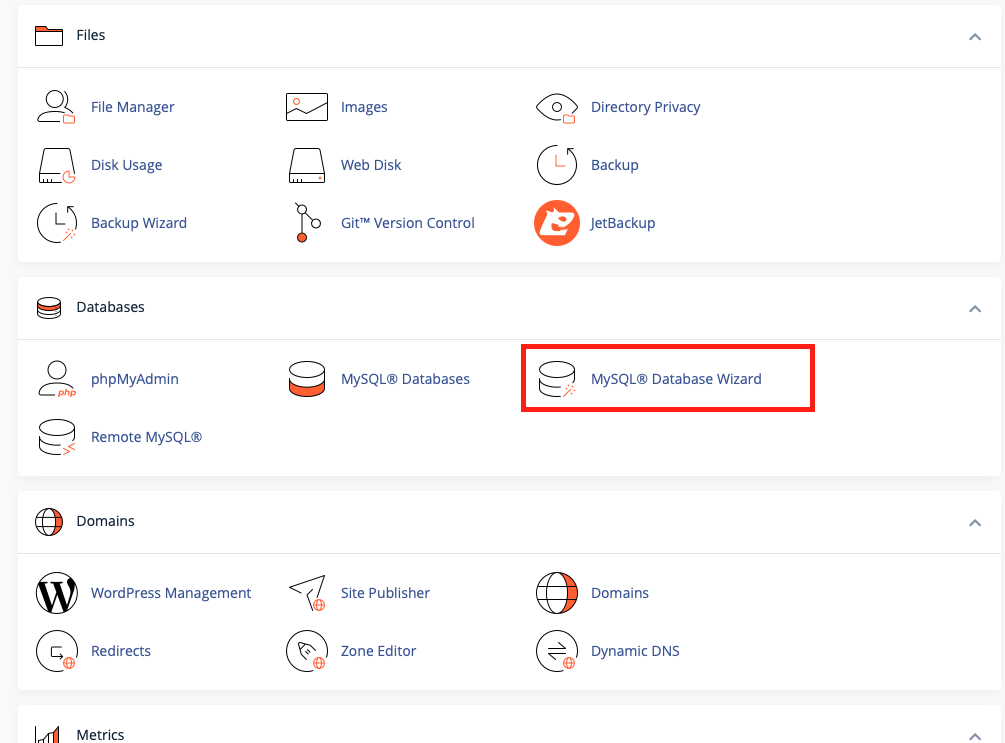
1. Open the MySQL Database Wizard
In cPanel, scroll to Databases and open MySQL® Database Wizard.
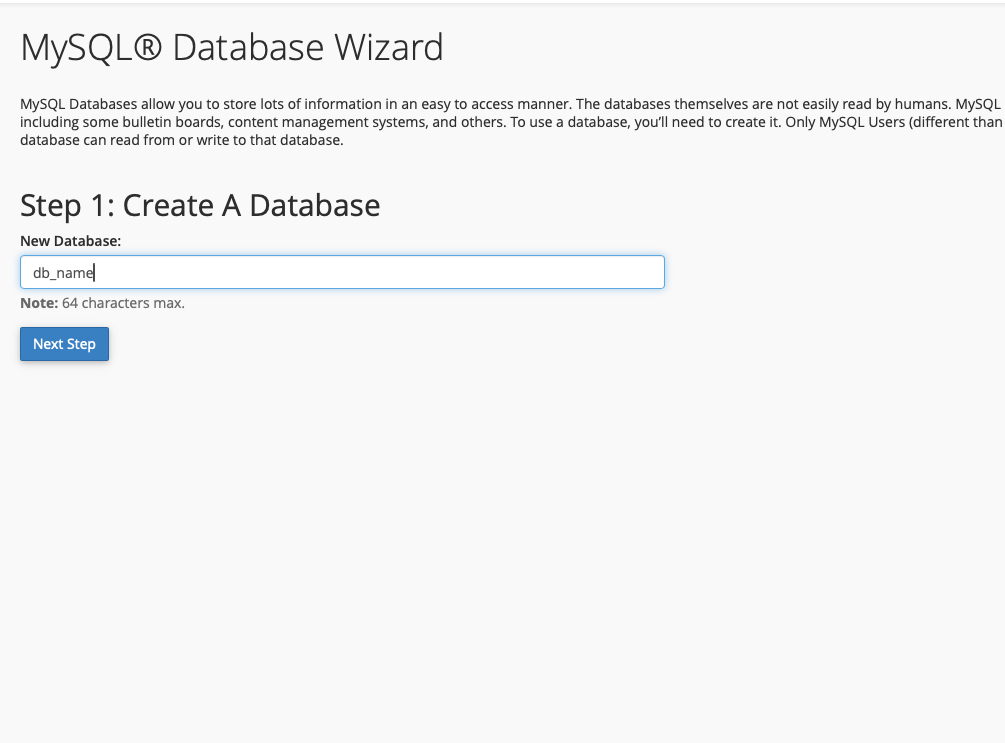
2. Create the database
Type a name for the database and click Next Step. cPanel adds your account name in front, so write down the full name it shows.
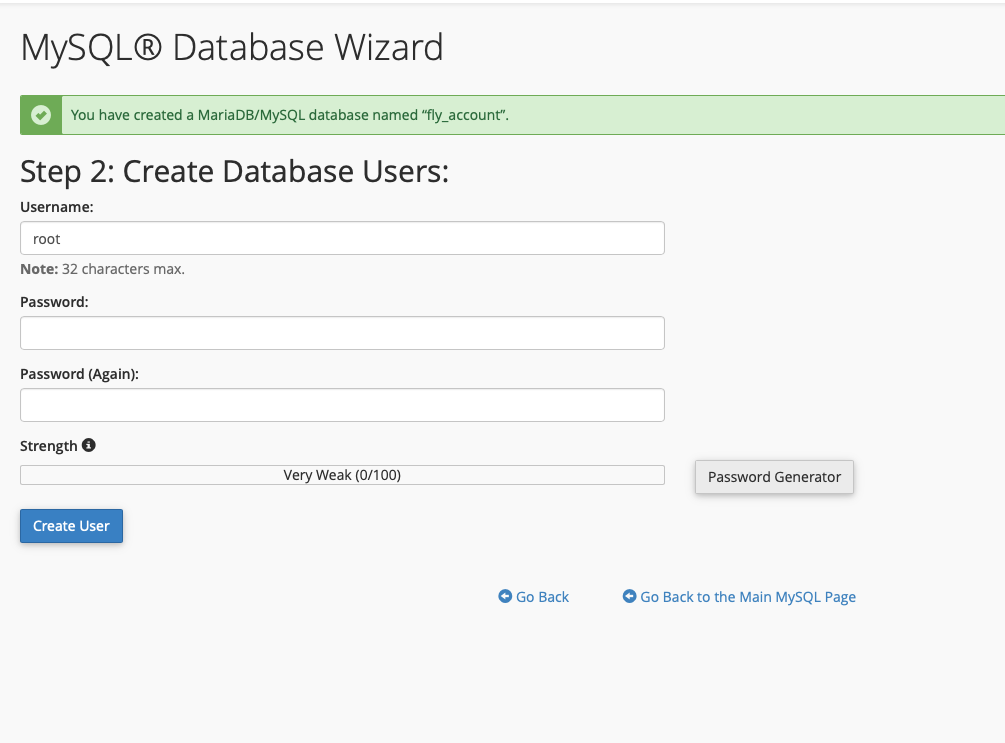
3. Create the database user
Choose a user name and a strong password (use the Password Generator), then click Create User. Save the user name and password: the installer asks for them.
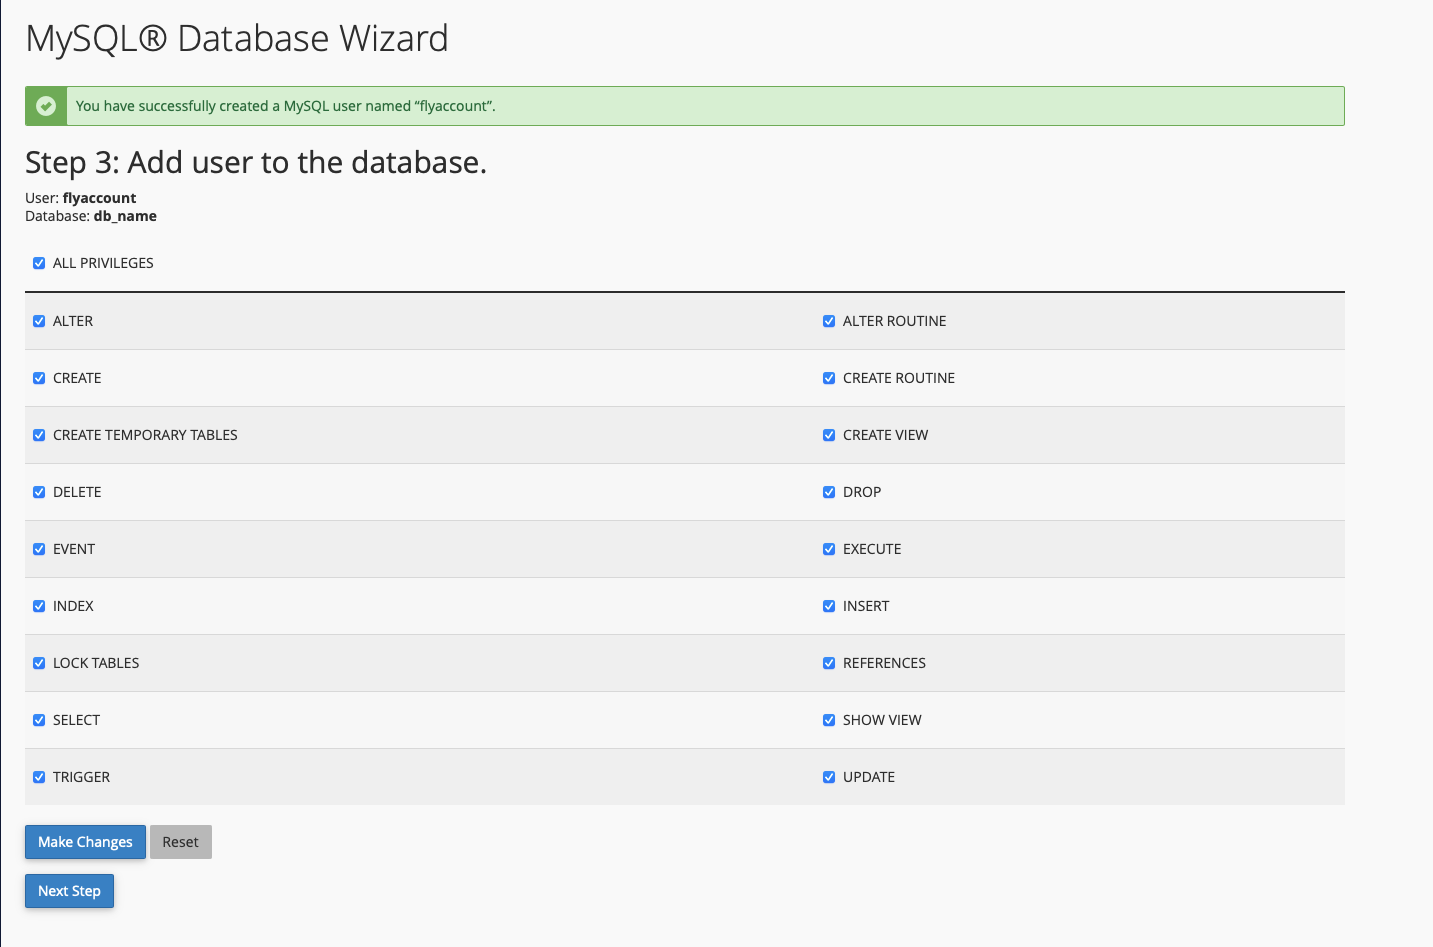
4. Give the user all privileges
Tick ALL PRIVILEGES, click Make Changes, then Next Step.
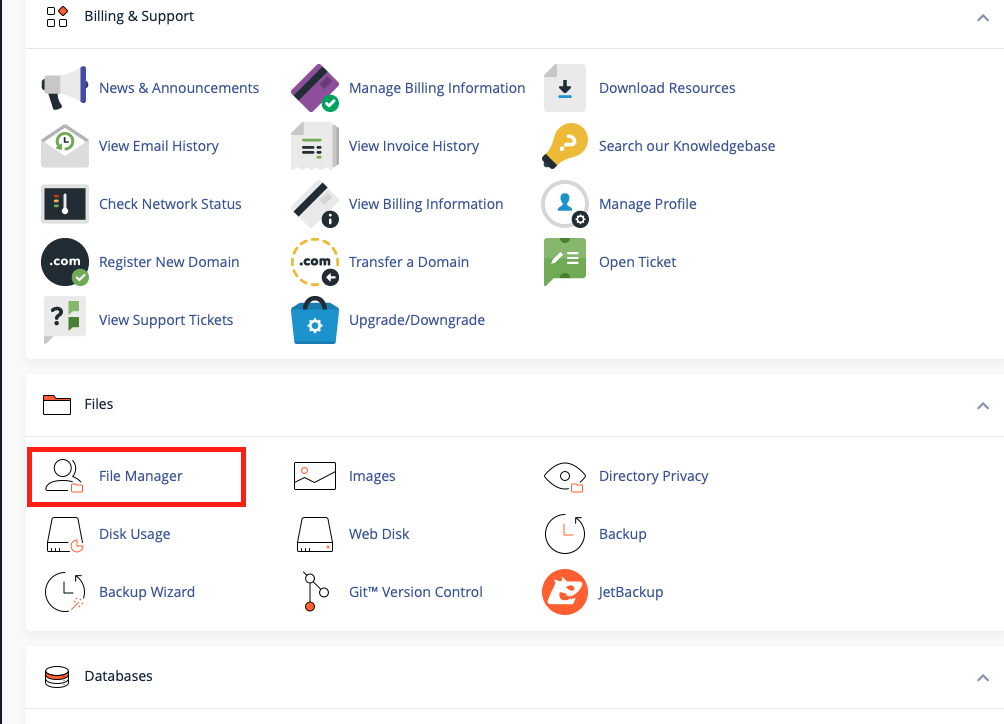
5. Open File Manager
Go back to the main cPanel page and open File Manager.
6. Upload the package
On your computer, compress the contents of the main folder into one ZIP (with vendor/ and public/build/, without node_modules/). In File Manager, open the folder of your domain (for example public_html or a folder for the domain), click Upload and choose the ZIP. Wait until the bar shows 100%.
7. Extract the ZIP
Back in File Manager, right-click the ZIP and choose Extract. Keep the folder path shown in the box and click Extract Files. You can delete the ZIP afterwards.
8. Move the files if they are in a sub-folder
If the files extracted into a new folder, open it, click Select All, then Move, and move them up into the domain's folder. Make sure the hidden files come too: open Settings in the top right of File Manager and tick Show Hidden Files (dotfiles) before you select.
9. Point the domain at the public folder
In cPanel open Domains, click Manage next to your domain, and set the Document Root to the public folder of the project (for example public_html/public or newsifly/public). Never leave the project root as the document root: the folders next to public hold your code and settings.
If your host does not let you change the document root, upload the project one level above public_html, copy the contents of its public folder into public_html, and change the two paths in public_html/index.php to point to your project folder: __DIR__.'/../newsifly/vendor/autoload.php' and __DIR__.'/../newsifly/bootstrap/app.php' (and the maintenance.php path above them).
10. Continue with the installer
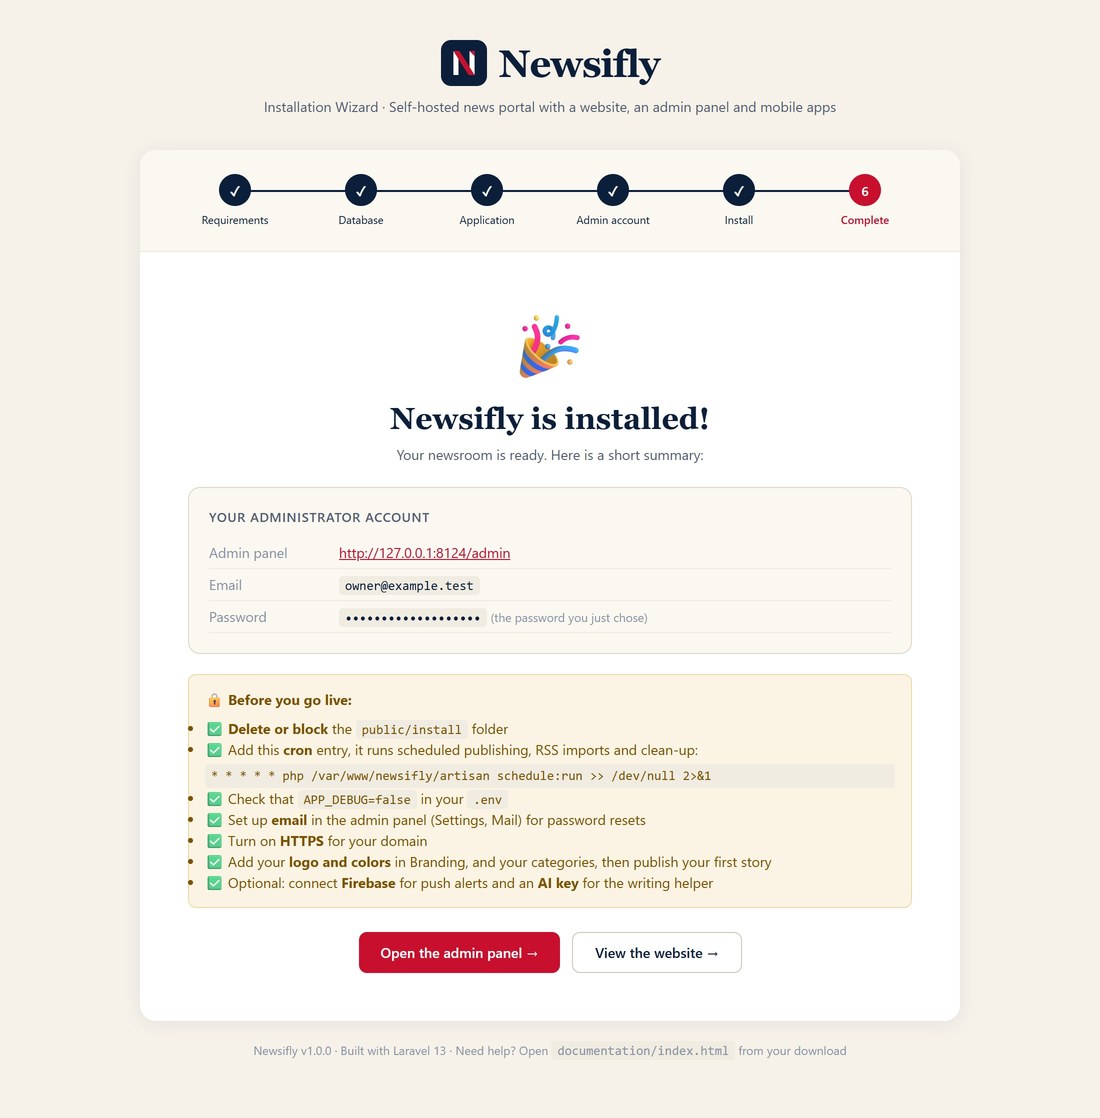
The files are in place and the database exists. Now open https://your-domain.com/install/ and follow the web installer below. Use the database name, user and password from steps 2 and 3, and keep the host as 127.0.0.1 (or localhost) unless your host tells you otherwise. Add the cron job from After installing when you are done.
Option A: Web installer
- Upload the files. Upload the contents of the
mainfolder to your server and point the domain's document root at itspublicfolder (the cPanel steps above show how). Do step 0 first, so the folder you upload containsvendor/andpublic/build/. - Create an empty database (MySQL 8 or MariaDB 10.4 and newer, utf8mb4) and a user that can create tables in it (done in the cPanel steps above).
- Open
https://your-domain.com/install/and follow the steps (the last one is the finish page):
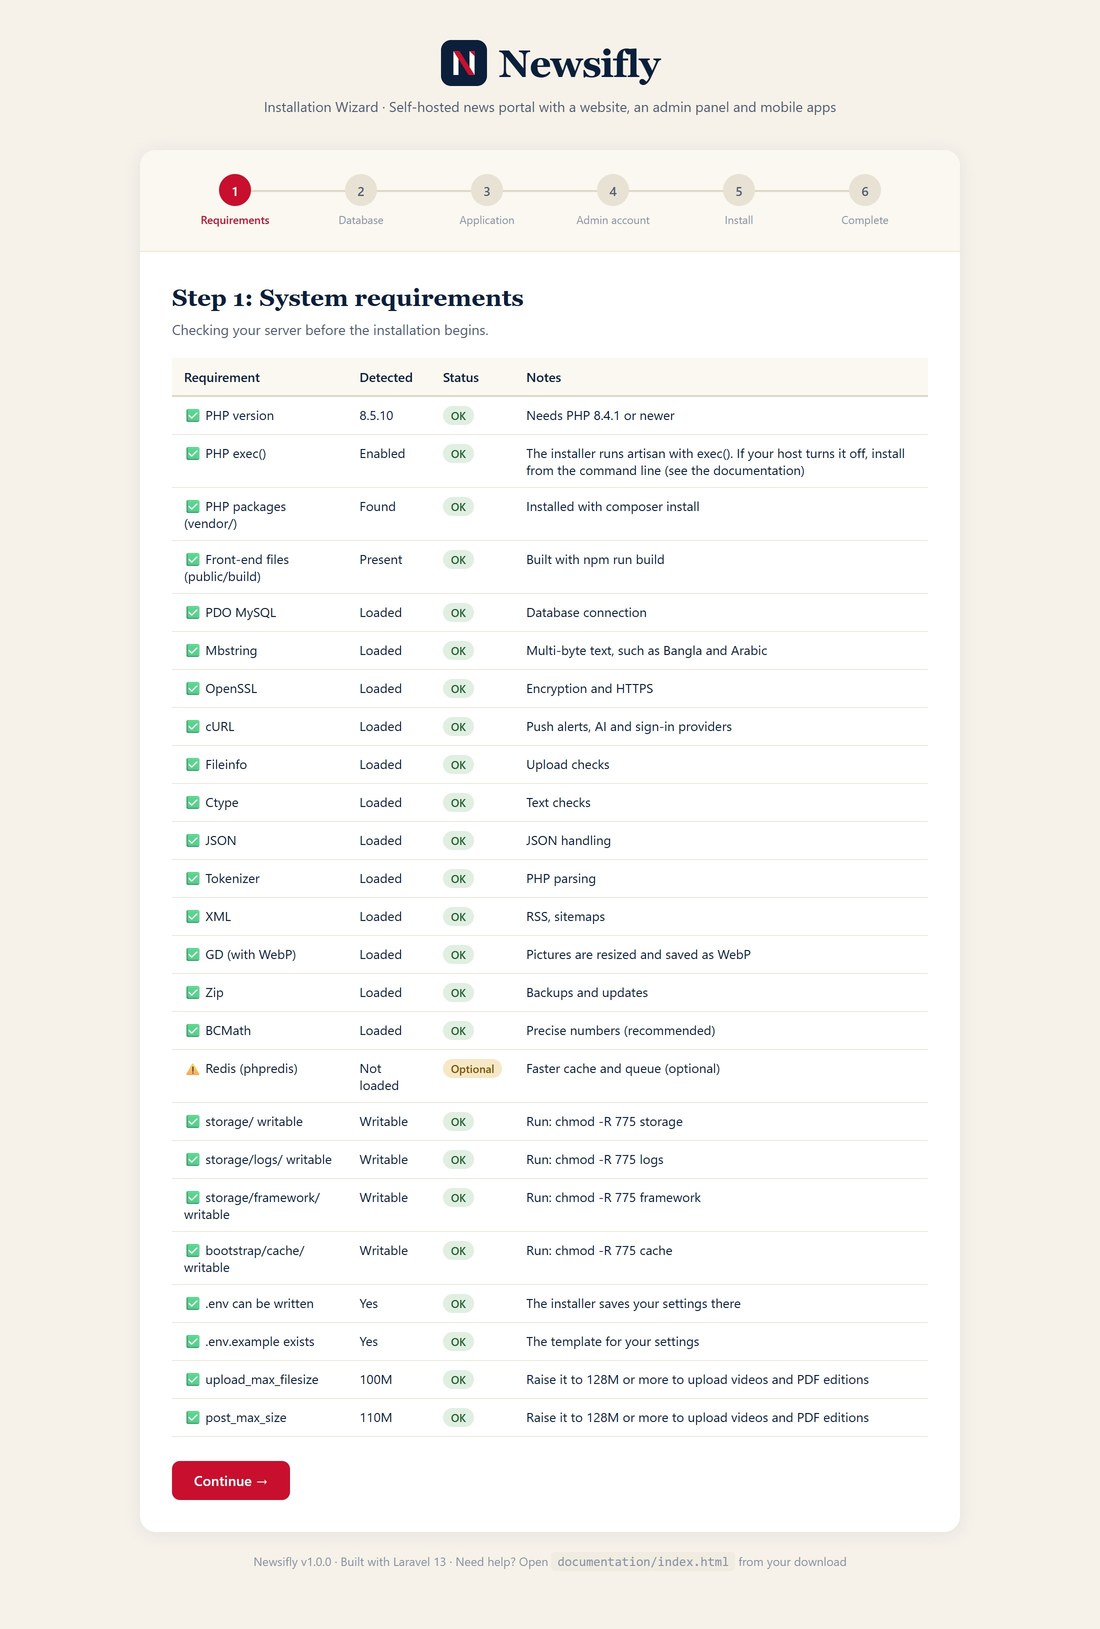
| Step | What it does |
|---|---|
| 1. Requirements | Checks PHP 8.4.1 or newer, that exec() is enabled, that vendor and public/build exist, the PHP extensions, and that storage, bootstrap/cache and .env are writable. Items you can fix are shown with the command to run. Optional items (such as the upload limits) never block. |
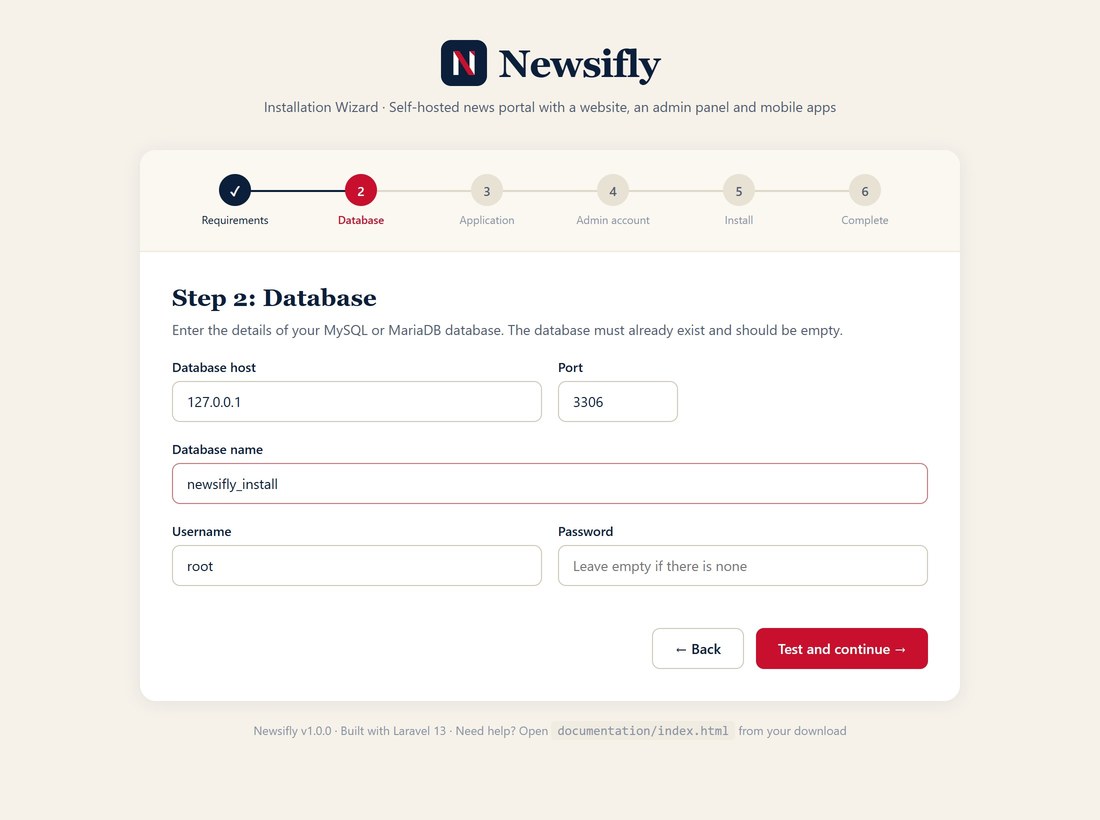
| 2. Database | Host, port, database name, user and password. The connection is tested before you continue and the real error is shown if it fails. |
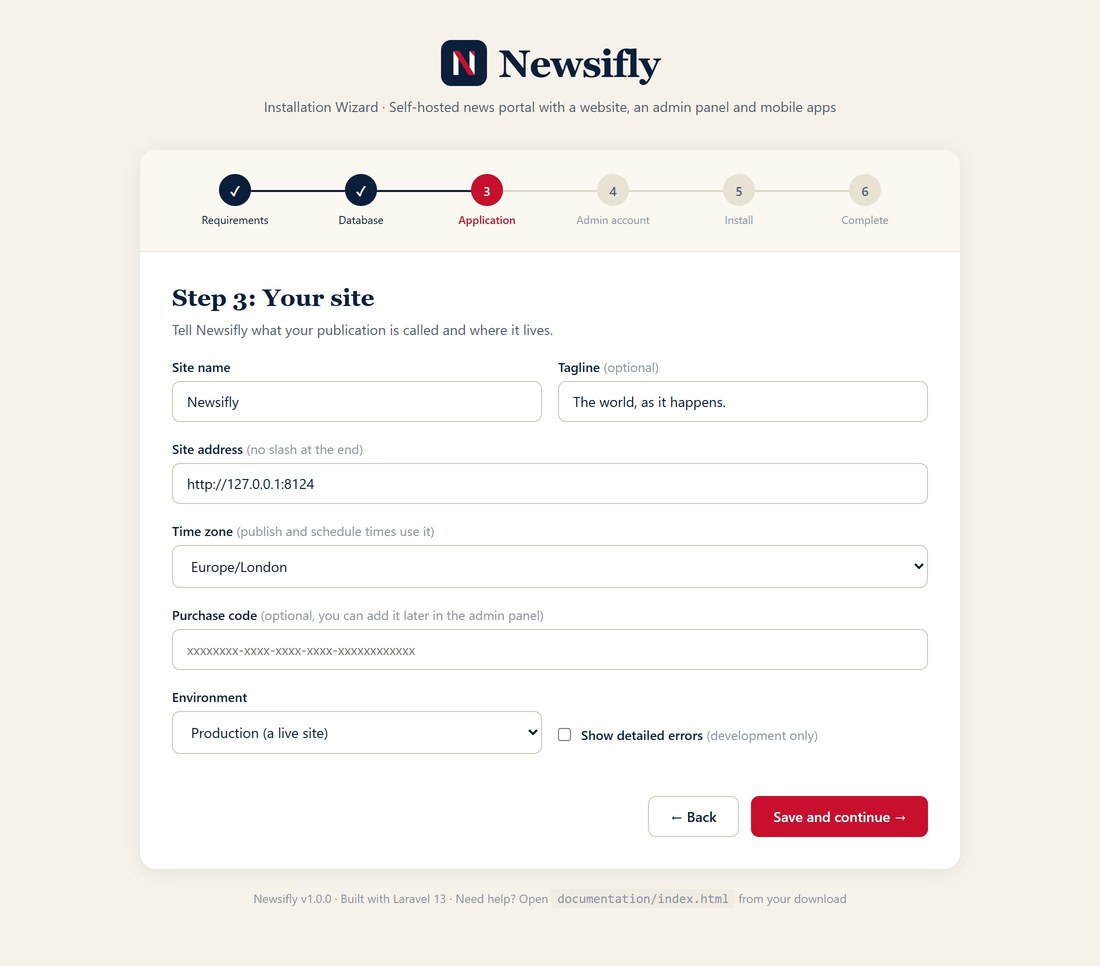
| 3. Application | Site name, tagline, site address, time zone, your purchase code (optional) and the environment. Choose Production for a live site. |
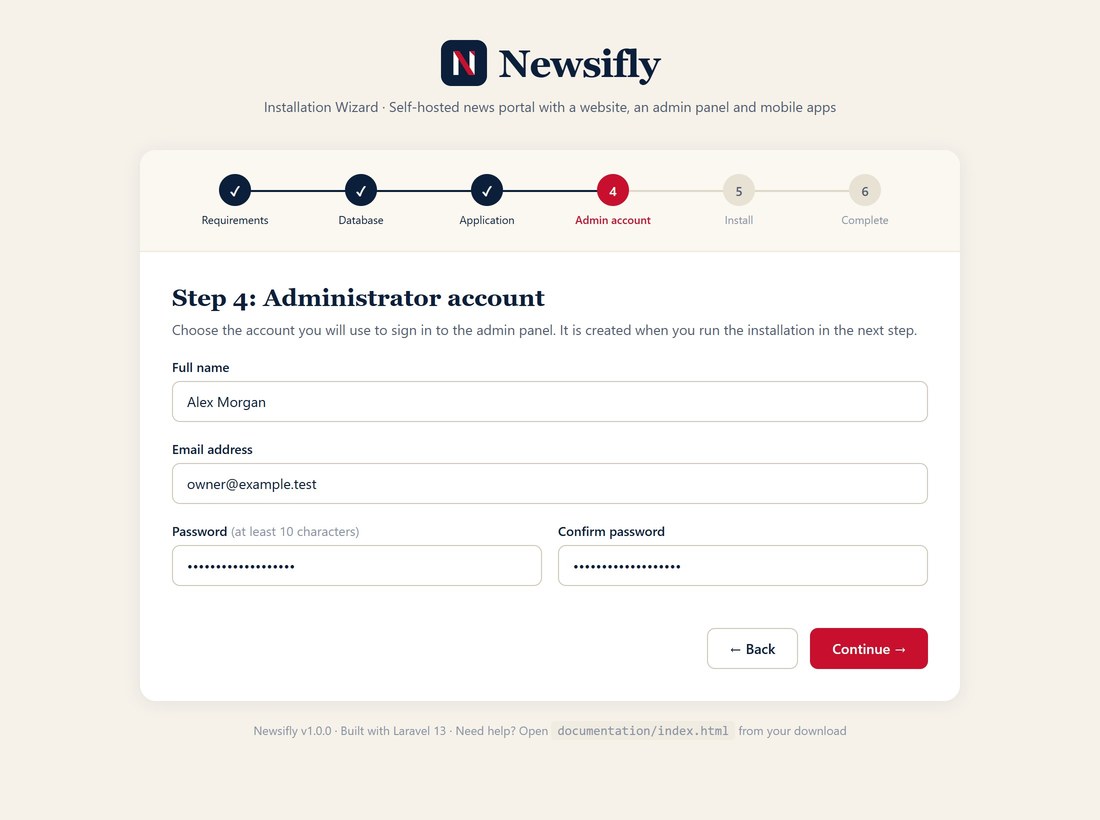
| 4. Admin account | Your name, email and a password of at least 10 characters. Nothing is written yet. |
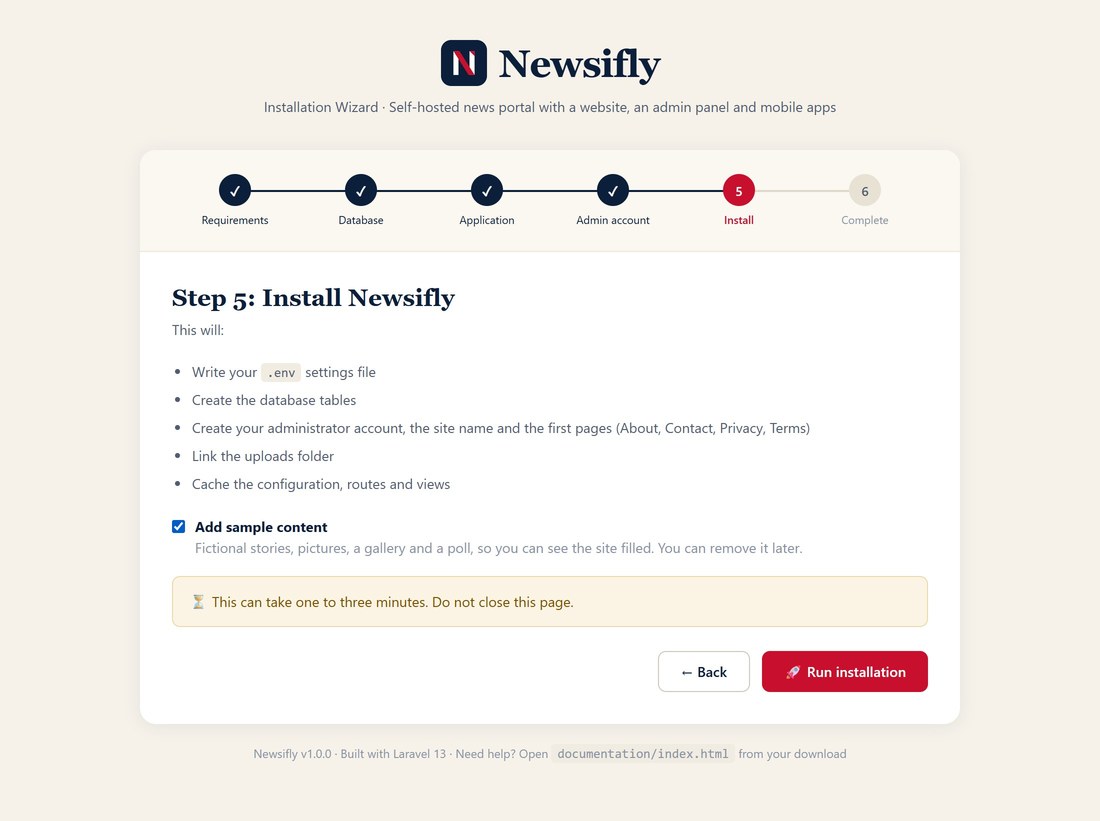
| 5. Install | Writes the .env file, generates the application key, creates the tables, then your administrator, the site name and the first pages (About, Contact, Privacy policy, Terms), links the uploads folder and caches the configuration. Tick Add sample content to see the site filled with fictional stories first. If a task fails, the output is shown and you can try again. |
| 6. Complete | Shows your admin address and a short checklist. The installer locks itself. |
The installer refuses to run again on a site that is already installed. To install again on purpose, delete storage/app/installed over FTP or SSH and open the page again. Delete the public/install folder when you are done.
Option B: Command line
# 1. Upload the code, create the empty database, then do step 0 above.
cp .env.example .env
php artisan key:generate

# 2. Edit .env: APP_NAME, APP_URL (the exact address of the site), the DB_* values,
#    APP_ENV=production, APP_DEBUG=false and APP_TIMEZONE.

# 3. Create the tables, your administrator and the first pages
php artisan migrate --force
NEWSIFLY_SETUP_PASSWORD='a-long-password' php artisan newsifly:setup \
  --name="Your Name" --email=you@example.com --site-name="Your Site"
php artisan storage:link
php artisan config:cache && php artisan route:cache && php artisan view:cache

# 4. Lock the installer
touch storage/app/installed
Then sign in at https://your-domain.com/admin.
After installing
Work through this list once. The admin panel's Setup checklist shows what is done and what is still open.
- Add the scheduler to cron. One entry runs scheduled publishing, RSS imports, nightly backups, clean-up and queued alerts. Without it, nothing is sent or imported. The installer's last page shows the line with your real path:
In cPanel, add it under Cron Jobs with the commandcrontab -e # add the line from deploy/newsifly.cron, with your path: * * * * * cd /var/www/newsifly && php artisan schedule:run >> /dev/null 2>&1/usr/local/bin/php /home/user/newsifly/artisan schedule:run. System health shows whether cron has run in the last five minutes. - Remove the installer. Delete the
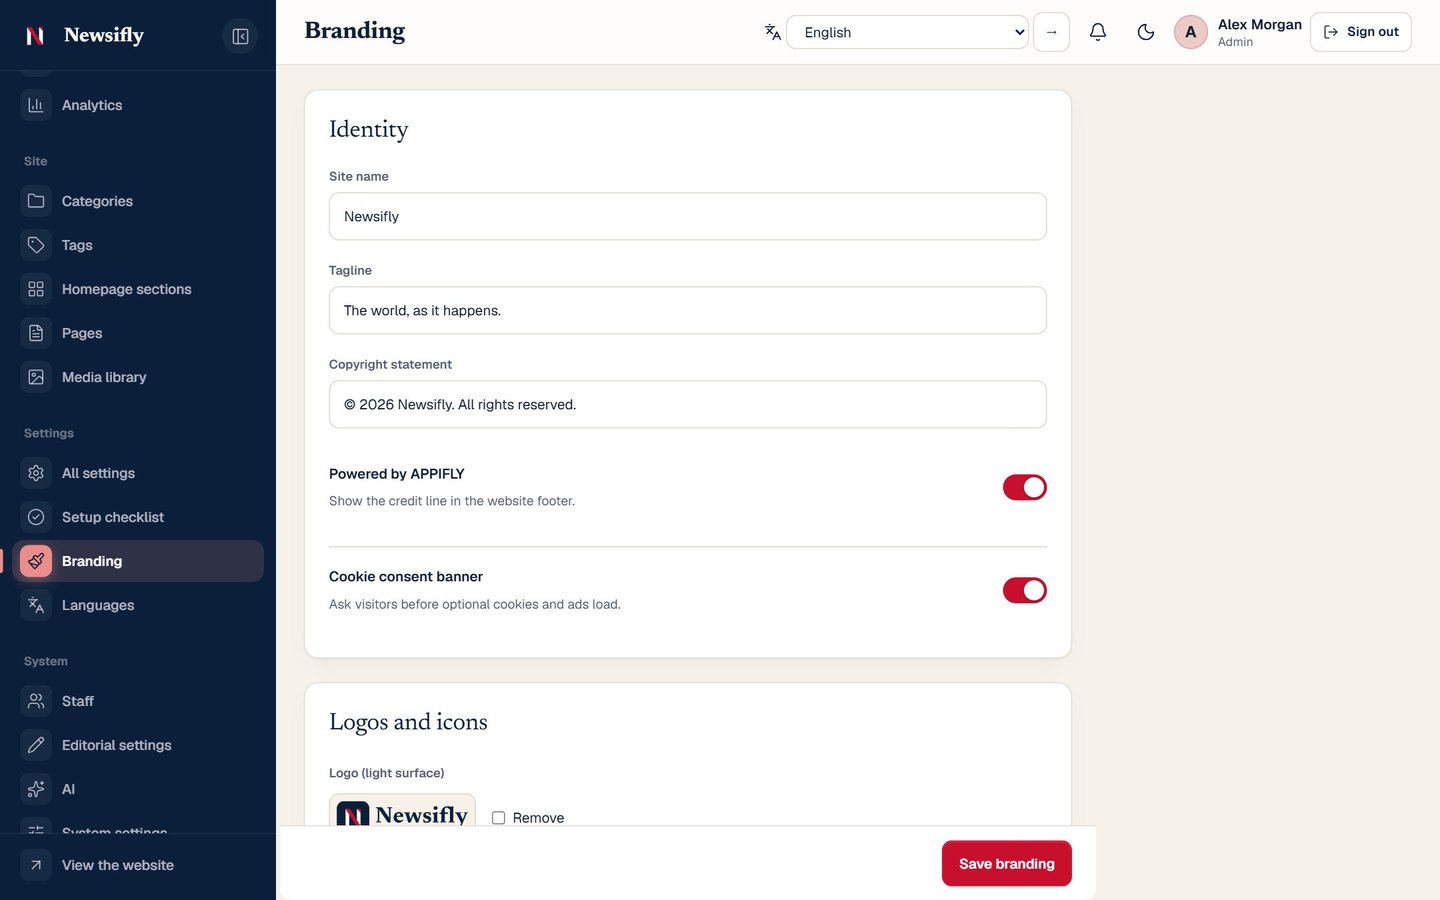
public/installfolder (or block it in your web server). - Branding. Upload your logo and favicon, choose your color and the color of the admin menu, and add your social links under Branding.
- Languages. Choose the default language, switch on the others, and mark right-to-left ones under Languages.
- Homepage. Pick the front-page layout and add sections under Homepage sections.
- Mail. Add your SMTP details so password resets and notices can be sent (All settings → Mail).
- Optional services. A Firebase file for push alerts, an AI key for the writing helper, Google sign-in, AdSense. See Optional services.
- HTTPS. Turn it on for your domain; push alerts and the app need it.
- Run the check.
bash scripts/deploy.shinstalls the packages, runs the migrations, rebuilds the caches and ends with a list of ticks. It is safe to run again, and it is also how you update a server later.
Create your content next: categories, a few stories, your pages (About, Privacy, Terms). Staff, reporters and readers can sign up and you approve them from the admin panel.
Sample content
To see the site filled before you write anything, add the sample content: fictional stories in several categories, pictures drawn by the server, a gallery, a poll, short news, short clips and an e-paper edition. The pictures are drawn by the server, so this works offline. Everything it creates is remembered, so it can be removed again in one go.
- At install time: tick Add sample content on step 5 of the installer.
- Later, from the command line:
- With the seeder: adds the same content, then replaces the drawn pictures with 16 free-to-use photographs from Unsplash (this needs internet access; if the download fails, the drawn pictures stay). It also creates a demo reader account,
reader@newsifly.test, with a random password that is shown once in the terminal, so you can try signing in from the app.
php artisan newsifly:demo                        # add the sample content (drawn pictures)
php artisan db:seed --class=DemoSeeder           # sample content, Unsplash photos and the demo reader
php artisan newsifly:demo --remove # remove it again, without touching your own contentRemove the sample content before you open the site to the public. The sample writers and readers have no password, so nobody can sign in as them, but their stories would stay on your front page. The demo reader created by the seeder does have a password; removing the sample content deletes that account too.
Demo mode (a public preview site)
To run a live preview that anyone can try without being able to break it, turn on demo mode. Visitors can look at every page, but nothing can be created, changed or deleted: every such request is refused with a clear message. Signing in and out still works.
- Install a separate copy for the preview and add the sample content (above).
- Turn demo mode on in
.env, then apply it:DEMO_MODE=true php artisan config:cache
Your own administrator account is the one you created in the installer. Use a strong password on any public demo.
Modules
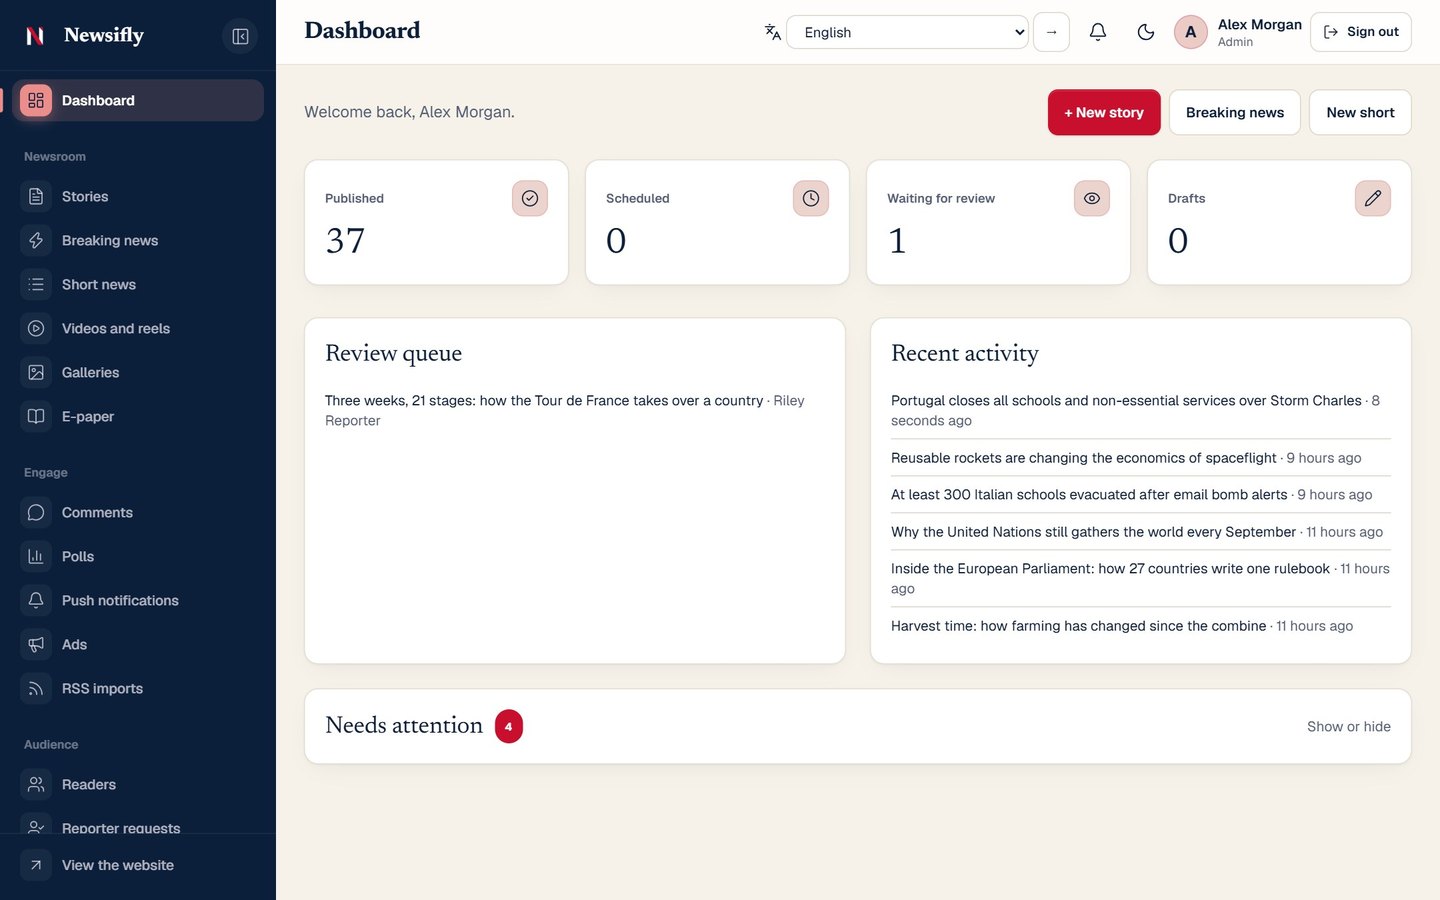
Open /admin and sign in. The dashboard greets you with what waits for you: stories to review, reporter requests to answer (admins), or stories an editor sent back to you (reporters), beside your story counts, the week's views, comments to check and new readers. Everyone sees only the figures they can act on.
Live updates. Open pages stay current without a reload. In the admin panel the bell, the menu counts and the lists (dashboard, notifications, reporter requests, comments, stories) update within a few seconds, and anything new (a reporter request, a story sent for review, a comment) pops up with a button. On the website the Breaking strip, the front page, section pages and the reader's account page update in place, and in the app the front page, the alert list and the reader's account follow the same way. It works on any host: the pages ask the server for two tiny markers every 5 seconds, so no extra service is needed. The menu on the left groups everything by what you do: Newsroom (stories, breaking news, short news, videos, galleries, e-paper), Engage (comments, polls, push alerts, ads, RSS), Audience (readers, reporter requests, analytics), Site (categories, tags, homepage, pages, media) and Settings and System. Fold the menu to icons with the arrow at its bottom or with Ctrl + B; choose its color under Branding.
Dashboard
What is published, scheduled, waiting for review and in draft, the latest activity, and a Needs attention box that lists anything to fix (cron not running, no backup, debug on).
Stories
Write in Markdown with a toolbar and live preview, add a featured image from the media library, pick categories and tags, schedule a time, and mark a story featured. Reporters send a story for review; editors publish it. The AI helper suggests headlines, tidies a draft and writes a summary for readers (see Optional services).
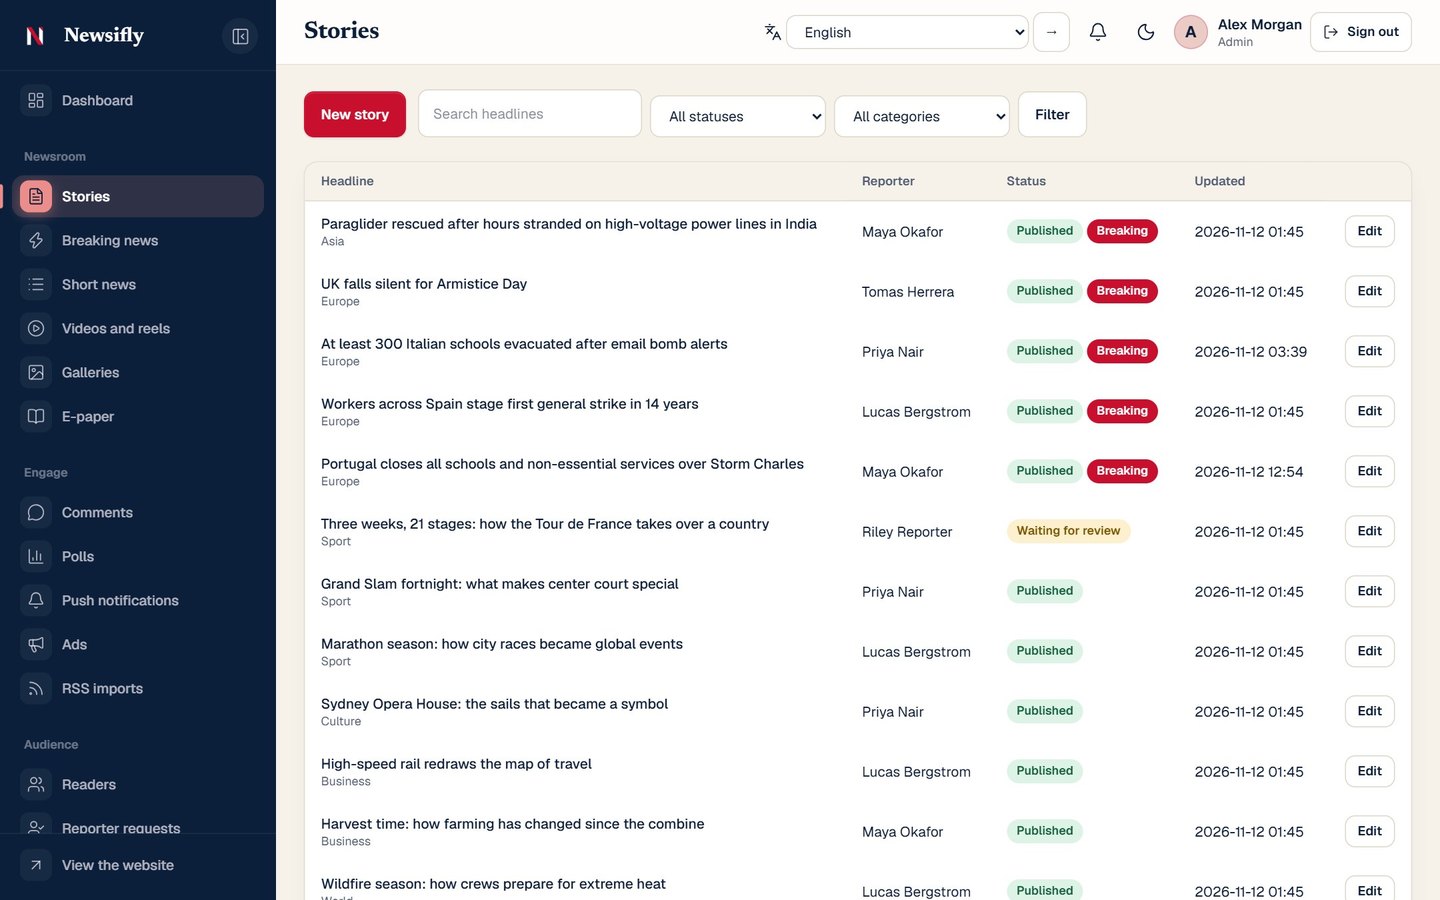
Breaking news, short news, videos, galleries, e-paper
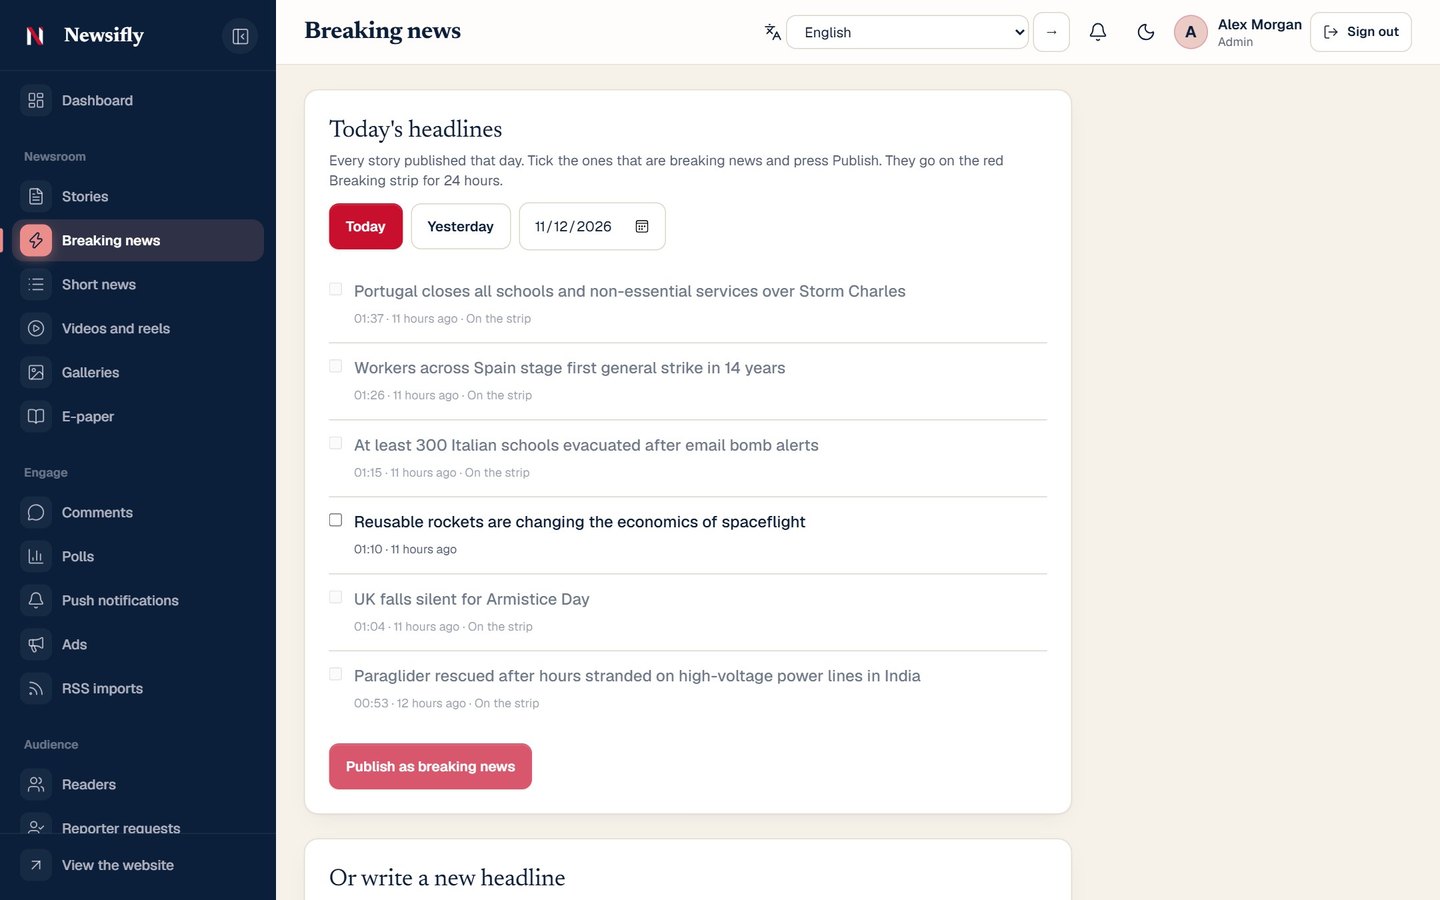
- Breaking news: press Breaking news, tick the stories (today's, or another day's) that should go on the red strip, and publish. See Breaking news.
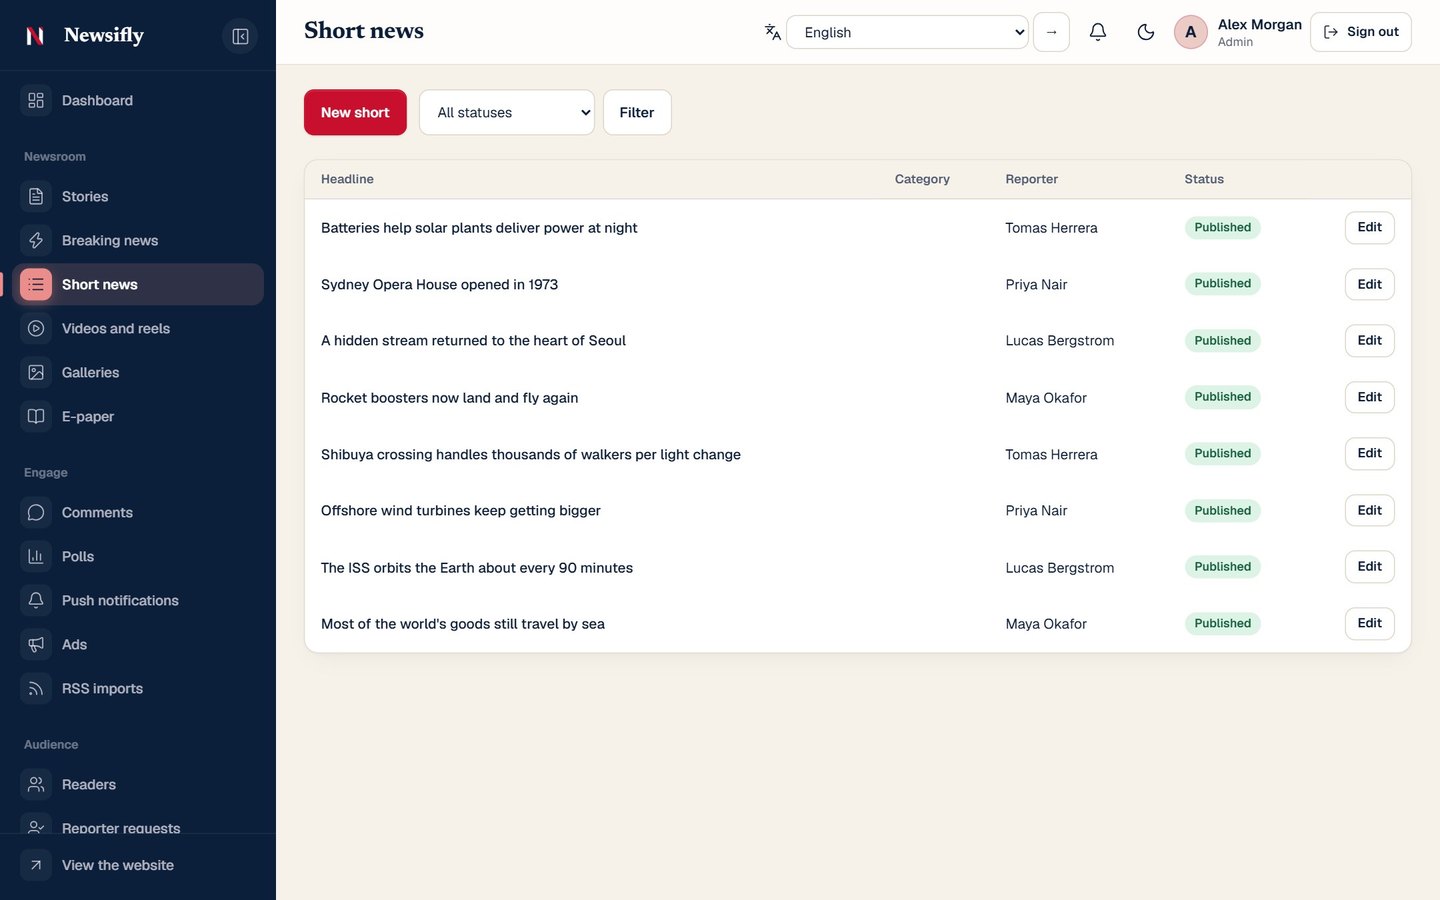
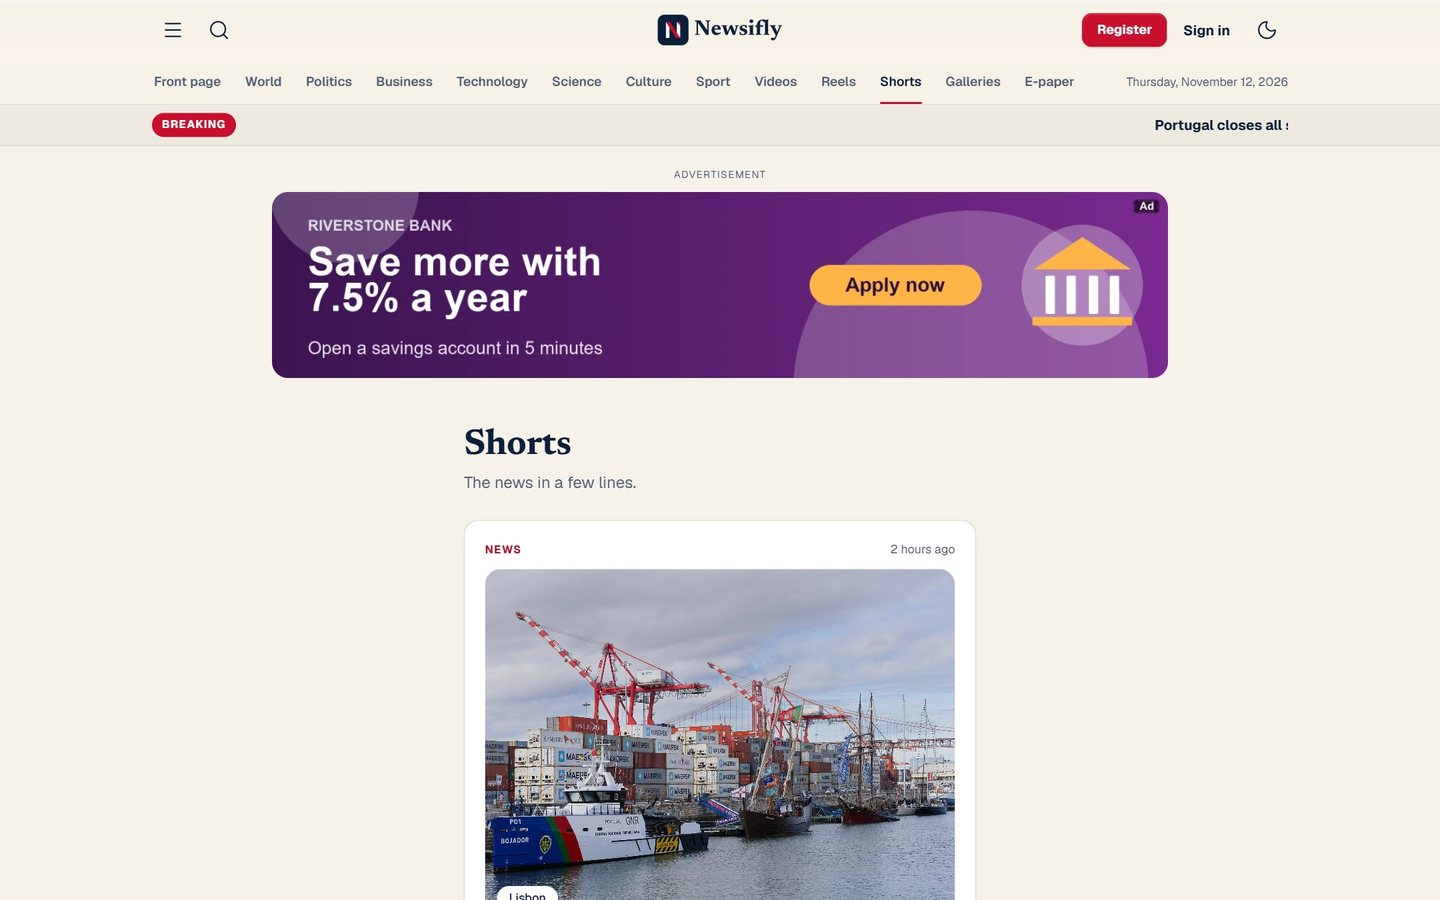
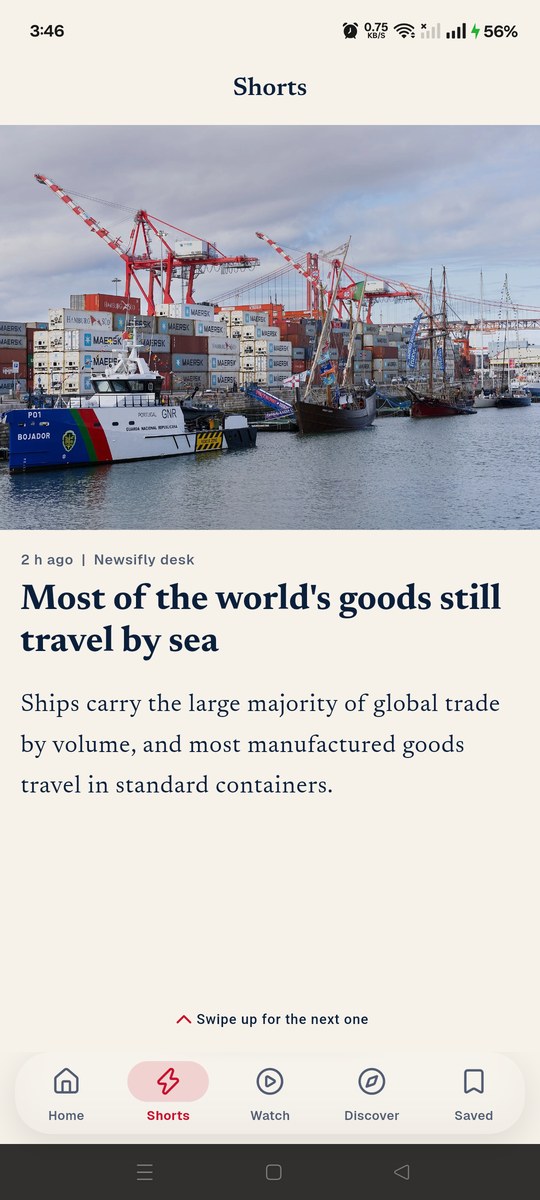
- Short news: a headline, two lines and a picture for readers in a hurry; the app shows them as a swipeable feed.
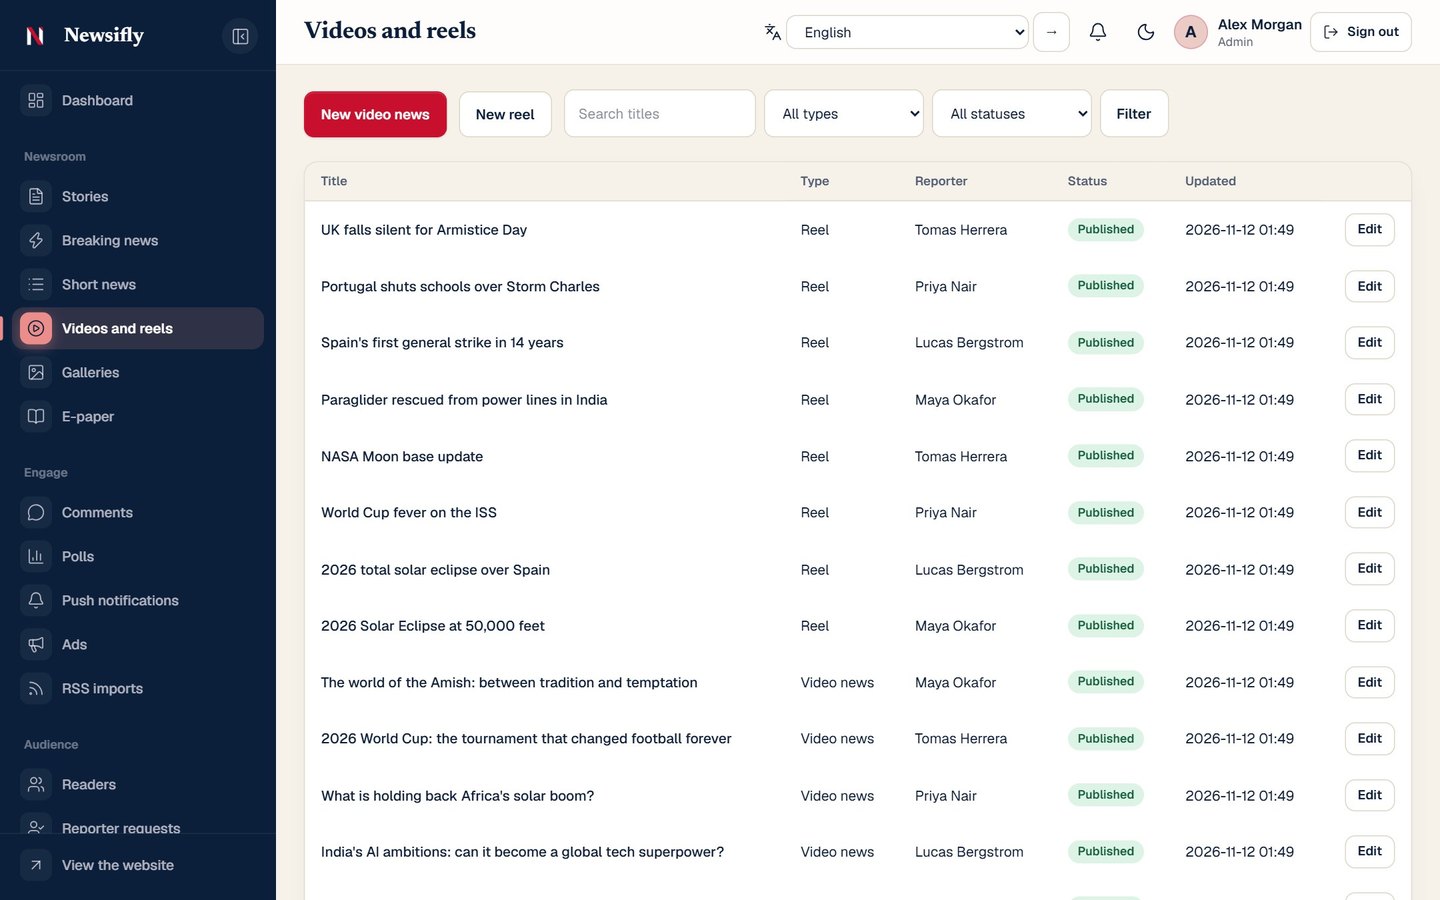
- Videos and reels: upload a file (big files are fine), paste a YouTube, Facebook or direct link, and mark a video as a reel for the vertical feed.
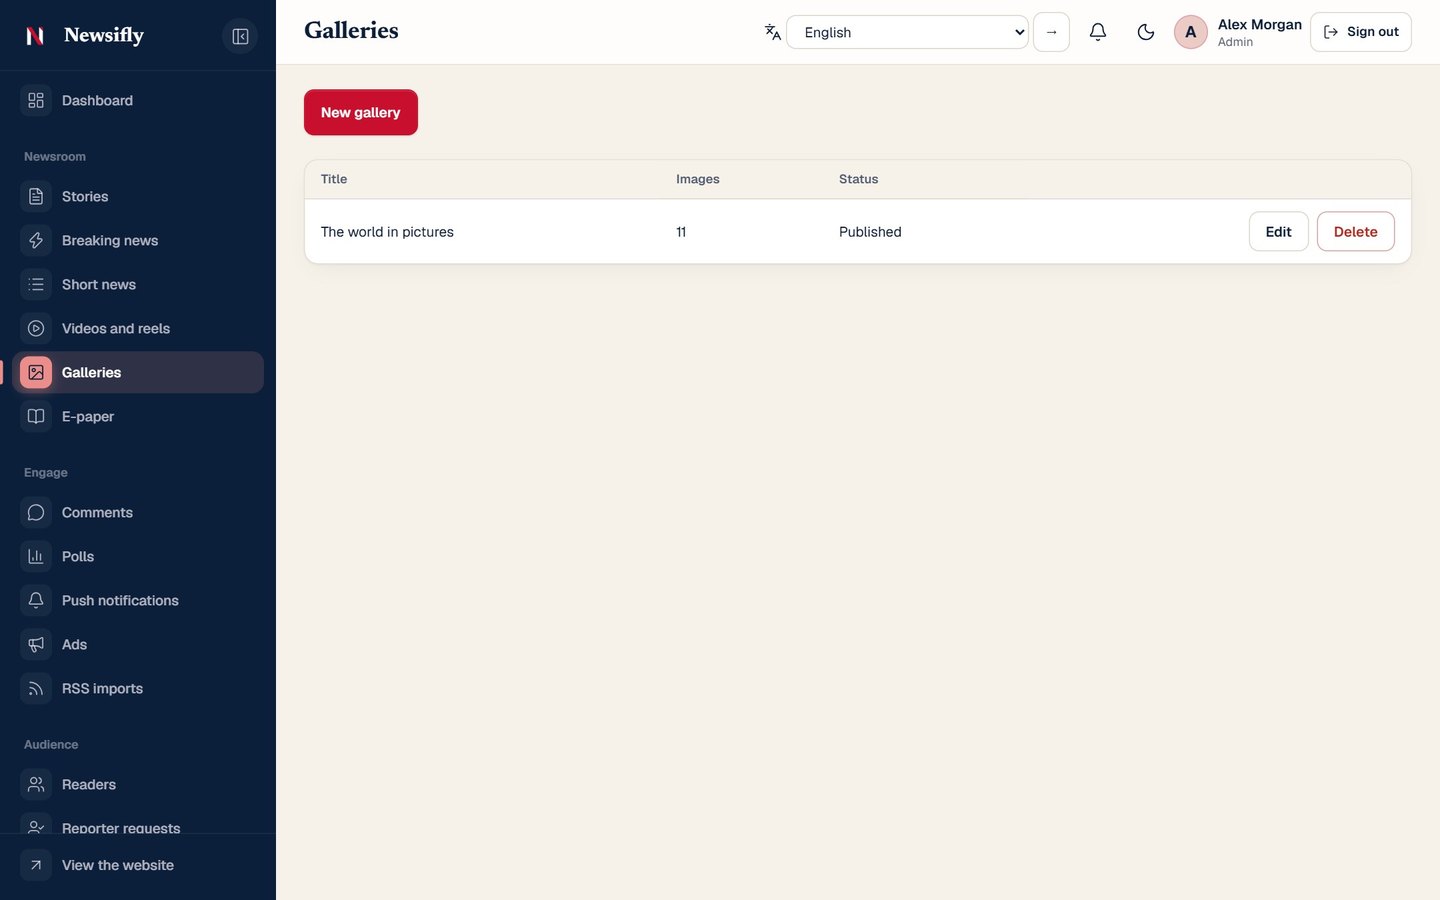
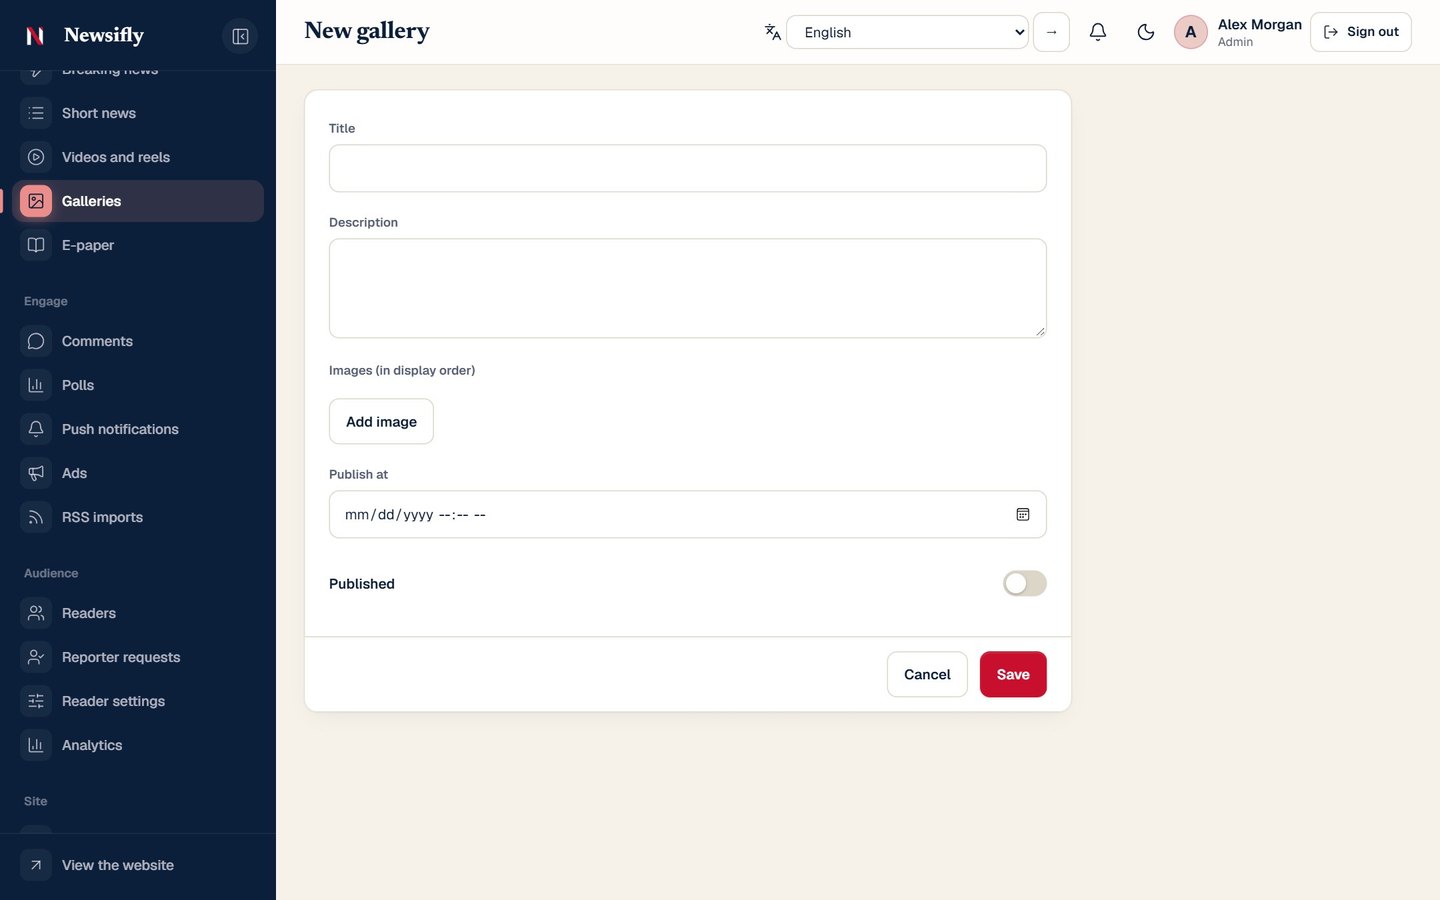
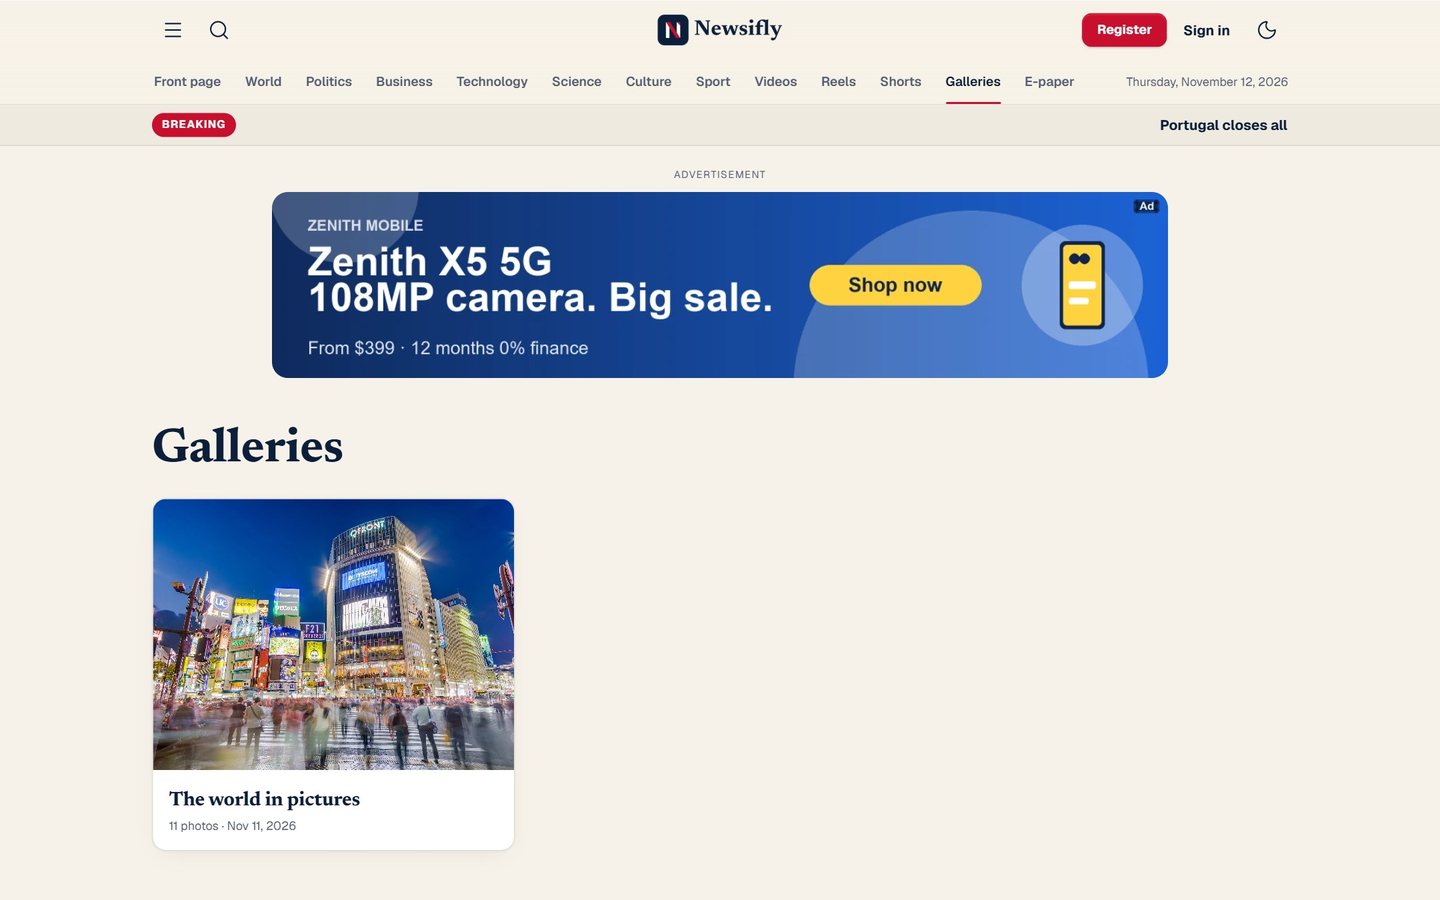
- Galleries: pick pictures from the library, order them and add captions.
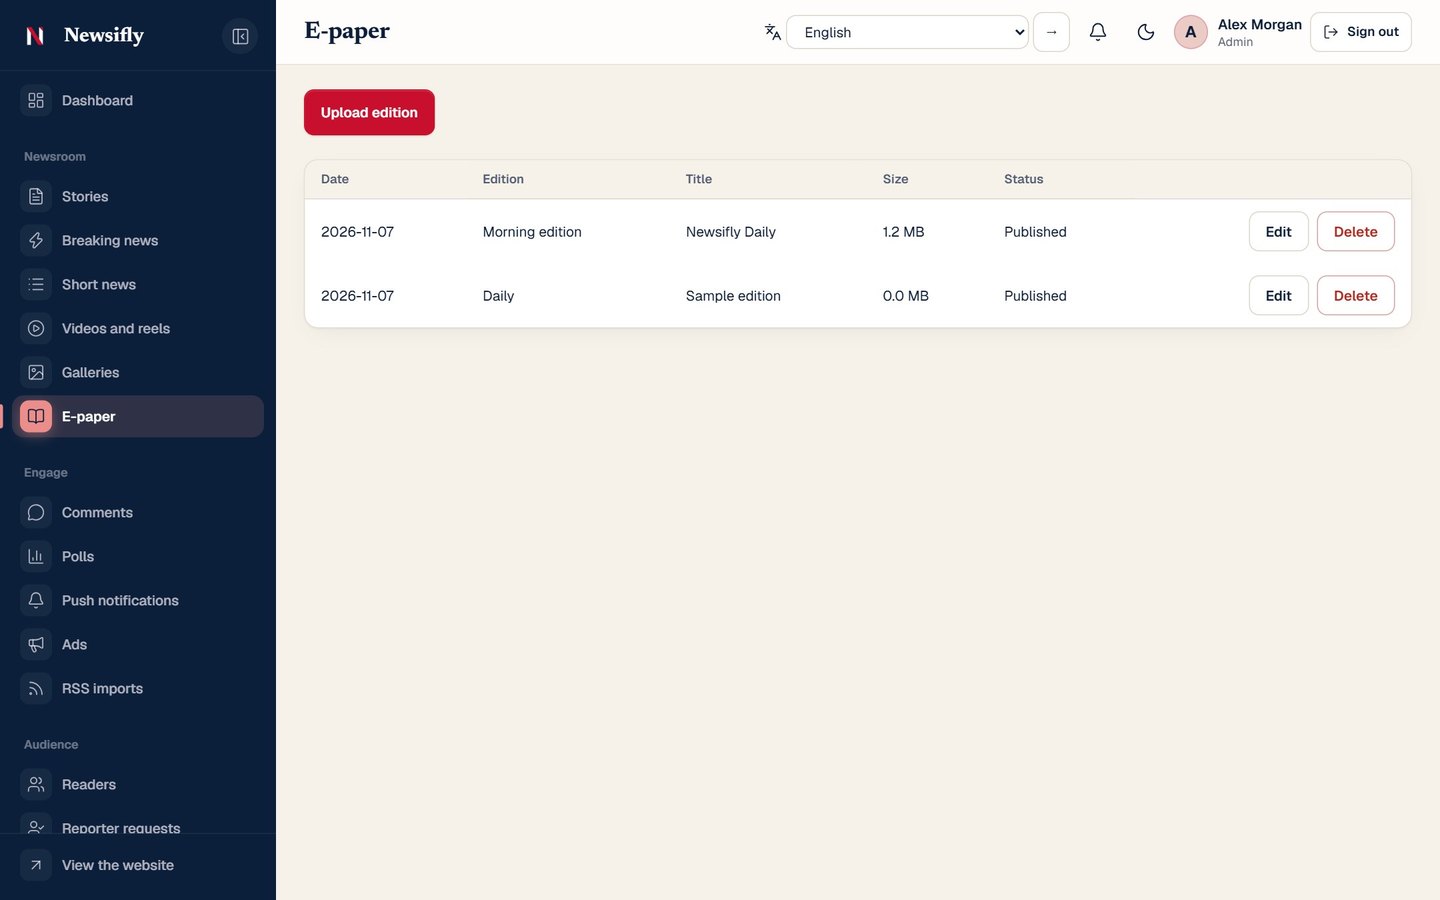
- E-paper: upload the day's PDF; readers browse and download it.
Engage
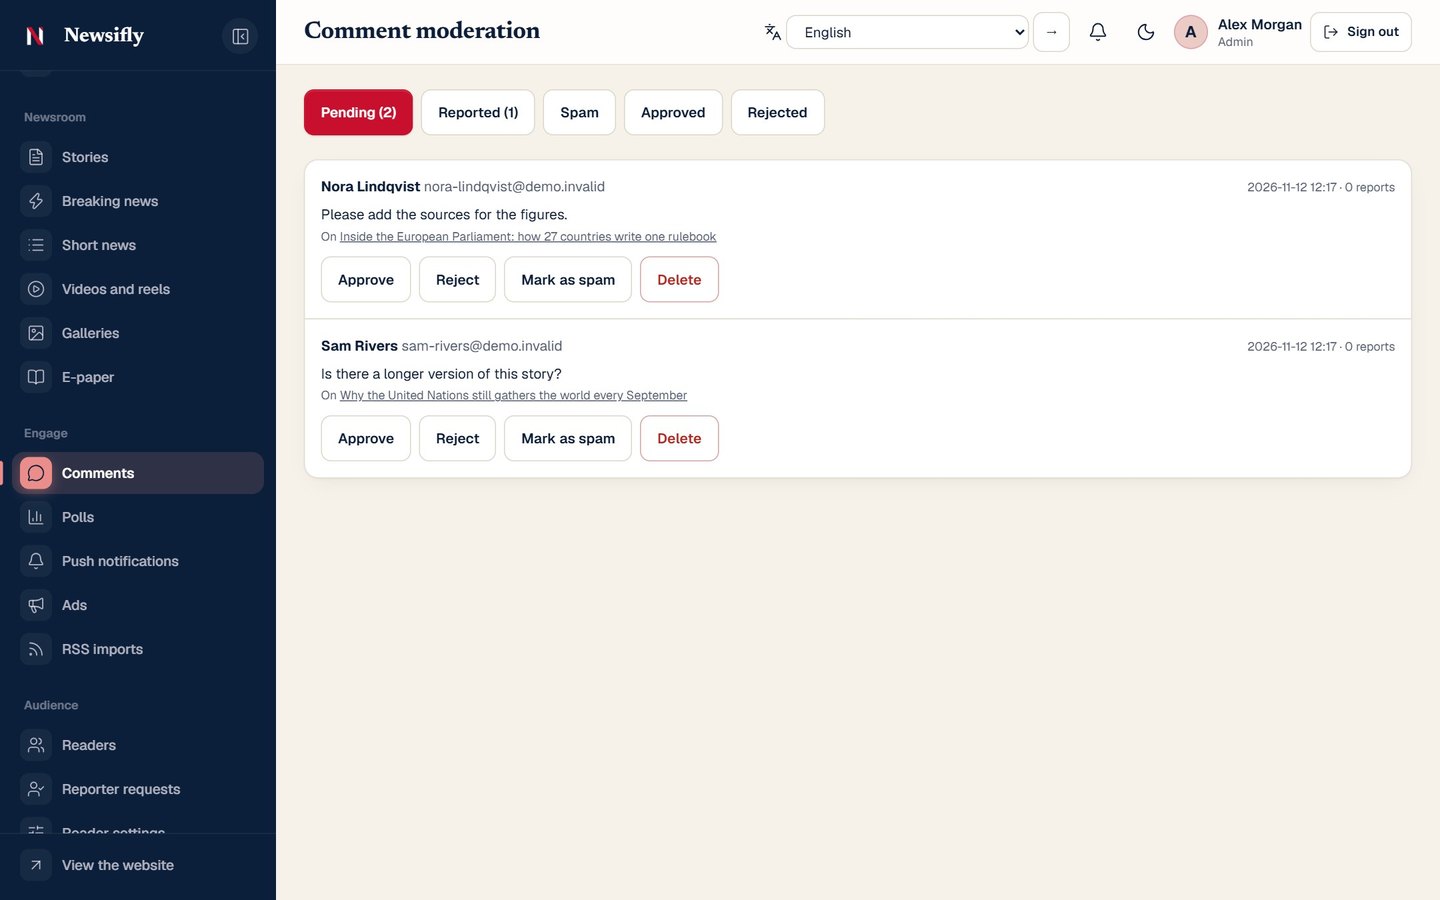
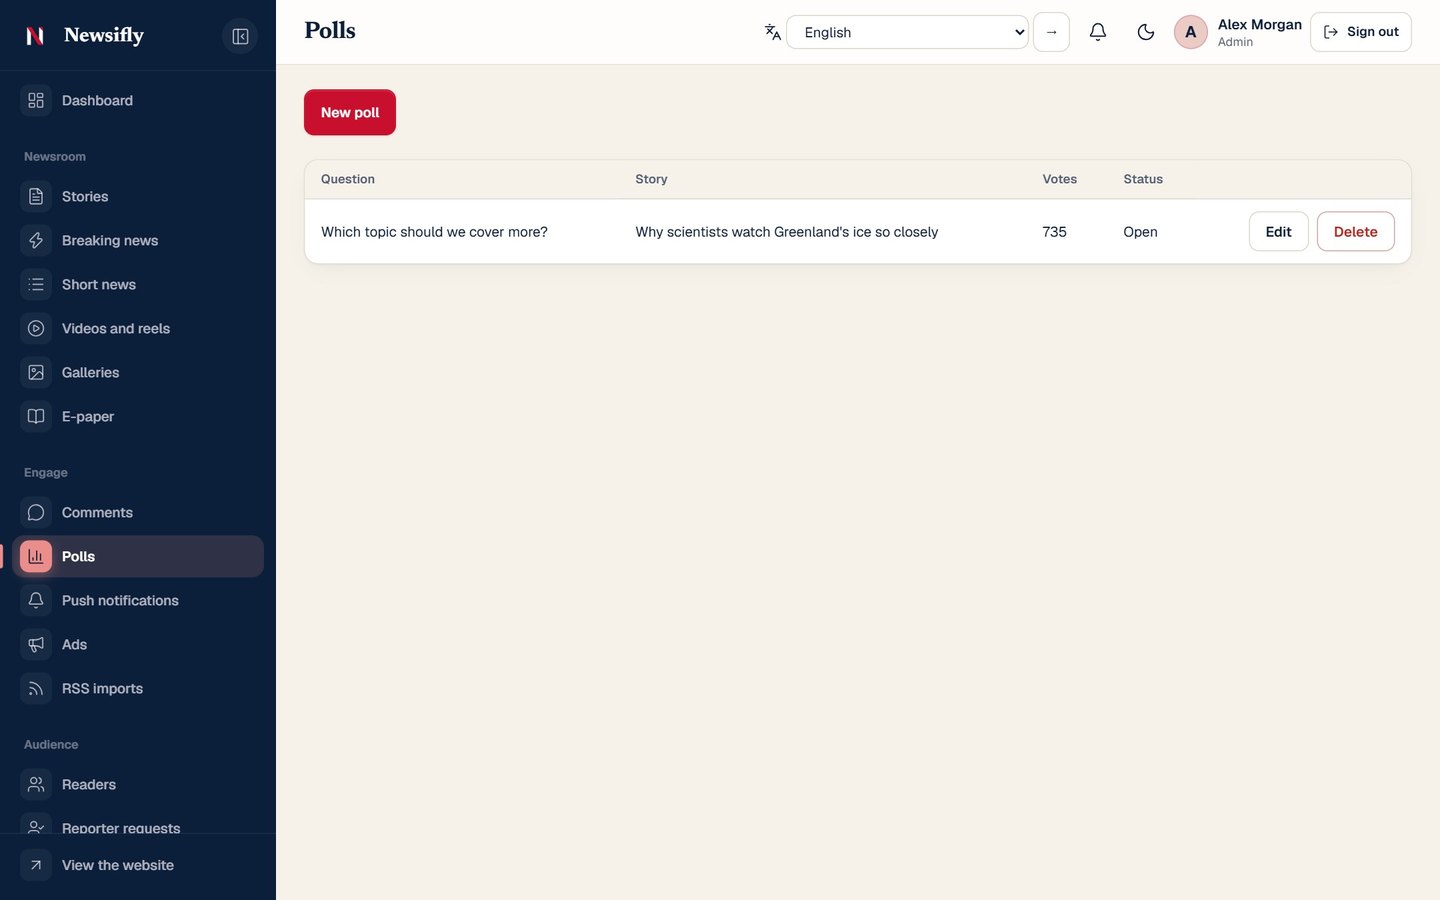
- Comments are moderated here (pending, reported, spam). Polls attach to a story and show live results.
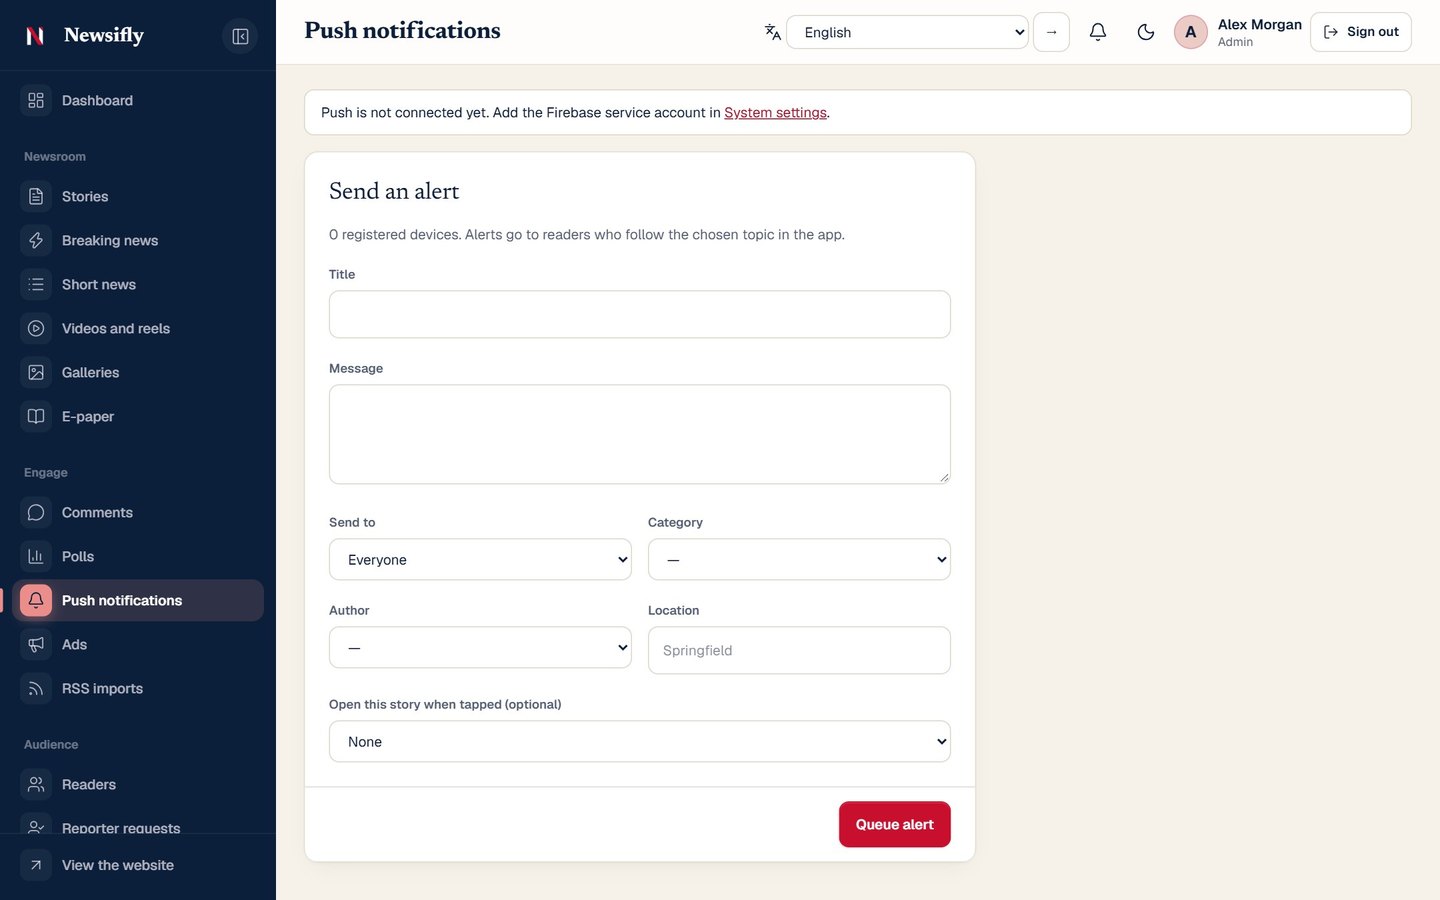
- Push notifications send an alert to every device, or to readers who follow a topic.
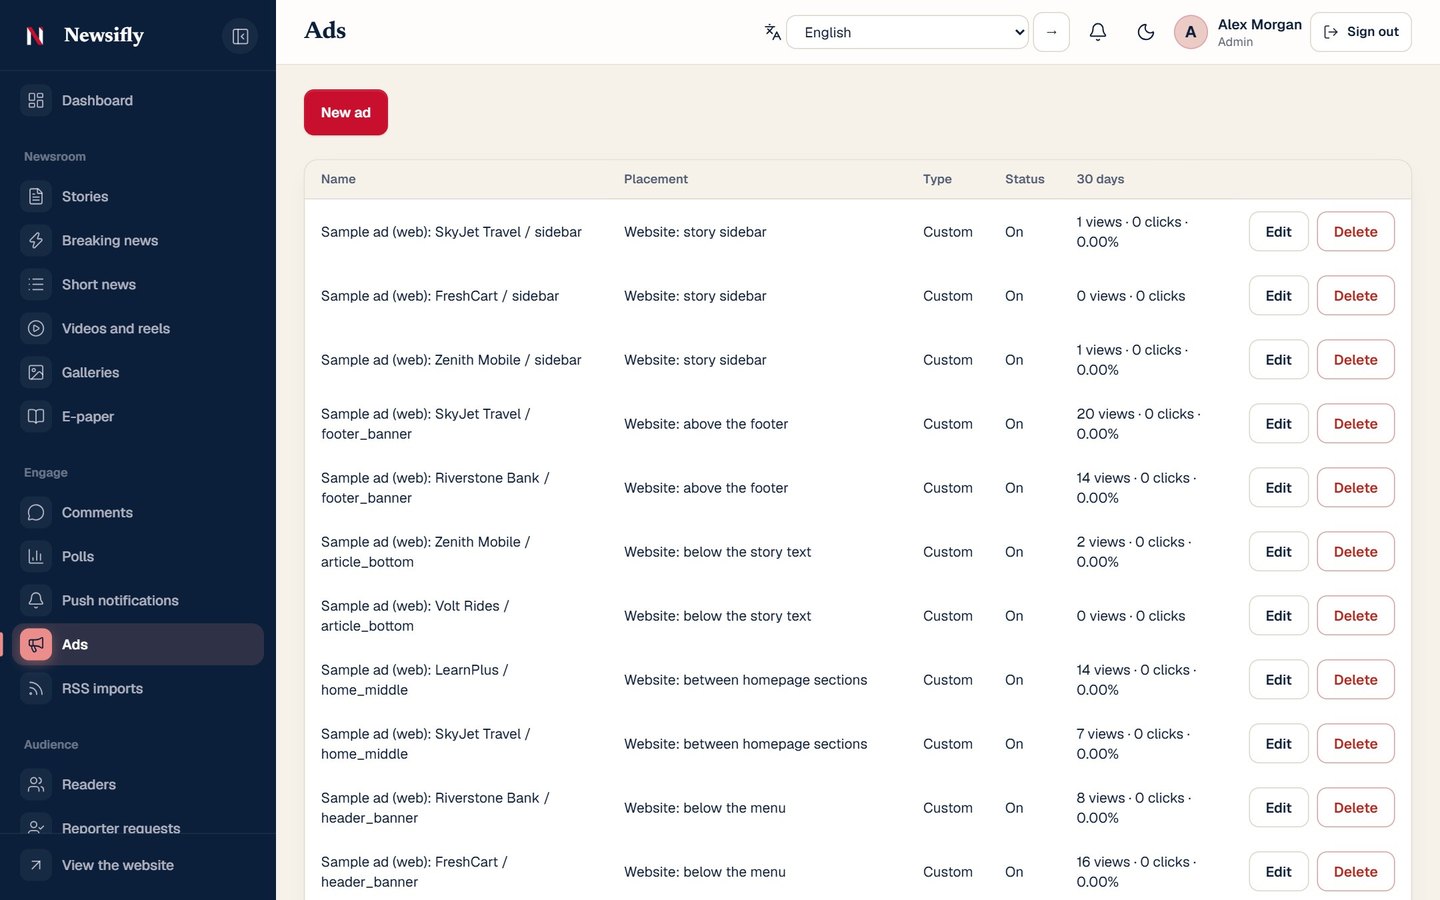
- Ads place banners, native cards and full-screen ads on the website and in the app, and count views and clicks (see Optional services).
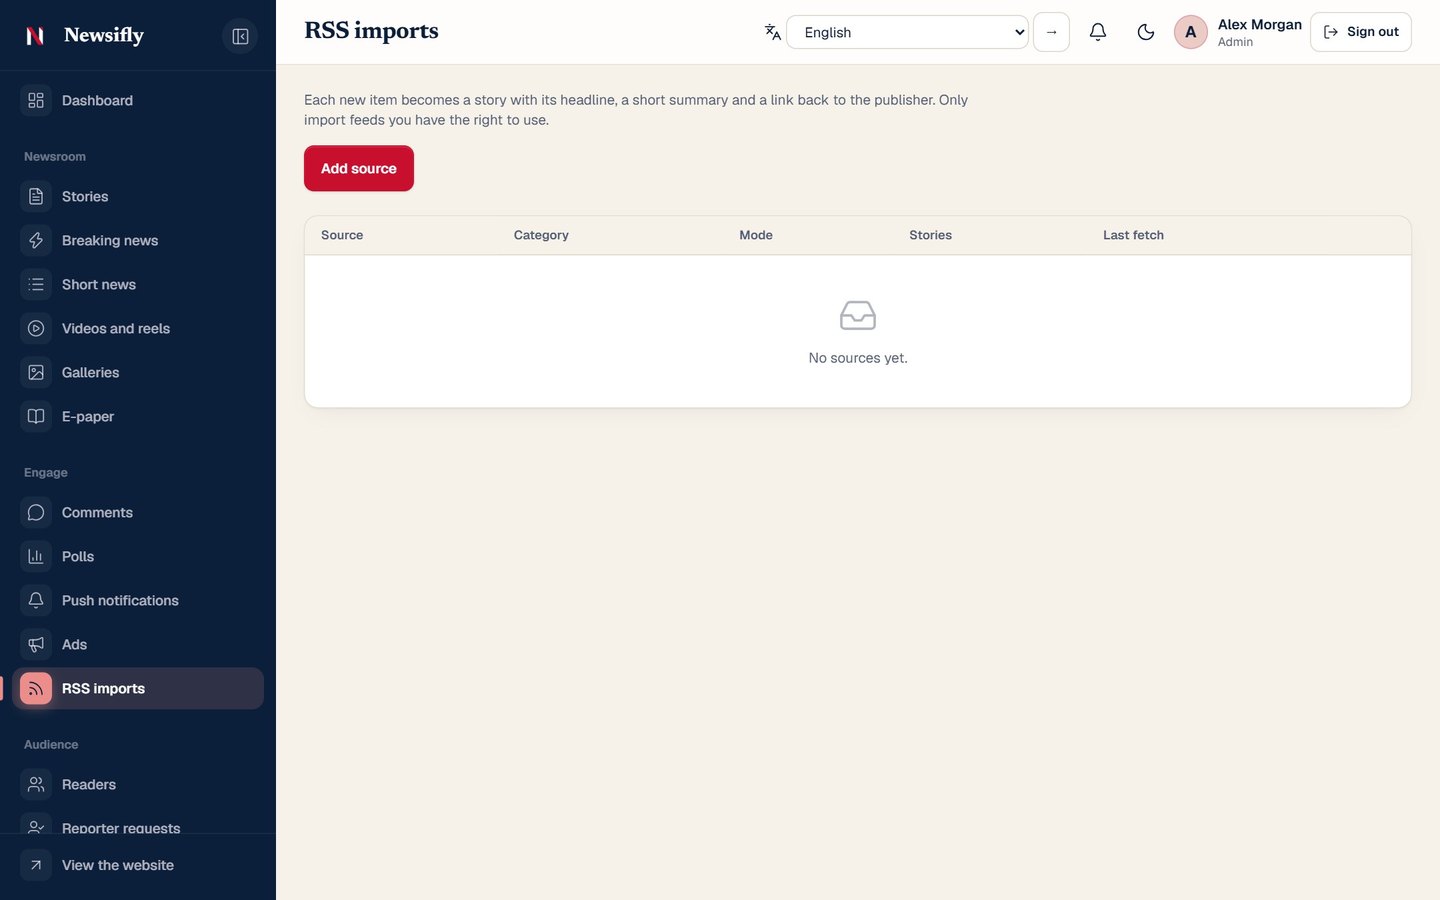
- RSS imports bring in stories from feeds you are allowed to use, as drafts or published.
Audience and analytics
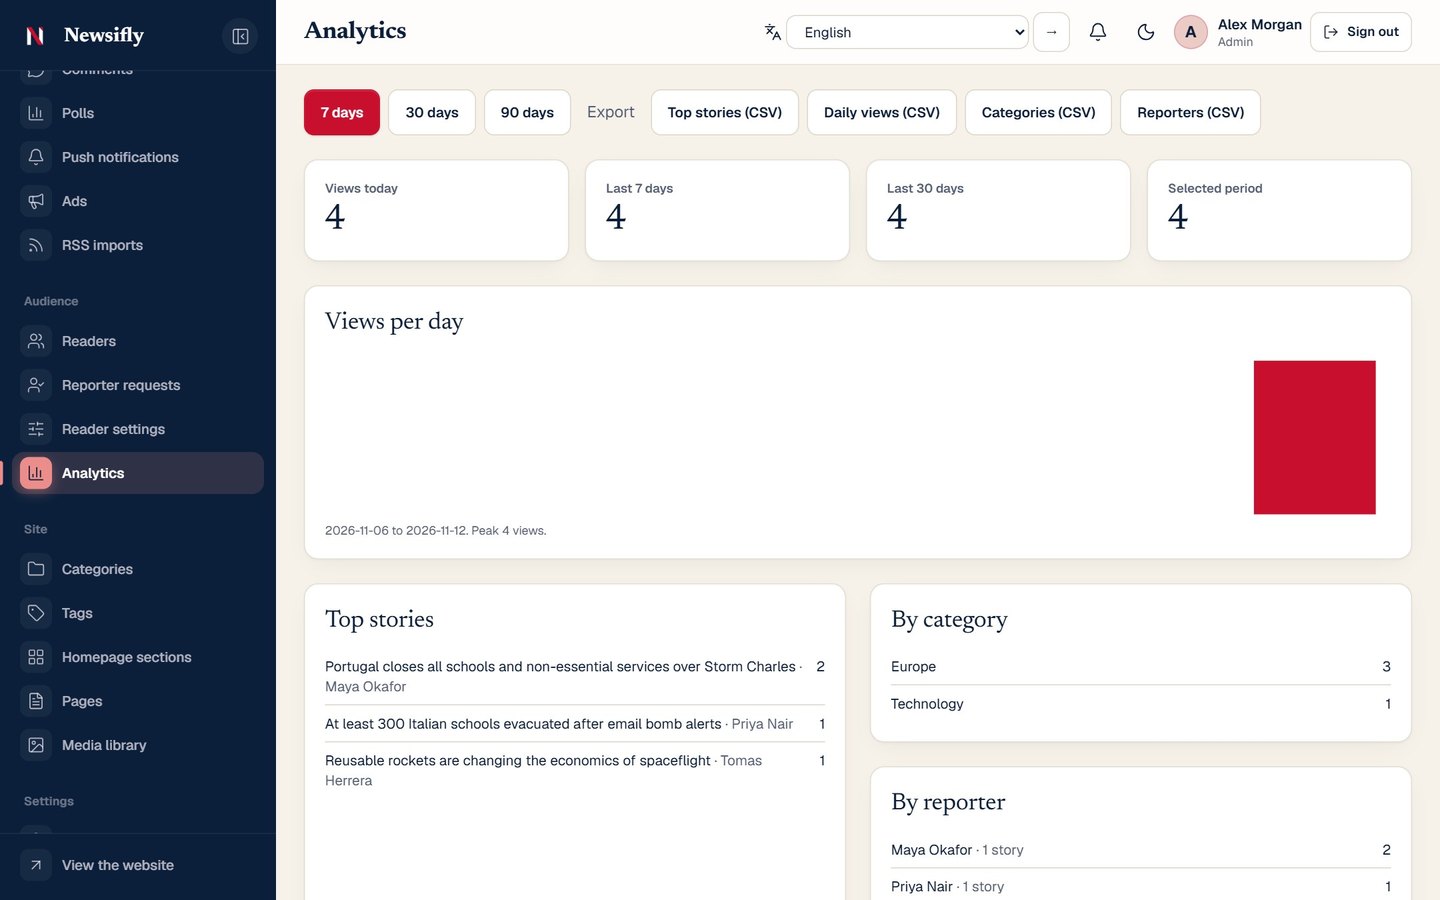
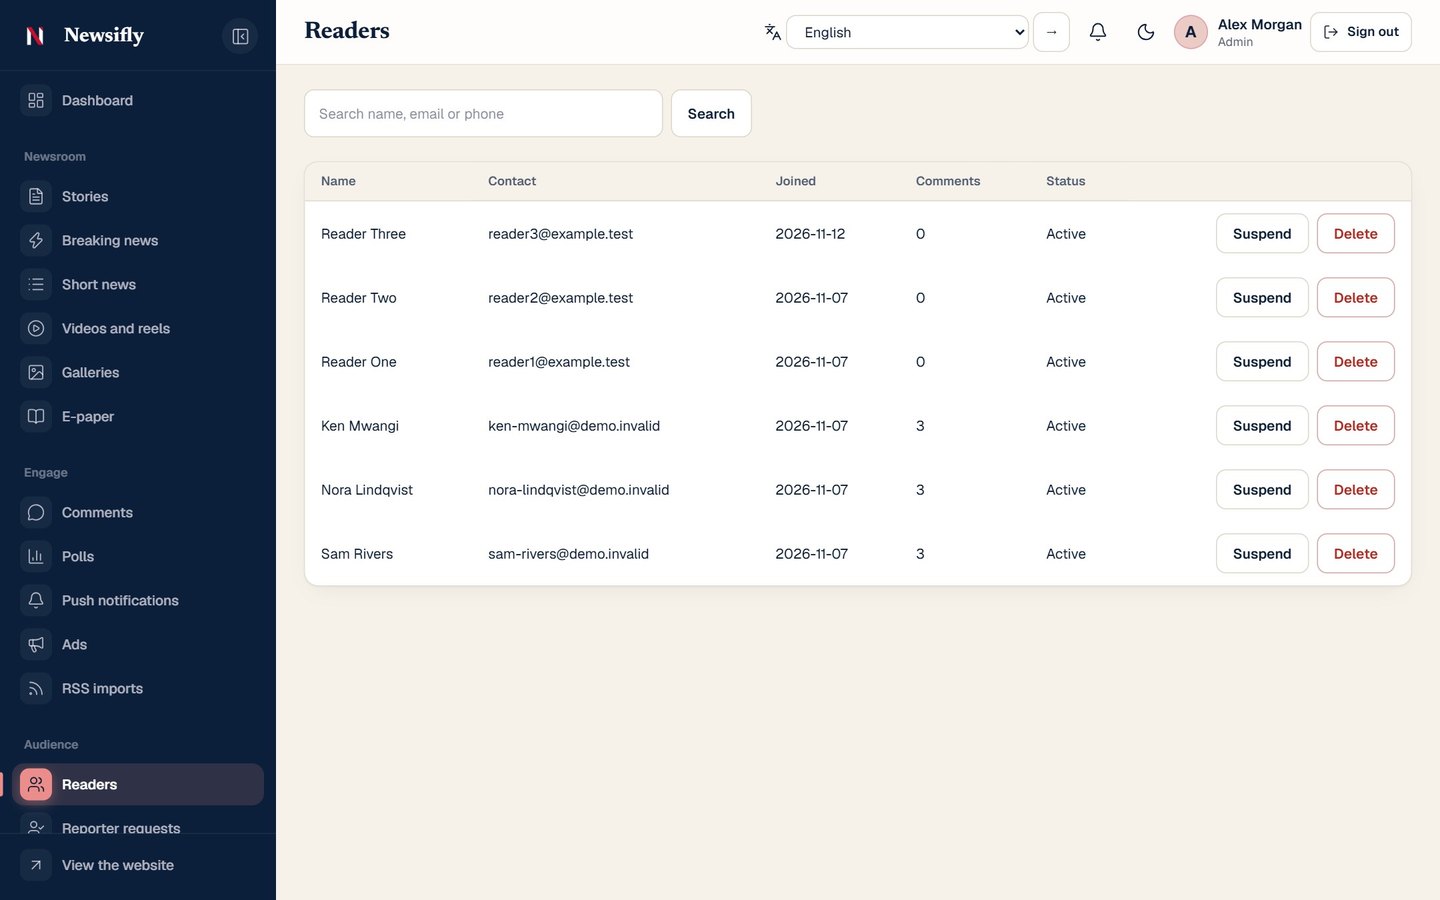
Readers lists registered readers; Reporter requests lets you approve readers who ask to write; Analytics shows views per day, top stories, categories and reporters, with CSV export.
Site: categories, homepage, pages, media
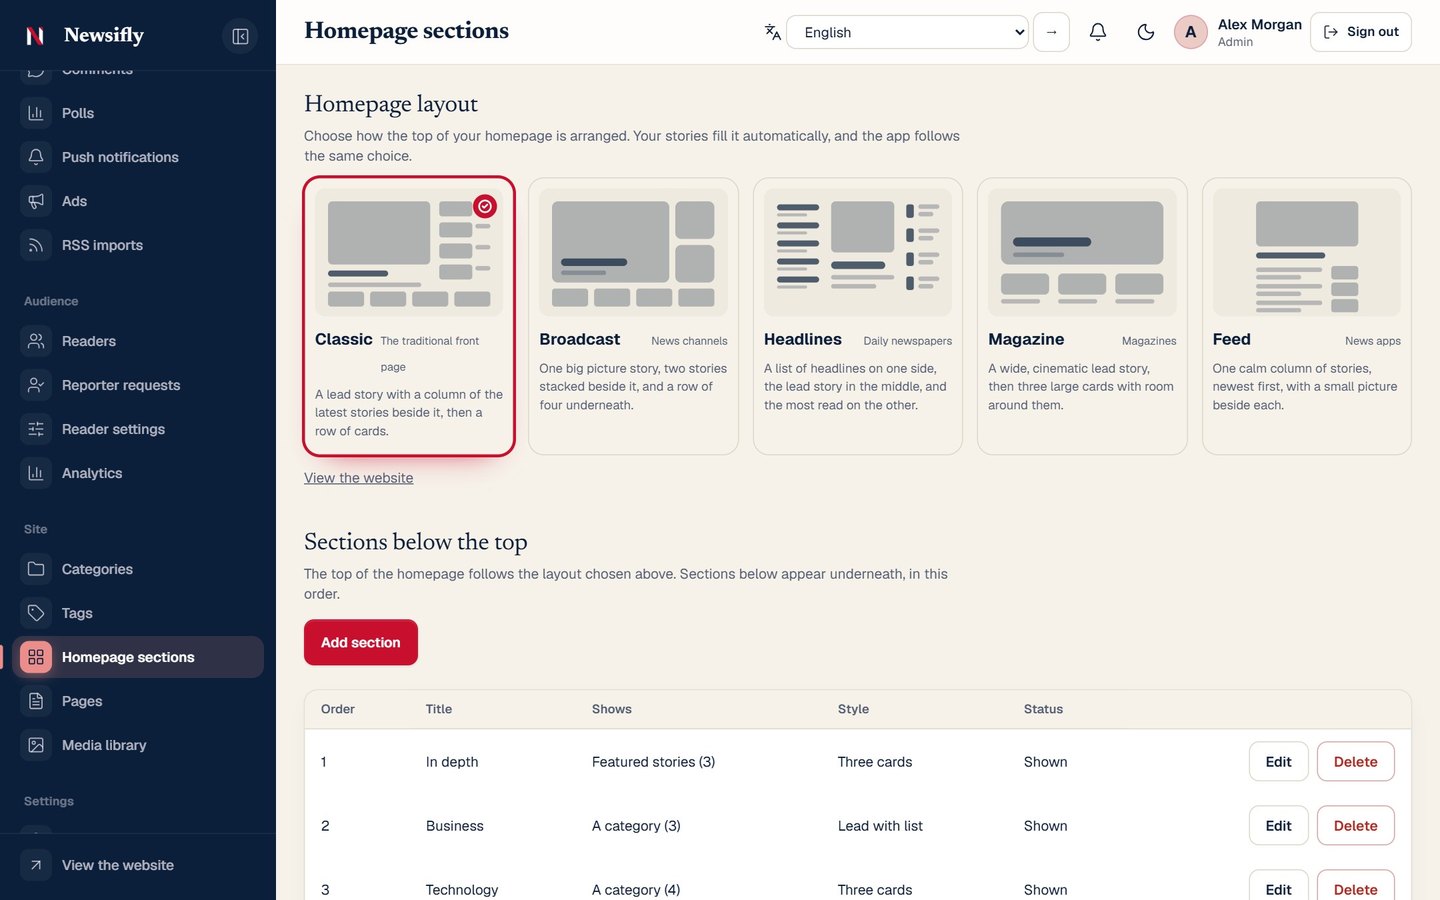
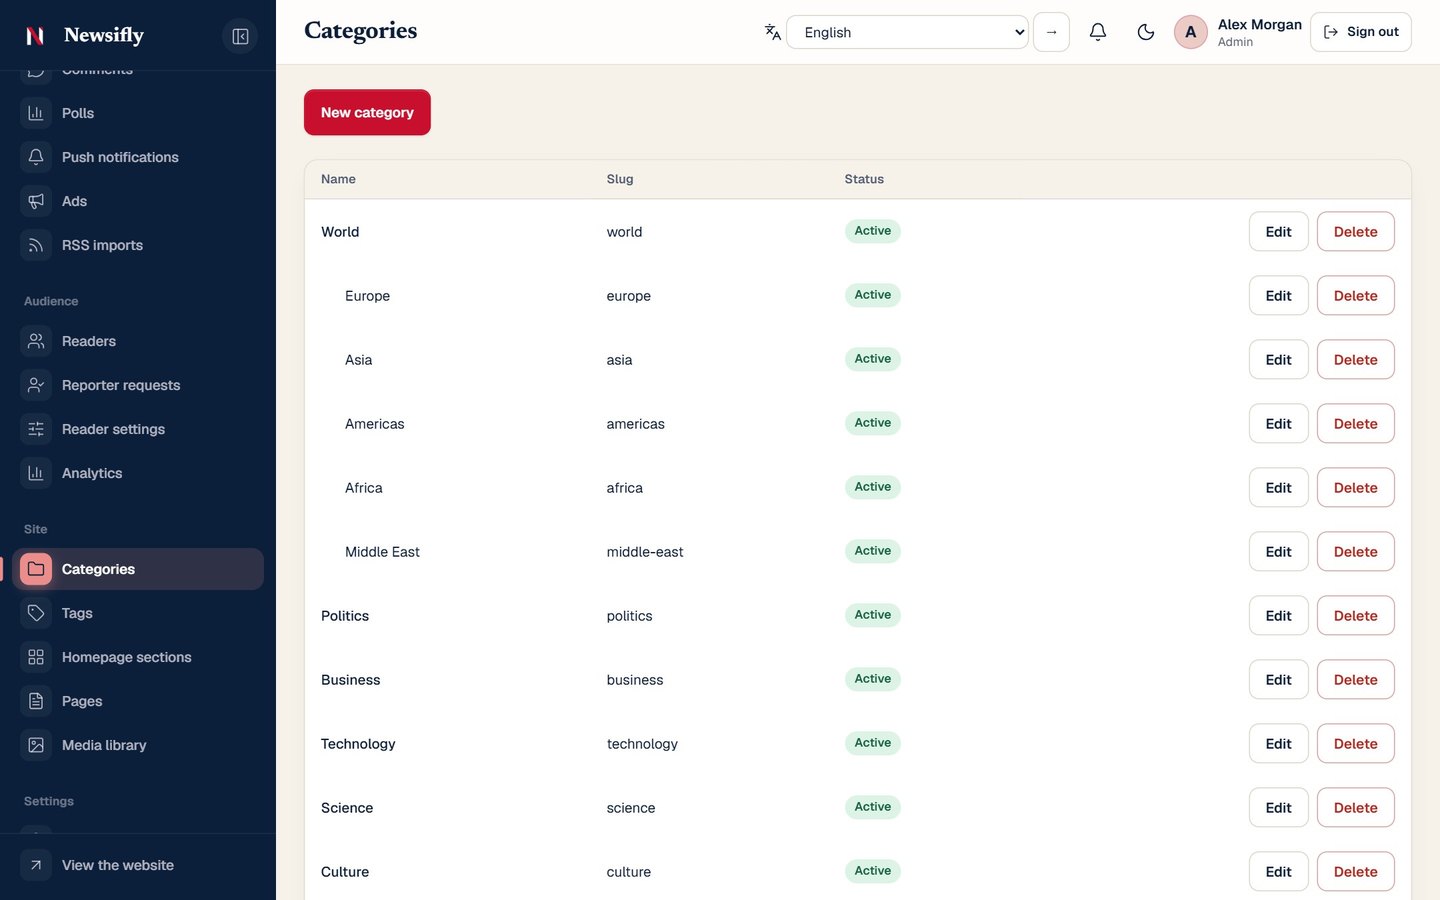
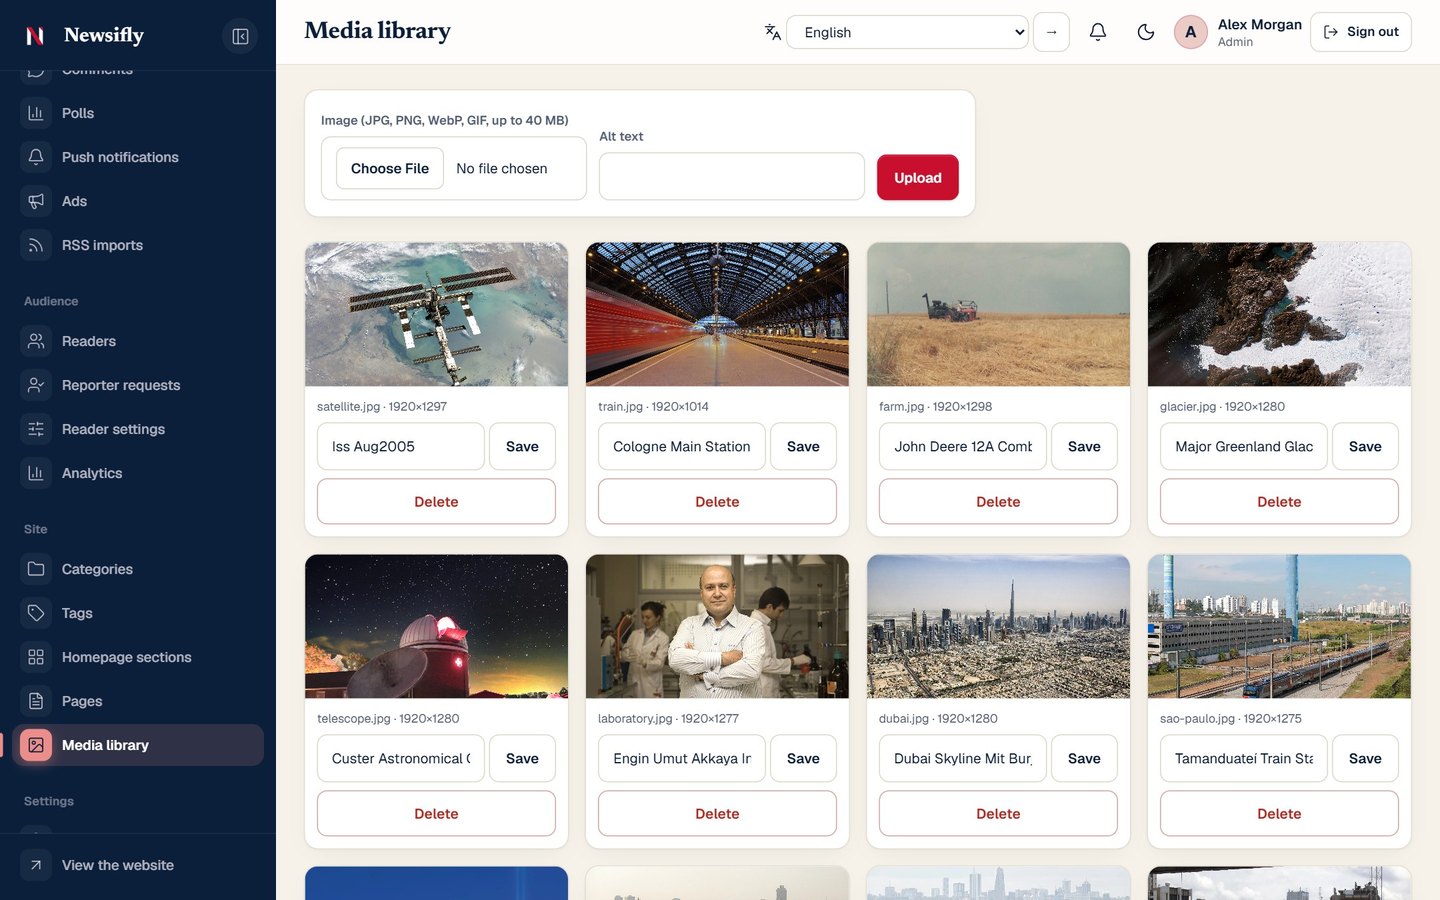
Categories can have sub-categories and appear in the menu. Homepage sections chooses the front-page layout and the sections below it. Pages holds About, Privacy and Terms. The Media library stores every picture and video you upload.
First steps
- Open Branding and set the site name, logo, favicon, color and social links; set the time zone and contact details under General.
- Create categories, then add the pages you need (About, Privacy, Terms).
- Choose how the top of the home page is arranged, and add the sections below it, under Homepage sections (see Homepage layouts).
- Optional: pick the color of the admin menu under Branding, Admin menu. Each person can fold the menu to icons with the arrow at its bottom (Ctrl or Cmd + B).
- Add staff accounts under Staff and turn on two-step sign-in for administrators (Security).
Writing and publishing
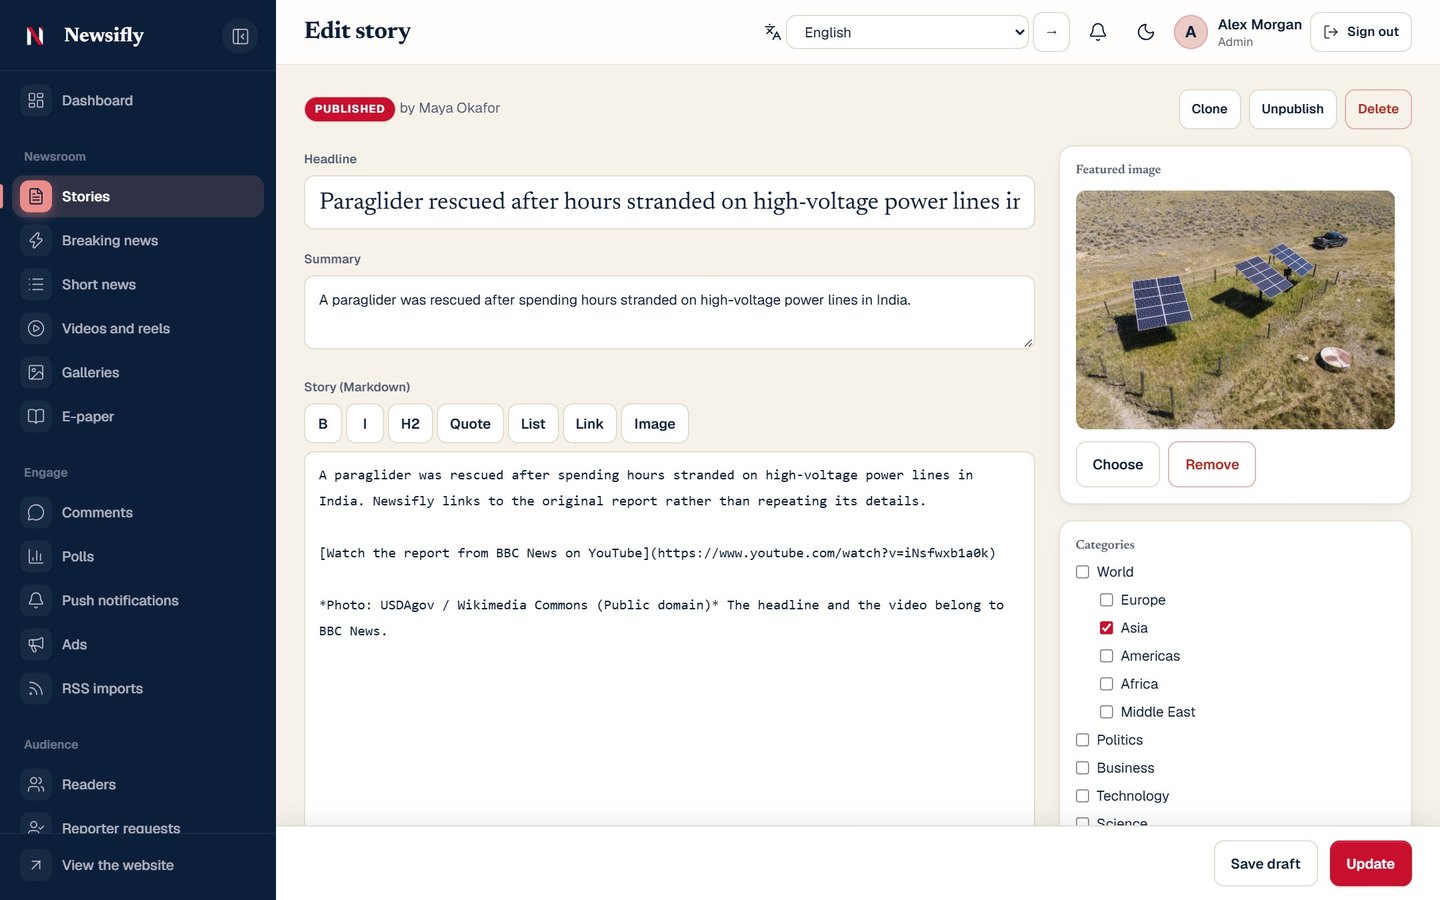
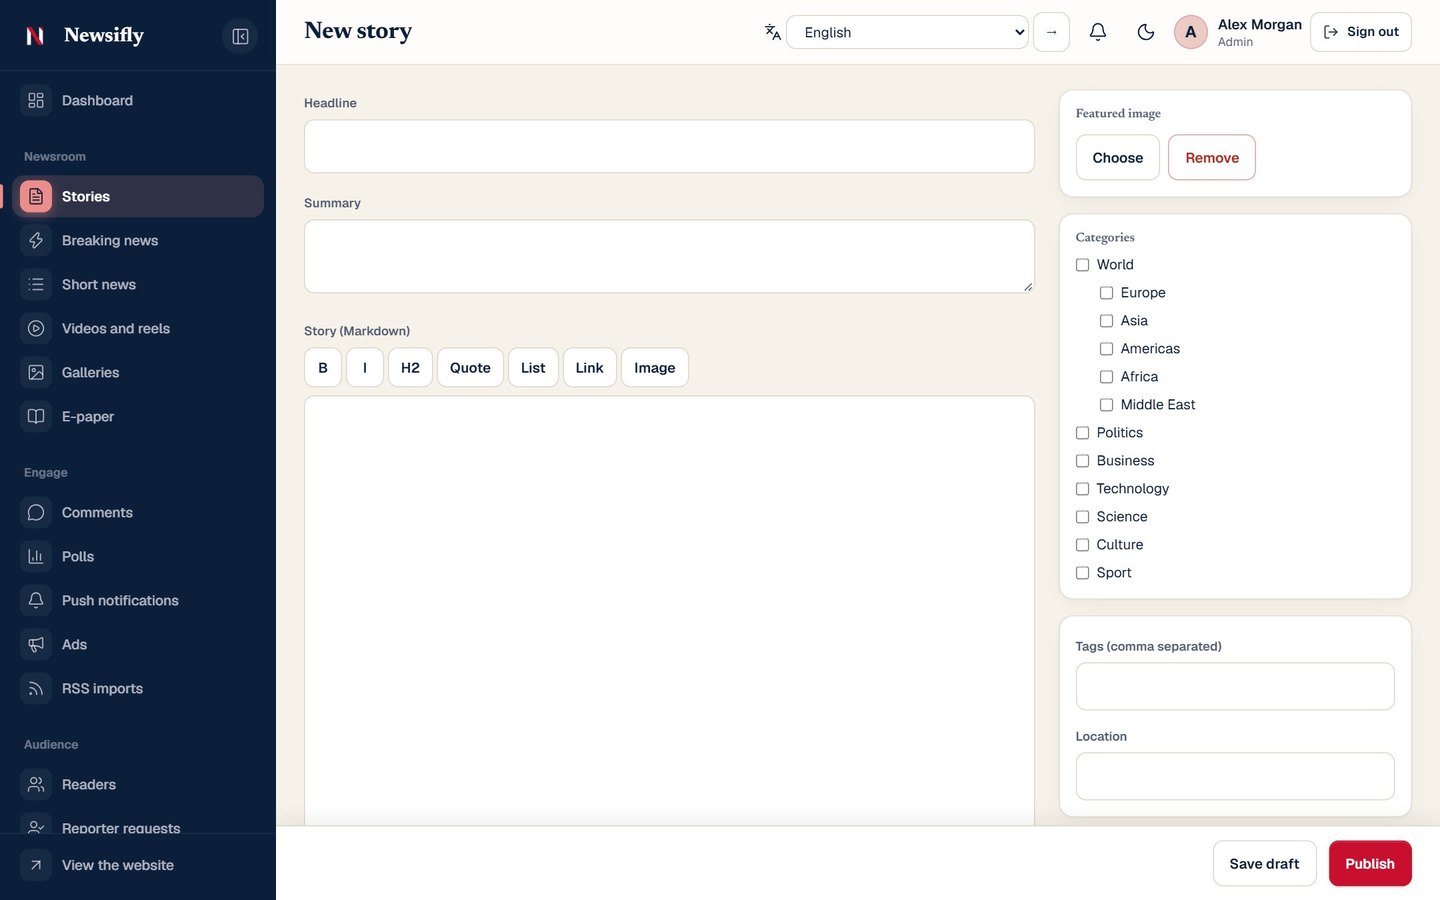
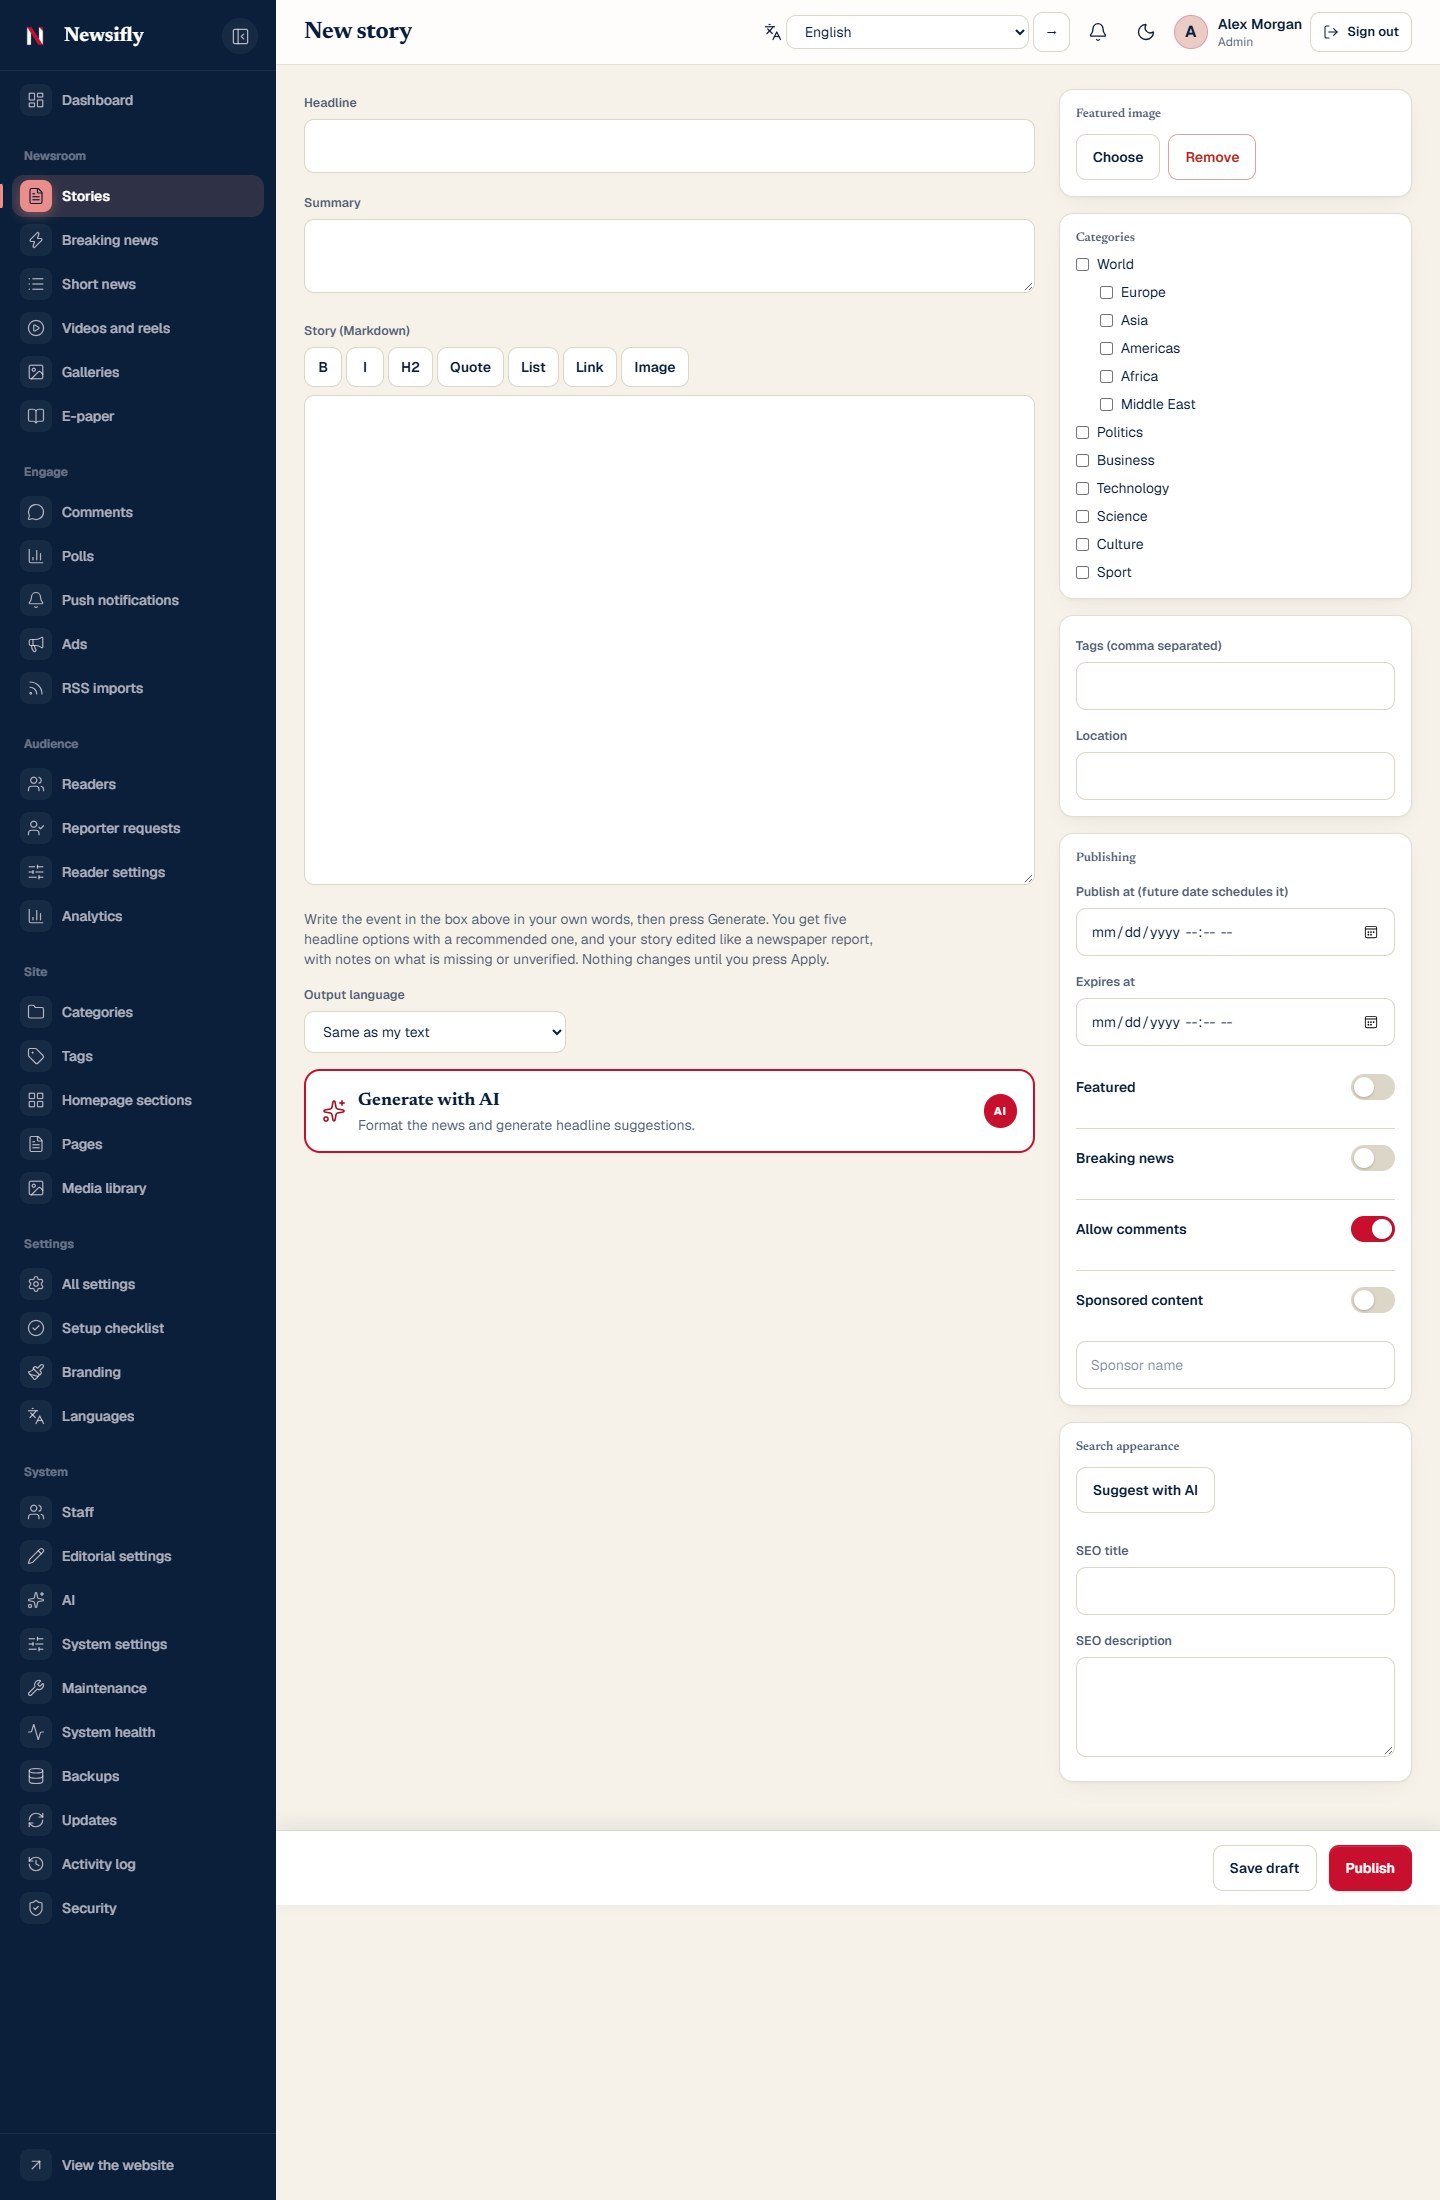
Everything a reporter or editor does with a story happens on one page: Stories → New story (or Edit on an existing one). The left side holds the words, the right side holds the picture, categories, tags and publishing options.
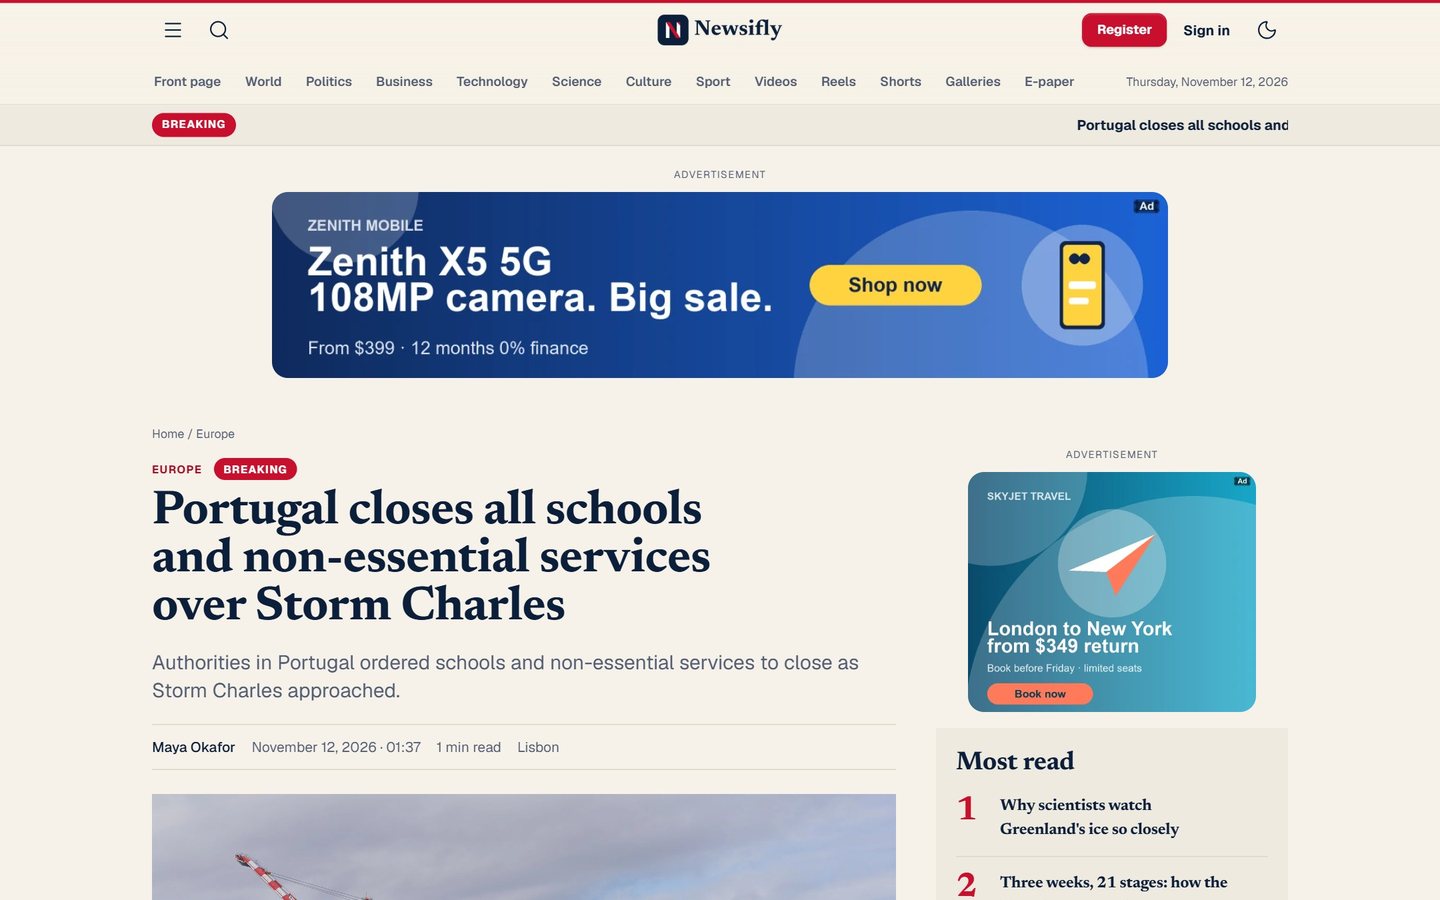
The fields, one by one
| Field | What it does |
|---|---|
| Headline | Required. Shown on the story, in lists and in push alerts. The web address (slug) is made from it. |
| Summary | One or two lines shown under the headline and on cards. Leave it empty and the lead of the story is used. |
| Story (Markdown) | The text. The toolbar adds Bold, Italic, Heading (H2), Quote, List, Link and Image (pick from the media library). Plain text works too; a blank line starts a new paragraph. |
| Featured image | Choose a picture from the media library (or upload a new one). It is the top picture of the story and the thumbnail in lists, the app and social shares. Remove clears it. |
| Categories | Tick one or more; sub-categories are listed under their parent. A story appears in every category it is ticked in. |
| Tags | Comma-separated words such as election, budget, climate. New tags are created on the fly; readers can open a tag page. |
| Language | Shown when more than one language is switched on. The language the story is written in. |
| Location | A place name such as “Lisbon”. Readers can follow a location, and push alerts can be sent to followers of it. |
Publishing options
- Publish at: leave empty to publish now. Choose a time in the future and the story is Scheduled; the scheduler (cron job) publishes it within a minute of that time.
- Expires at: optional. After this time the story disappears from the site. (Under Editorial settings you can also choose to delete expired stories automatically.)
- Featured: eligible for the lead position and the “featured” strips on the front page.
- Breaking news: puts the story on the red breaking strip. You can also do this in bulk from the Breaking news page.
- Allow comments: turn off to close the discussion on this story only. (Comments can be switched off for the whole site in Comments and readers.)
- Sponsored content: labels the story as sponsored and shows the sponsor name you type. Use it for paid placements so readers can tell.
Search appearance
Optional. SEO title (up to 160 characters) and SEO description (up to 320) are what Google shows. Leave them empty and the headline and summary are used. Suggest with AI writes both for you when AI is switched on.
Status and workflow
| Status | Meaning |
|---|---|
| Draft | Only the author and staff with edit rights see it. |
| Waiting for review | A reporter has sent it to the desk. An editor or admin reads it next. |
| Scheduled | Approved; goes live automatically at the chosen time. |
| Published | Live on the website and in the app. |
Reporters can create stories and edit their own; their buttons are Save draft and Submit for review. Editors and admins can edit any story and use Publish (or Update on a live story). If you turn on Auto-approve reporter stories under Editorial settings, reporters publish without review.
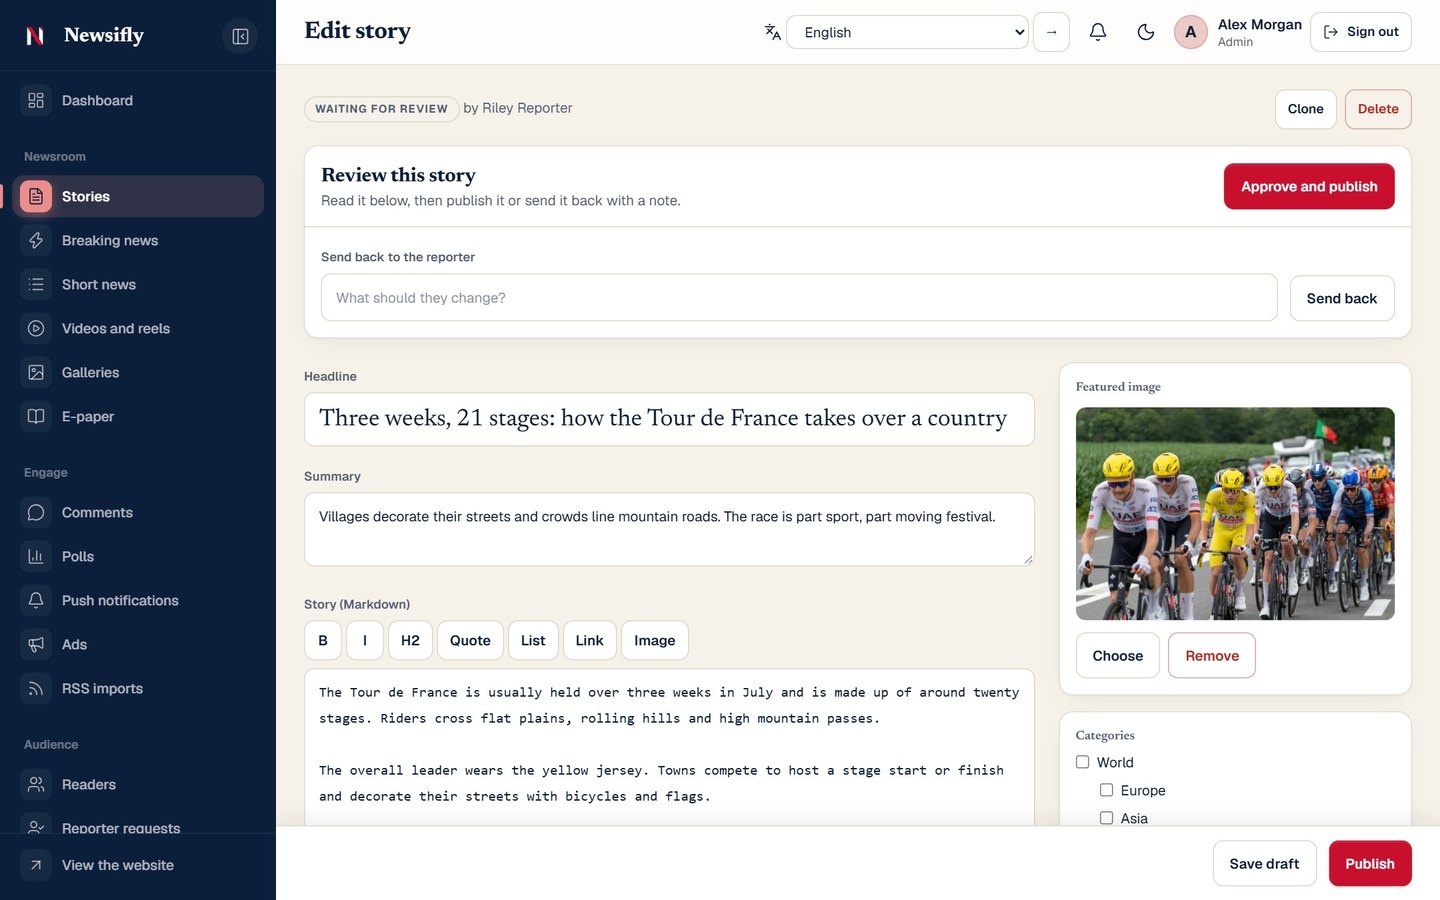
On a story waiting for review the review box offers Approve and publish and Send back with note (the reporter sees the note and fixes the story). An editor who is not sure can choose Ask an admin to decide.
More actions on a story
- Clone: makes a draft copy to build a follow-up from.
- Unpublish: takes a live story back to draft without deleting it.
- Delete: removes the story (admins and editors only; asks first).
- Revision history: every save is kept. Open the list at the bottom of the page and press Restore to go back to an earlier version.
- Poll: create it under Polls and attach it to a story; it shows under the text (see Videos, galleries, e-paper and polls).
The AI writing helper
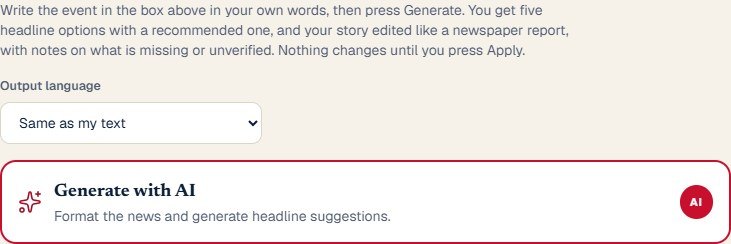
Under the editor, AI writing helper turns rough notes into a draft. It appears only when AI is switched on for your role (AI and translation).
- Type what happened (facts, quotes, numbers) into the box.
- Choose the output language (the default is Same as my text) and press Generate with AI.
- You get five headline options with one recommended, an edited article, and notes: Missing information, Verification warnings and Editorial notes. In breaking mode the helper writes short strip headlines.
- Press Edit to change it, Apply to Draft to put it in the form (with Undo), or Discard.
The helper is told not to invent facts, names or numbers, and every number you typed is kept exactly. It is a helper, not an editor: always read the result before publishing.
Translating stories
A story belongs to the language it was written in. To offer the site in another language, open Languages and press Translate everything now; stories, categories, pages and names are translated by AI (numbers are checked and kept exactly), or you can write the translation yourself as a new story in that language.
Videos, e-paper & polls
Besides stories, the Newsroom menu holds the other kinds of content readers enjoy. They appear on the website and in the app.
Videos and reels
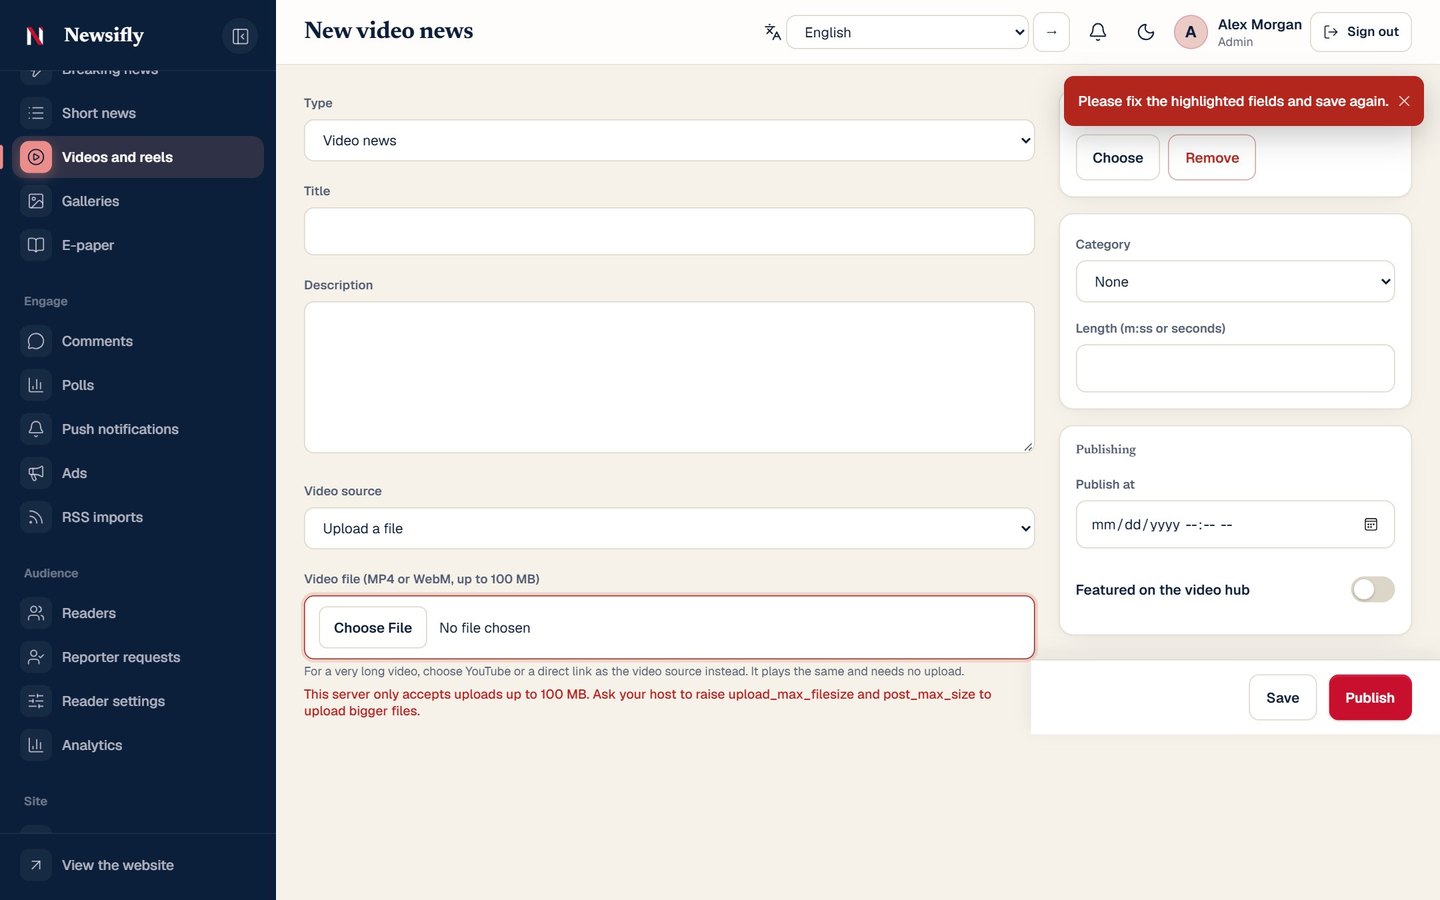
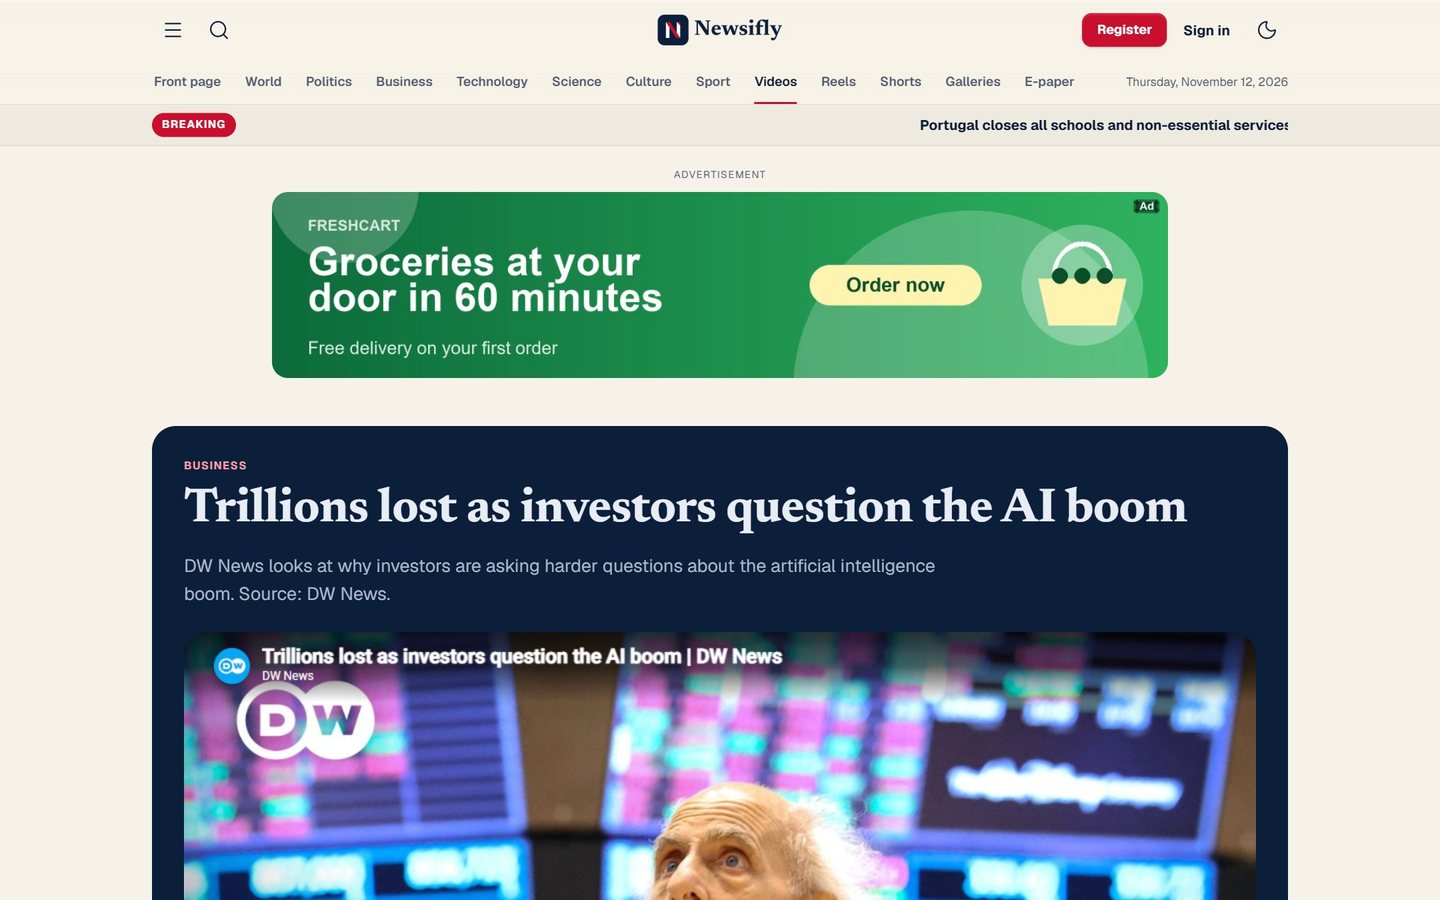
Newsroom → Videos → New video. Choose how the video is supplied:
- Upload: a video file from your computer (big files are fine; see Large photos and videos).
- Link: paste a YouTube link, a public Facebook video link, or a direct
httpsaddress ending in.mp4,.webmor.m3u8. The site recognizes which one it is. - Live: a live stream link. Set Stream starts at, and use the live button on the video when the broadcast begins and ends.
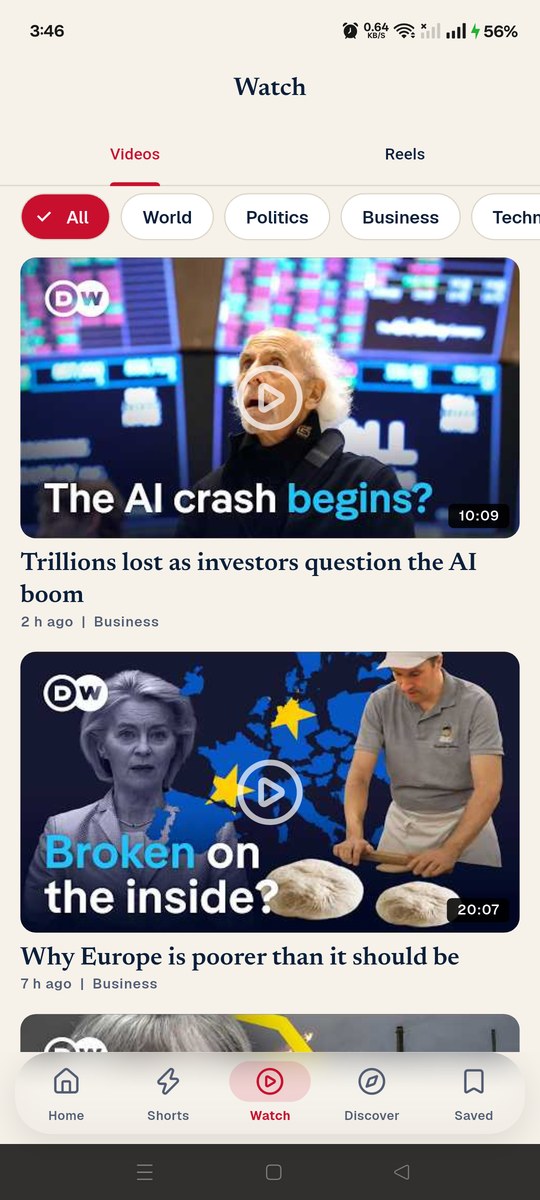
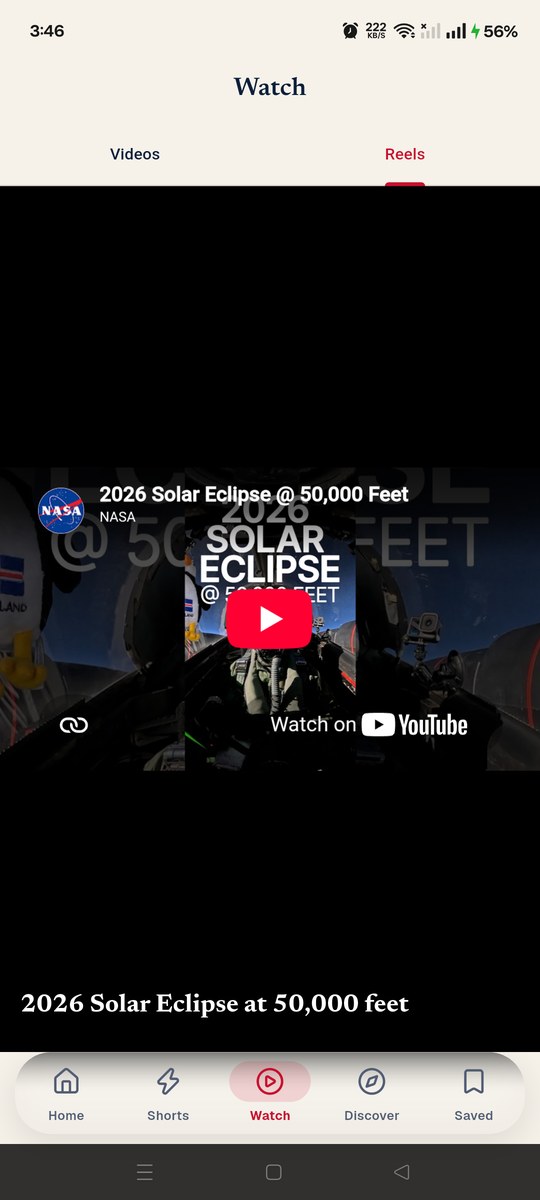
Then add a title, a description, a thumbnail, a category and the length (m:ss or seconds). Publish at schedules it; Featured on the video hub pins it to the top of the Watch page. A video marked as a reel also shows in the vertical, swipe-up Reels feed.
Short news
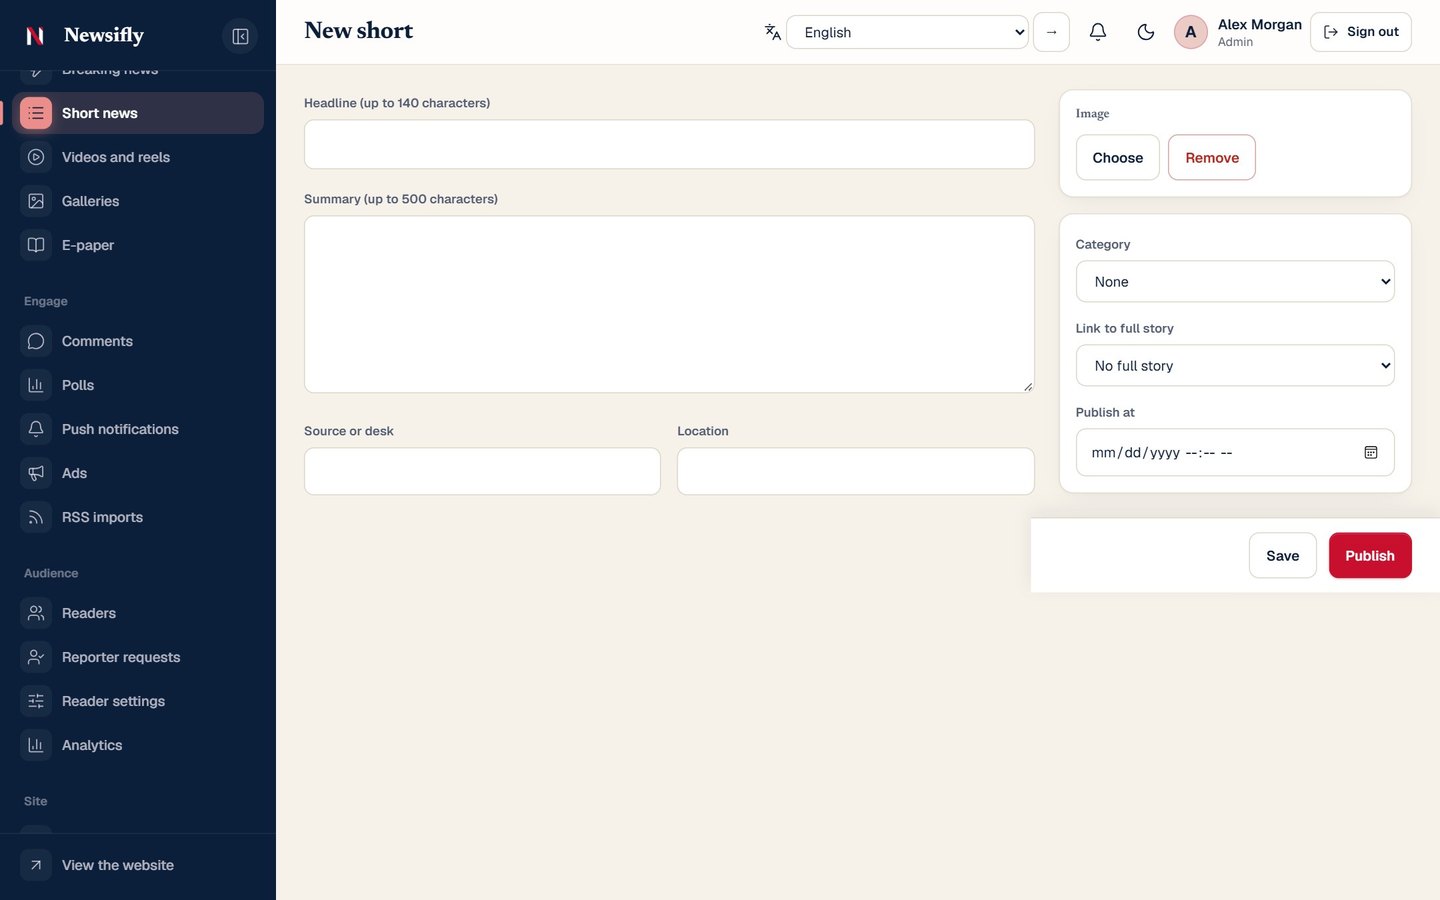
Newsroom → Short news → New. A title, a short summary (the lines readers swipe through), an optional picture, a category, a location, and an optional source name and source link. Publish at schedules it. In the app they form a full-screen swipeable feed.
Galleries
Newsroom → Galleries → New. A title, a description, a cover and then pictures picked from the media library, in the order you choose, each with a caption. Galleries open as a grid with a full-screen viewer.
E-paper
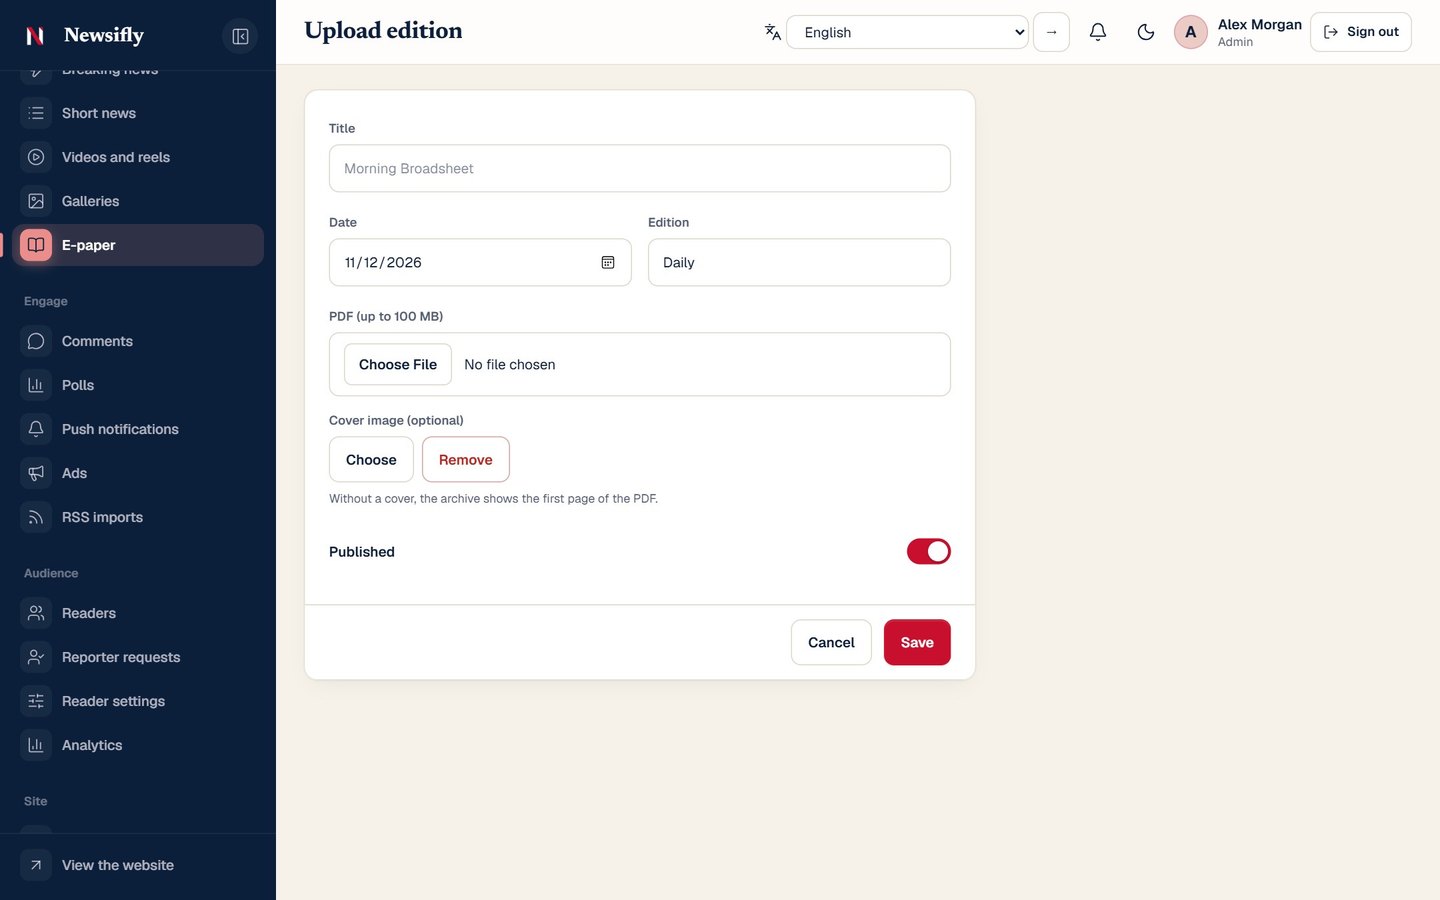
Newsroom → E-paper → New edition. Give the edition a name and a date, upload the PDF (up to 100 MB) and, if you like, a cover picture. Readers browse the editions and read or download the PDF.
Polls
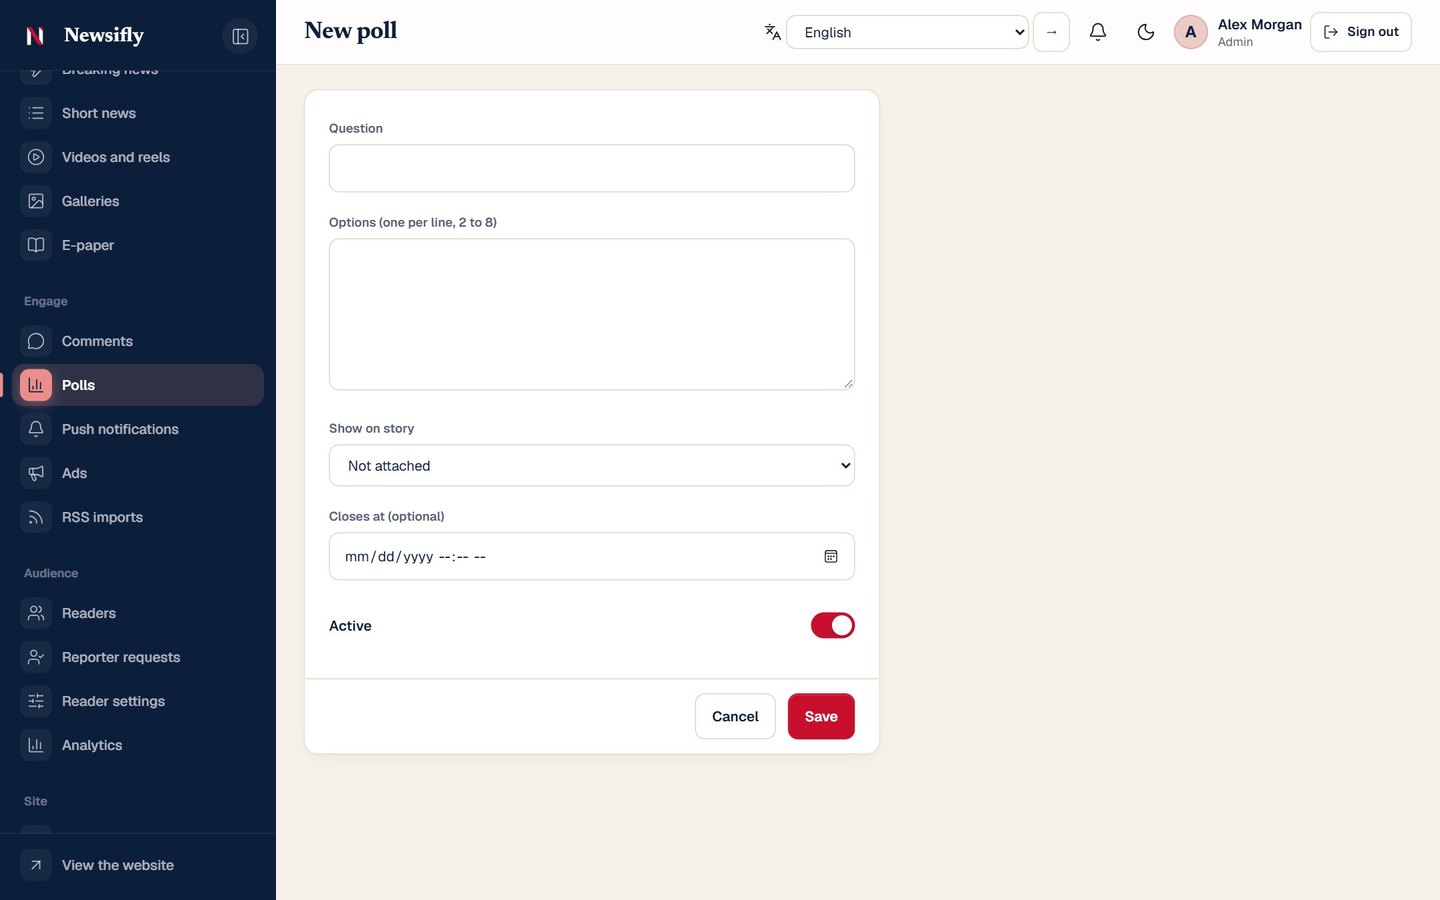
Engage → Polls → New poll. Write the question and two to eight options (one per line). Options cannot be changed once the poll exists, so the votes always match what readers saw. The newest open poll is shown on the front page of the website and in the app. Optionally attach the poll to a story so it also shows under that story, and set Closes at to end voting automatically. Readers choose an option and press Vote (in the app, tap an option); they see live results straight after, and each reader or device can vote once. On the front page the poll then leaves that reader's page. A reader who does not want to vote can close the poll with the × button, and it does not come back for them; a newer poll from the newsroom shows again. A poll that is switched off or past its closing time is not shown.
Breaking news
The red breaking strip at the top of the website (and the breaking banner in the app) shows the headlines you mark as breaking. You choose them from stories you already have, so nothing is typed twice.
- Open Newsroom → Breaking news. The page is called Today's headlines and lists the stories published today. Use Today, Yesterday or the date picker to choose another day.
- Tick the stories that should be on the strip.
- Press Publish as breaking news. The strip shows them for 24 hours, then clears by itself.
- A story from an earlier day is published again as of now when you pick it, so it shows as fresh news.
- You can also tick Breaking news on the story form (see Writing and publishing).
- You can have a push alert sent automatically when a breaking story is published; see Push notifications.
- The AI writing helper has a breaking mode that proposes short strip headlines.
Homepage layouts
Under Homepage sections the card Homepage layout shows five ready-made arrangements with a small picture of each: Classic (a lead story with the latest stories beside it), Broadcast (one large picture story with two stacked beside it), Headlines (a headline list, the lead story and the most read, as in daily newspapers), Magazine (a wide lead and three large cards) and Feed (one calm column). Choosing one saves it at once: the website changes immediately, and the mobile app follows the same choice within a few seconds (it shows the nearest of its own three looks: classic, big pictures or compact list). Your stories fill the layout automatically; the sections you add below stay the same in every layout.
Languages
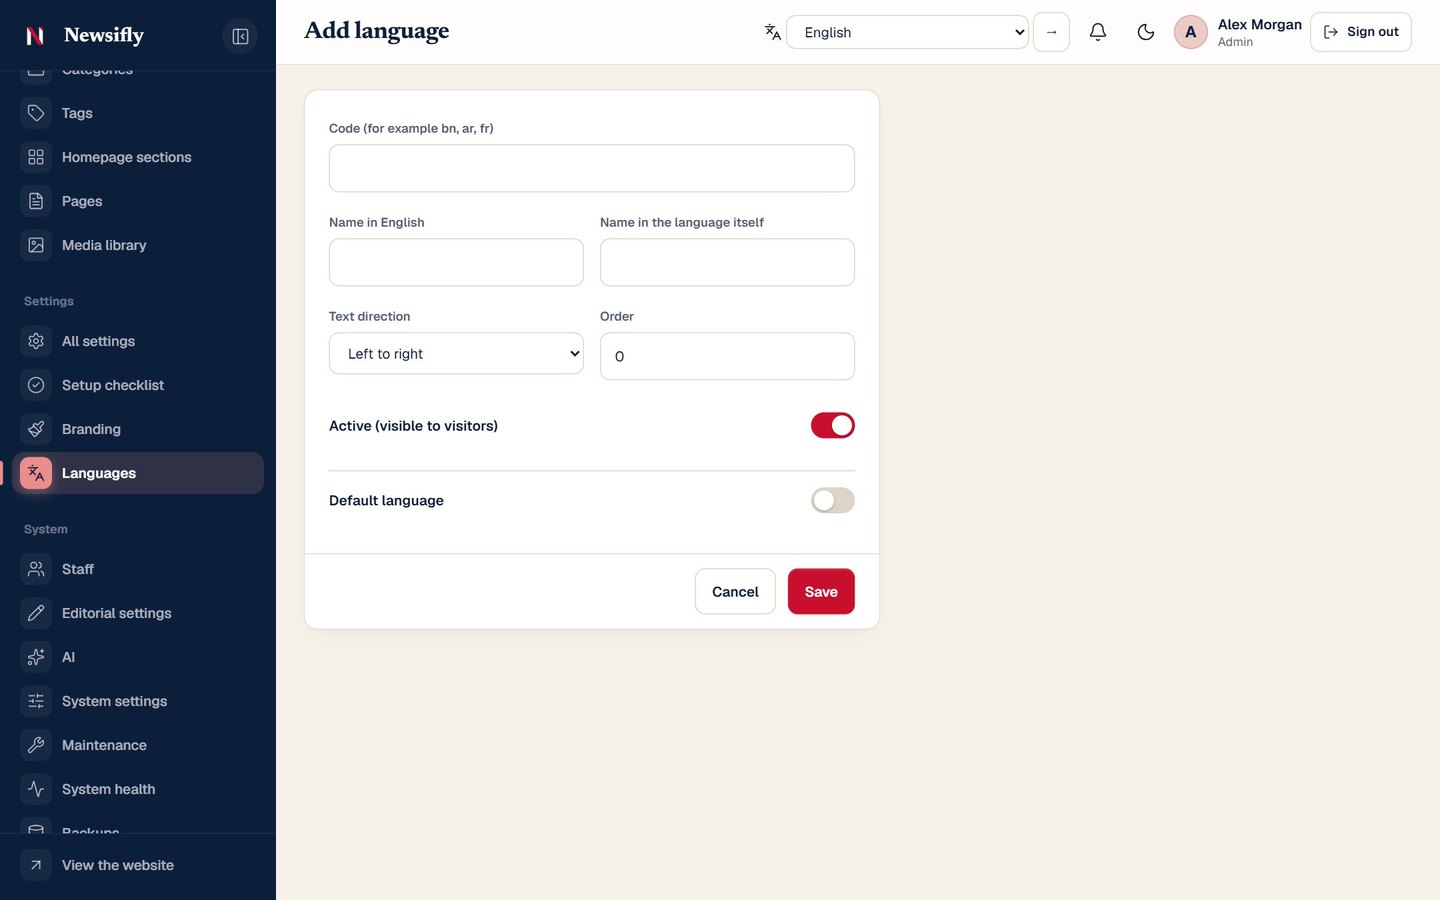
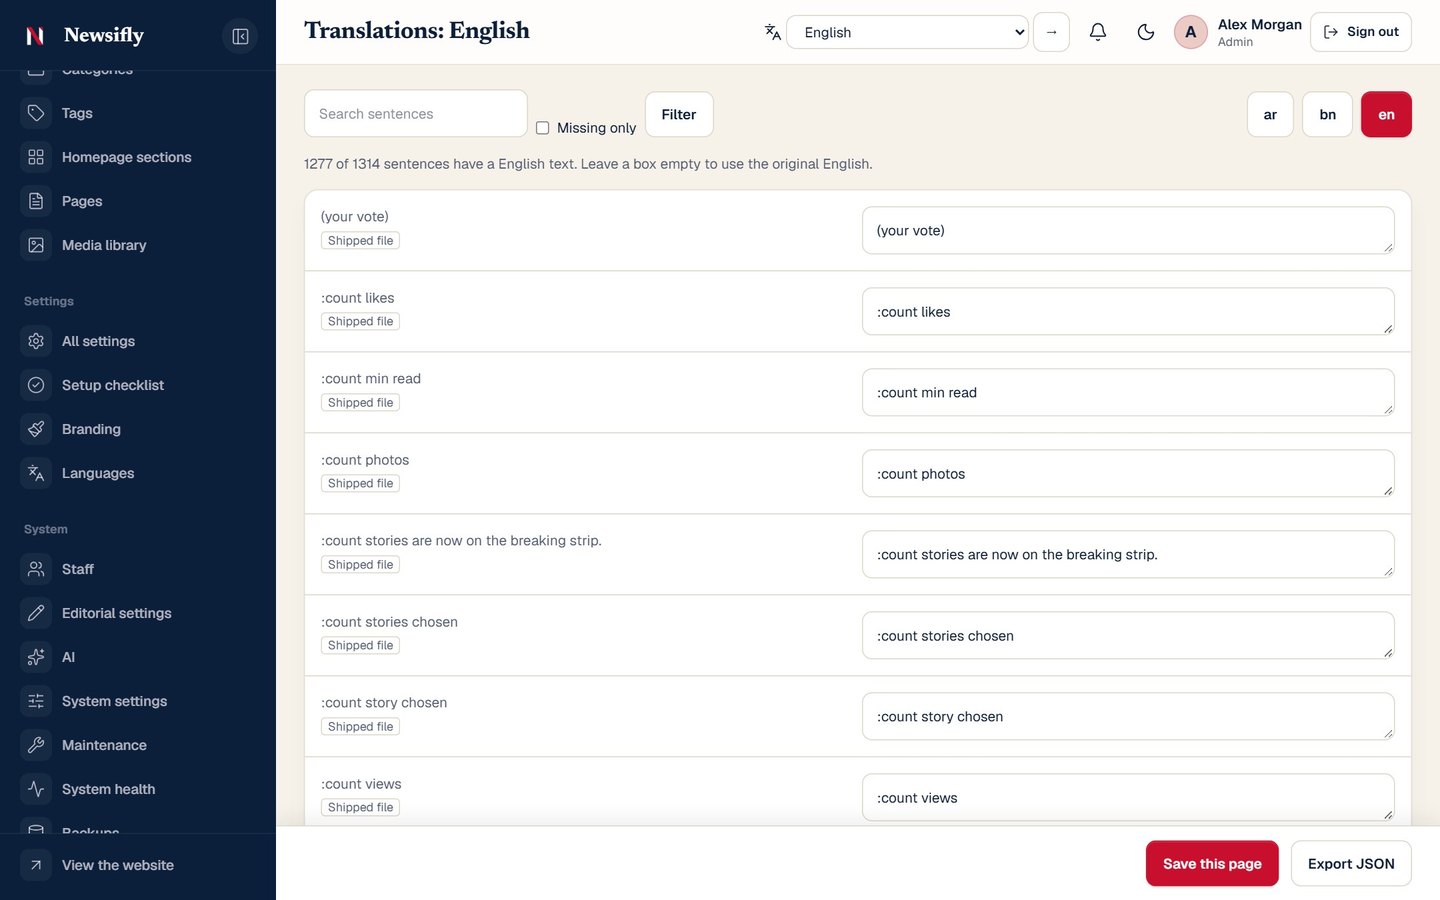
Bangla, English and Arabic are included in full. The whole public website, the admin panel and the app follow the language you choose, and right-to-left languages such as Arabic turn the layout around by themselves.
Switching the site language
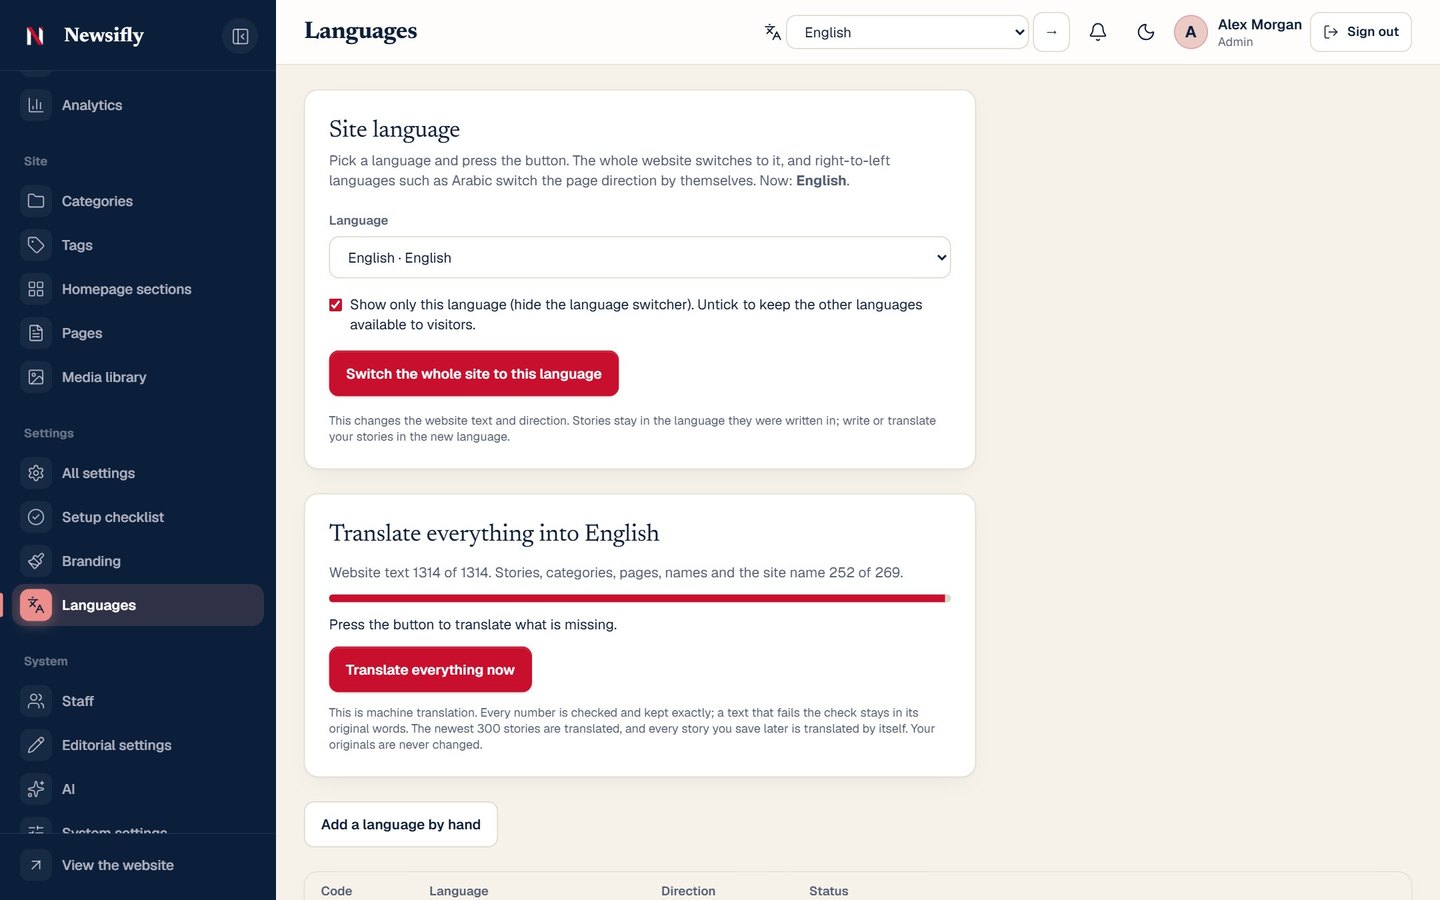
Open Settings → Languages, pick a language and press the button. The language switcher for readers shows only when more than one language is active. Stories stay in the language they were written in.
Adding a language
Press New language, give it a name, its native name, a code (such as fr) and whether it is right-to-left. Then make it active.
Translating
- Translate everything now (needs an AI key): translates the missing website sentences, and the newest stories, categories, pages, names and the site name. Numbers are checked and kept exactly; text that fails the check stays in its original words. This is machine translation, so have someone read the important pages.
- Translate button on a language: the translation manager lists every sentence; edit any of them. Your edits are kept when the language files are updated. You can export and import a language as a file.
The mobile app reads the same language list from the server.
Categories, tags & pages
Categories
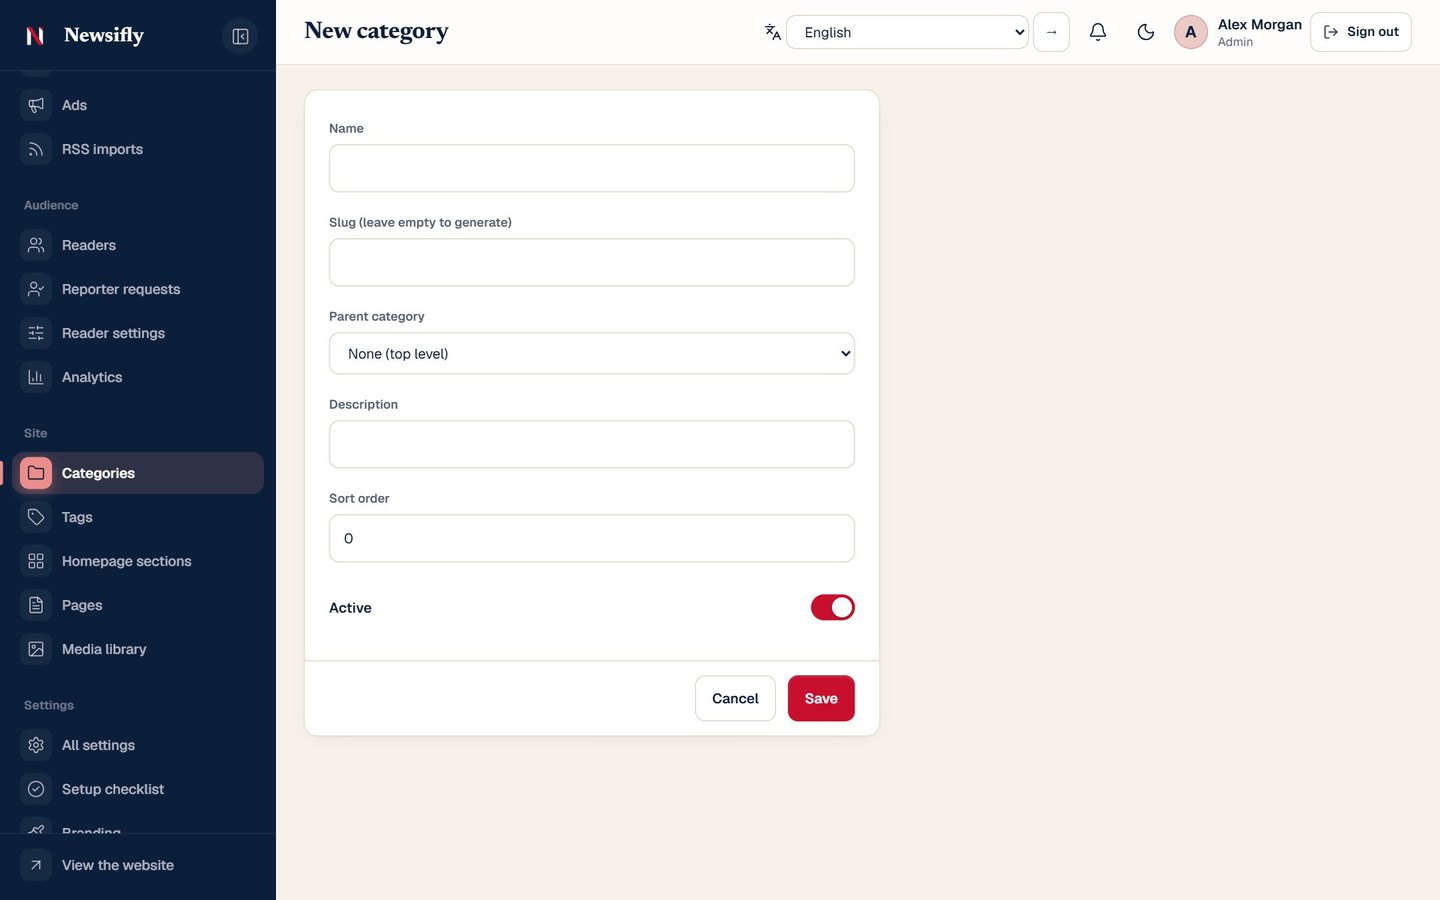
Site → Categories → New category. Fields: Name, Slug (leave empty to generate), Parent category (choose one to make a sub-category, or “None (top level)”), Description, Sort order and Active. Active categories appear in the website menu and in the app. A story can be in several categories.
Tags
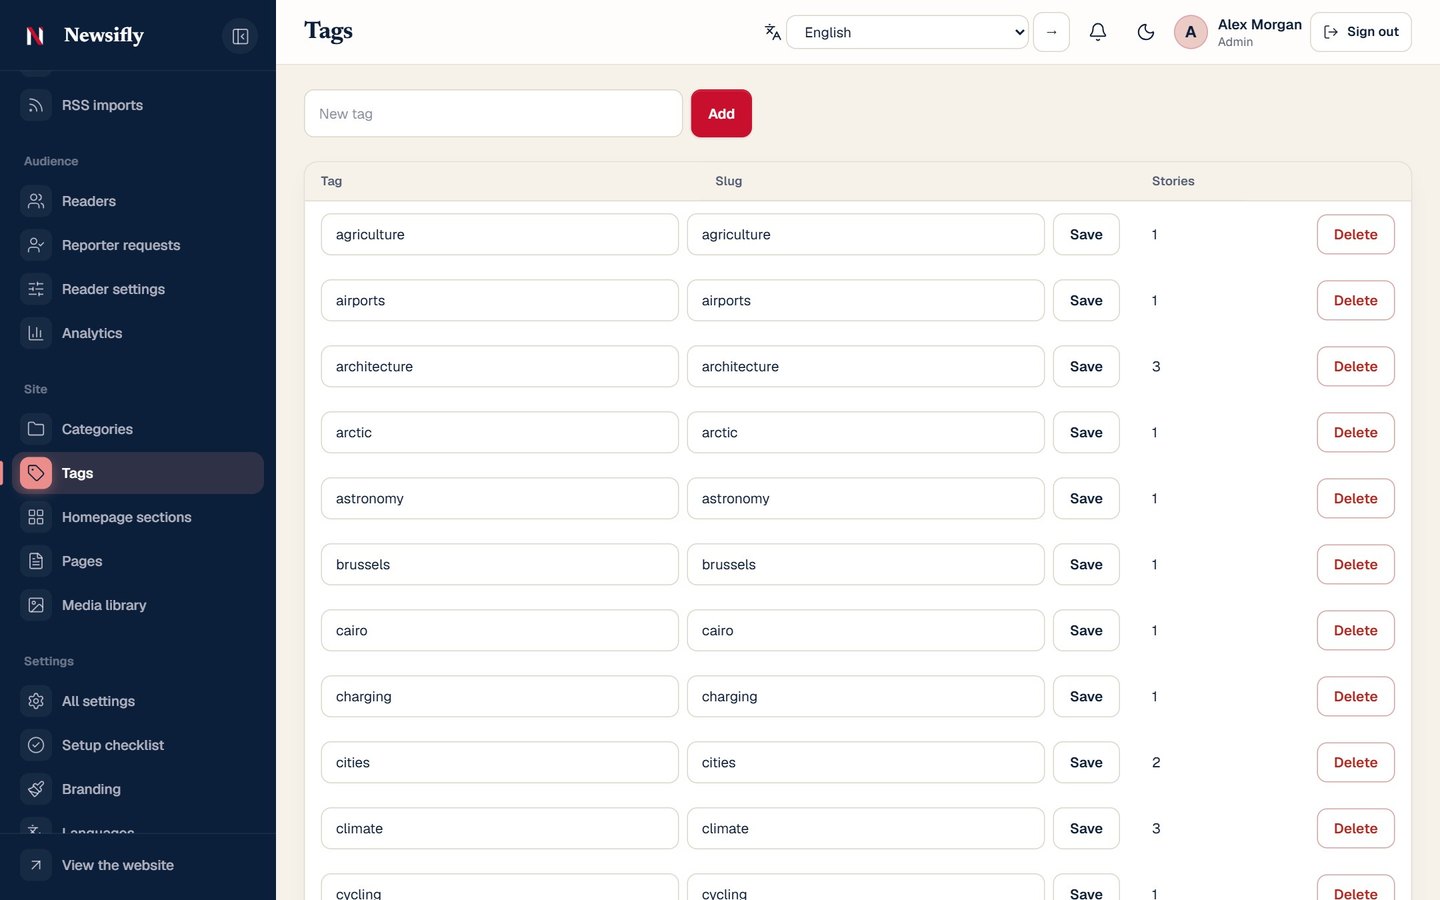
Site → Tags lists every tag. Add a tag here, rename it or delete it. Tags are also created by typing them on the story form.
Pages
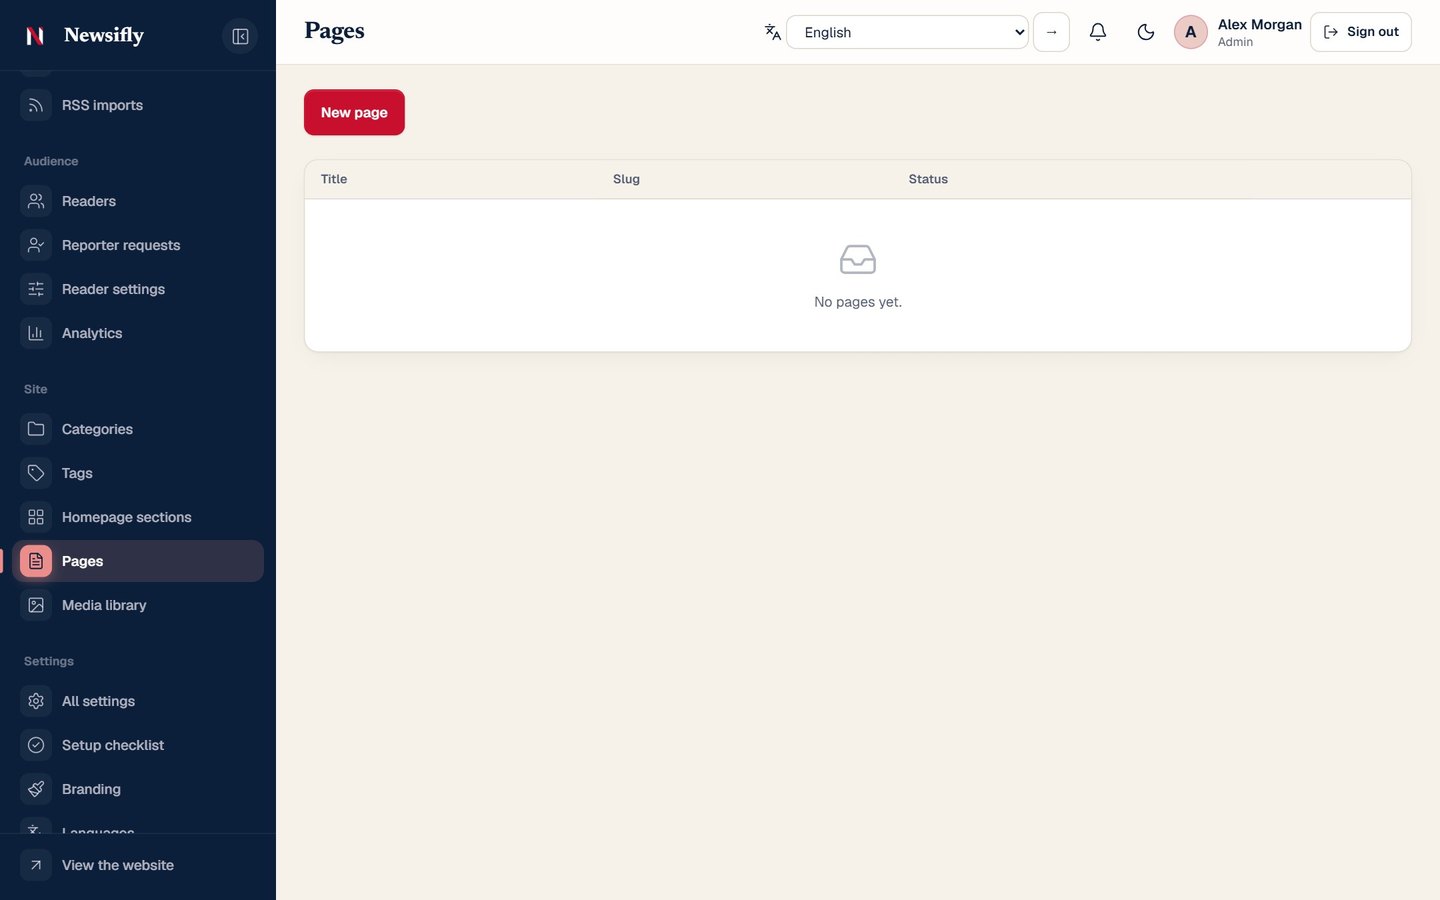
Site → Pages holds About, Privacy, Terms and any page of your own. Fields: Title, Slug, Content (Markdown), Sort order, Published and Show in footer. Fill in the privacy and terms pages before you go live (the app stores ask for a privacy link).
Comments & readers
Moderating comments
Engage → Comments has tabs for Pending, Reported, Spam, Approved and Rejected. Approve, reject or mark a comment as spam; a reported comment shows how many readers reported it. Admins and editors can moderate.
Reader settings
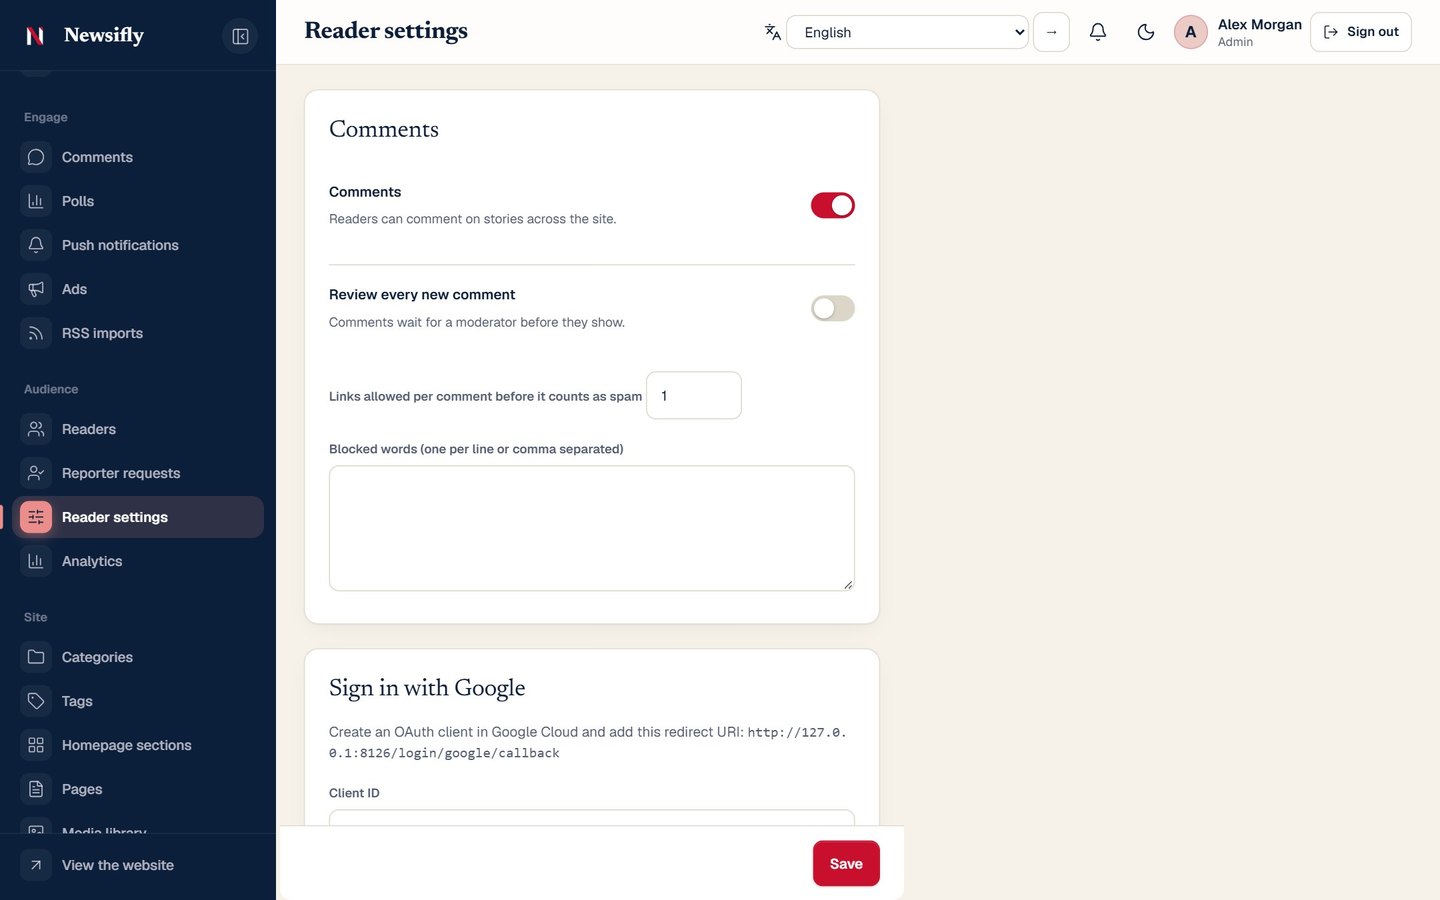
Audience → Reader settings controls who can comment and how readers sign in:
- Comments on or off, and Review every new comment (each comment waits for approval).
- Blocked words and the maximum number of links in a comment (default 1), the usual spam stoppers.
- Sign in with Google (client ID and secret, plus the client IDs used by the app), Mobile app sign-in and Phone number sign-in (one-time code). Email and password sign-up always work.
Readers and reporter requests
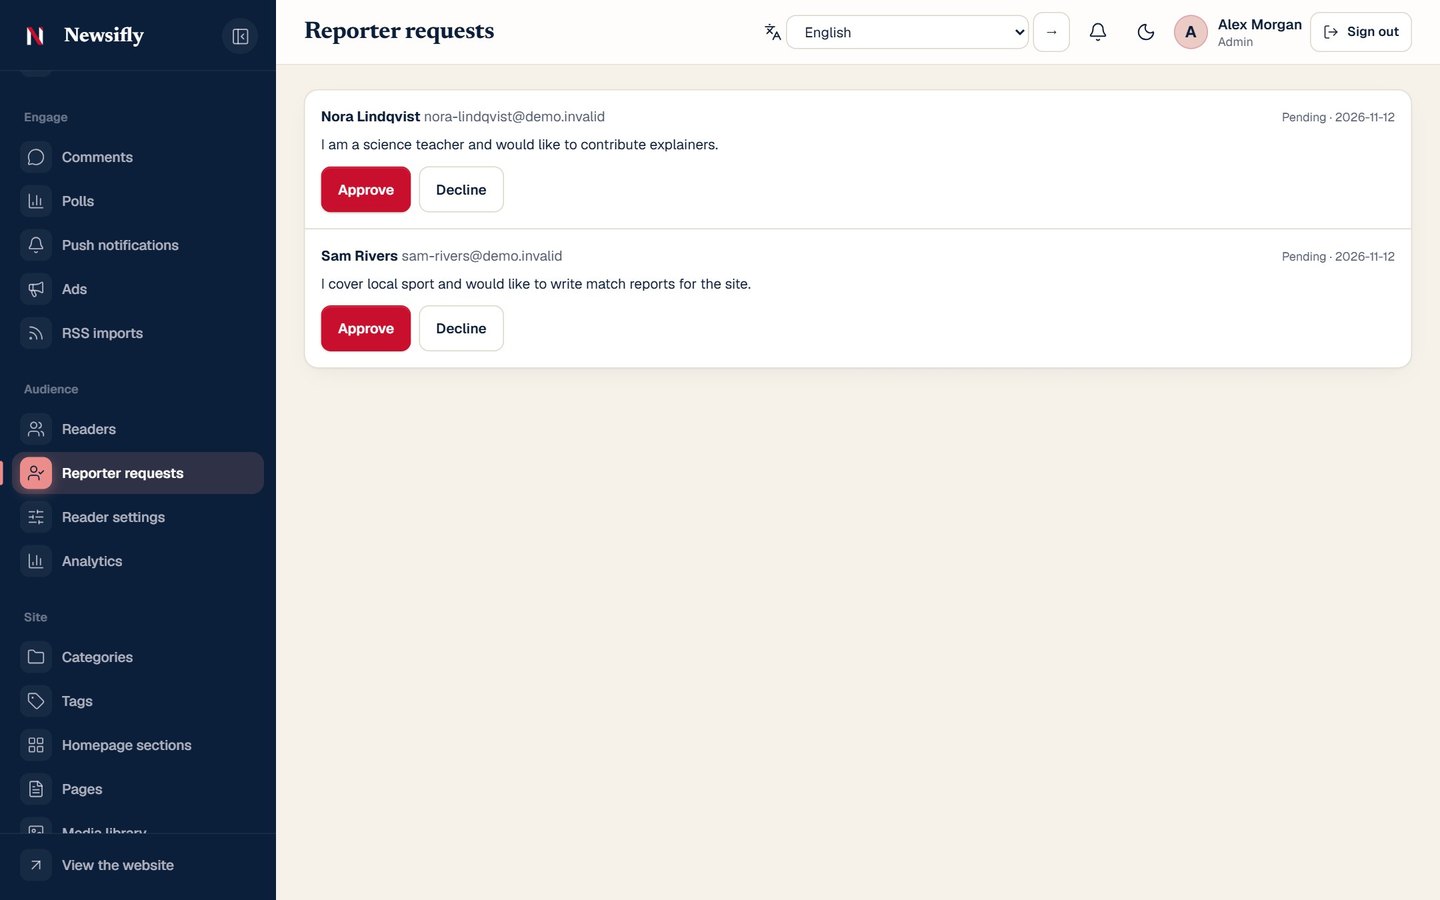
Audience → Readers lists registered readers and lets you suspend or re-activate an account. A reader can ask to become a reporter; those requests (from the website or the app) arrive under Audience → Reporter requests, and every admin is told at once: the number shows on the bell in the top bar, beside the menu item and on the dashboard, where you can approve or decline straight away. The reader is told the answer at once: a message on their account page and in the app, a short alert on their phone (when push is connected) and an email (when mail is set up). An approved reader is shown the way into the newsroom and signs in there with the same email and password; a reader who joined with Google first chooses a password with Forgot password. Approve turns the reader into a reporter (who can then write stories and send them for review); Reject keeps them a reader.
Profile photos
Readers add a profile photo under My account → Add a photo on the website, or Account → Edit profile in the app (it opens the phone's photos). The picture is cropped to a square and stored on your server; readers can change or remove it at any time.
Forgotten passwords
Readers press Forgot password? on the website's sign-in page or in the app; staff use the same link on the newsroom sign-in page (/admin/login). They type their email and receive a message with the site's name and a Choose a new password button. The link works for 60 minutes and only once; it opens the website, where they pick a new password (10 characters or more). Readers then sign in again in the app; a new password signs the account out of the app on every phone. Staff are taken back to the newsroom sign-in.
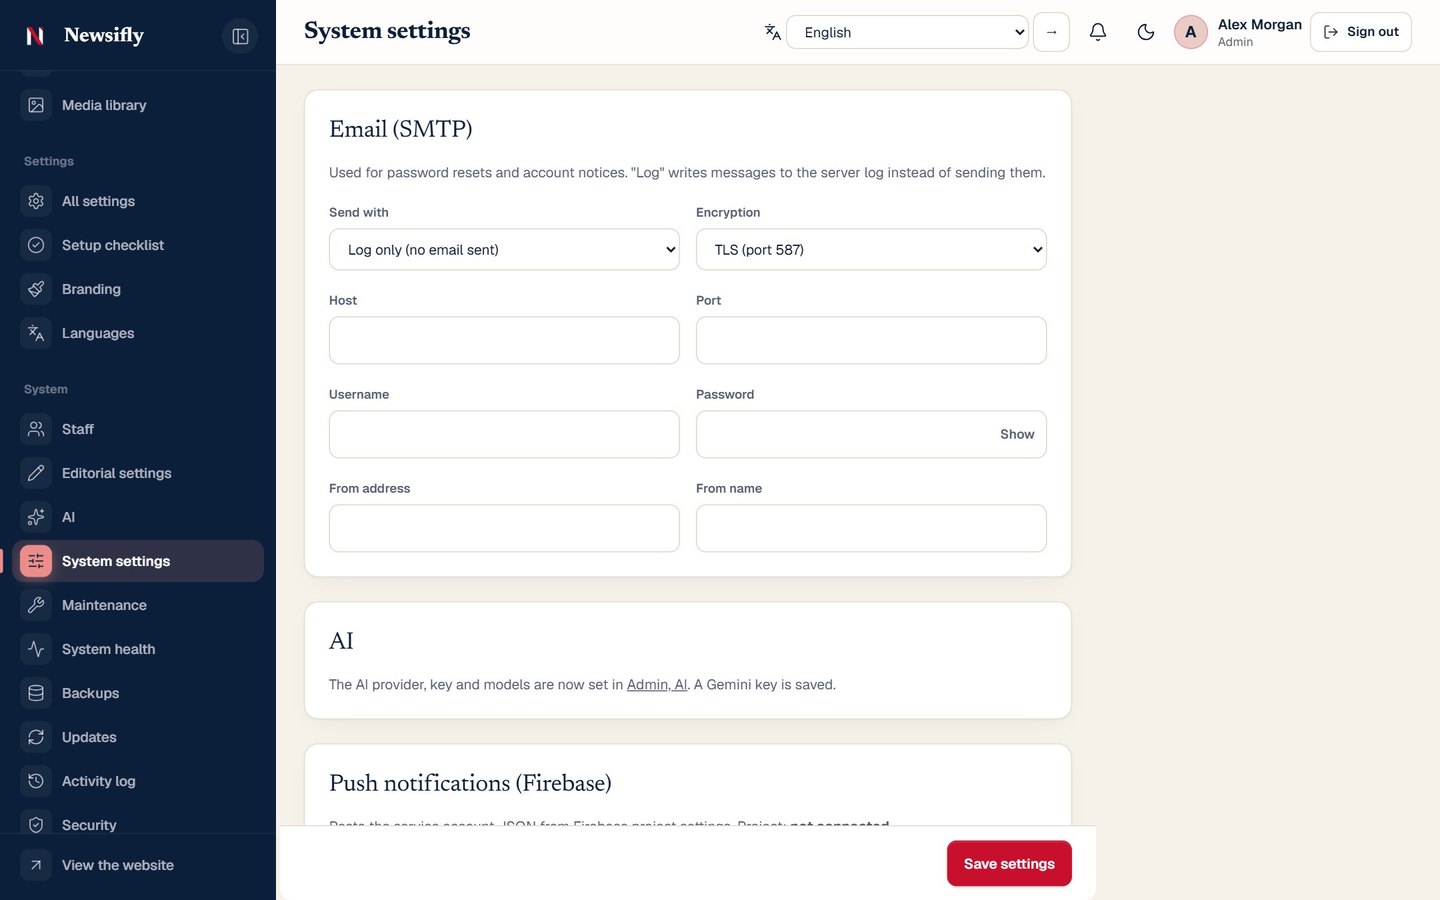
For safety the screen never says whether an address has an account. The email is only sent when email is set up under System settings → Email (SMTP); with “Log only” it is written to the log file instead.
Ads
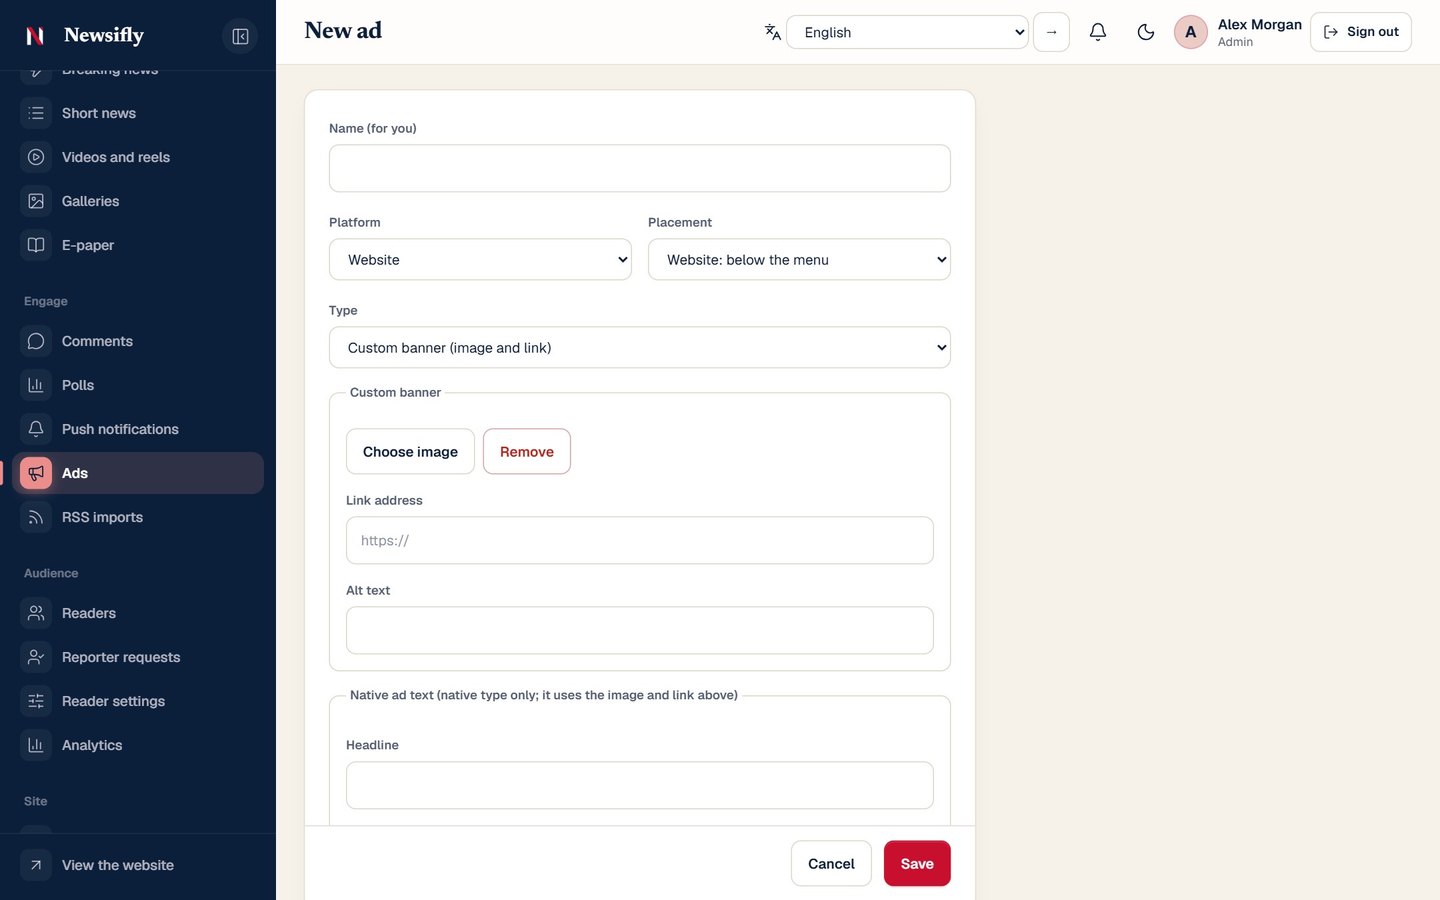
Engage → Ads → New ad. Each ad has a Name (for you), a Platform (website or app), a Placement, a Type, optional Starts and Ends dates, and a Weight from 1 to 10 (a heavier ad is shown more often when several compete for one spot). Views and clicks are counted for every ad.
Types
- Custom banner: your own image with Link address, Alt text and Ad width. The width (Full width, Large 970 px, Standard 728 px, Medium 468 px or Small 320 px) is the widest the banner shows, on the website and in the app; it never gets wider than the screen, and the height always follows the picture's own shape, so nothing is cropped.
- Native: looks like a story card: Headline, Short text, picture, Sponsor name and Button text.
- AdSense: a Google AdSense unit; enter the AdSense ad slot id. Set your AdSense publisher ID once in the ad settings.
Placements
| Where | Placement | Position |
|---|---|---|
| Website | Header banner | Below the menu |
| Website | Home middle | Between front-page sections |
| Website | Article top, Article bottom | Above and below a story |
| Website | Sidebar | Beside lists and stories |
| Website | Footer banner | Above the footer |
| Website | Home native | A card inside the story list |
| App | Home banner, Article bottom, Home native | Banner or card in the feed and under stories |
| App | Interstitial | Full screen, after every N stories (default 3) |
Full-screen ads in the app. Set how often in Ad networks → App: show a full-screen ad every N stories: with 3, the ad appears as the third story opens, then again three stories later. Your own ad in the Interstitial placement is used first; when none is running (switched off, or outside its Starts and Ends dates), the AdMob full-screen unit is used. Changes reach the app within seconds.
In the app you can use your own creatives or Google AdMob; enter the AdMob app IDs and the banner and interstitial unit IDs (Android and iOS) as described in AdMob ads.
Push notifications
Push alerts reach readers who installed the app and allowed notifications. They need a Firebase project (see Firebase).
- Open Engage → Push notifications. It shows how many devices are registered.
- Write the title and message. Optionally link a story so a tap opens it.
- Choose the audience: Everyone, Breaking news followers, A category, A reporter or A location (readers follow topics in the app).
- Send. The History list below keeps every alert.
To alert automatically, open System settings in All settings, paste the Firebase service-account JSON under Push notifications (Firebase) and tick Send a push alert automatically when a breaking story is published.
RSS imports
Engage → RSS imports → New feed brings in stories from feeds you are allowed to republish. Fields: the feed URL, whether items are published immediately or saved as drafts for review, the category, how often to check (interval) and how many items per check. The list shows each feed's last status and any error.
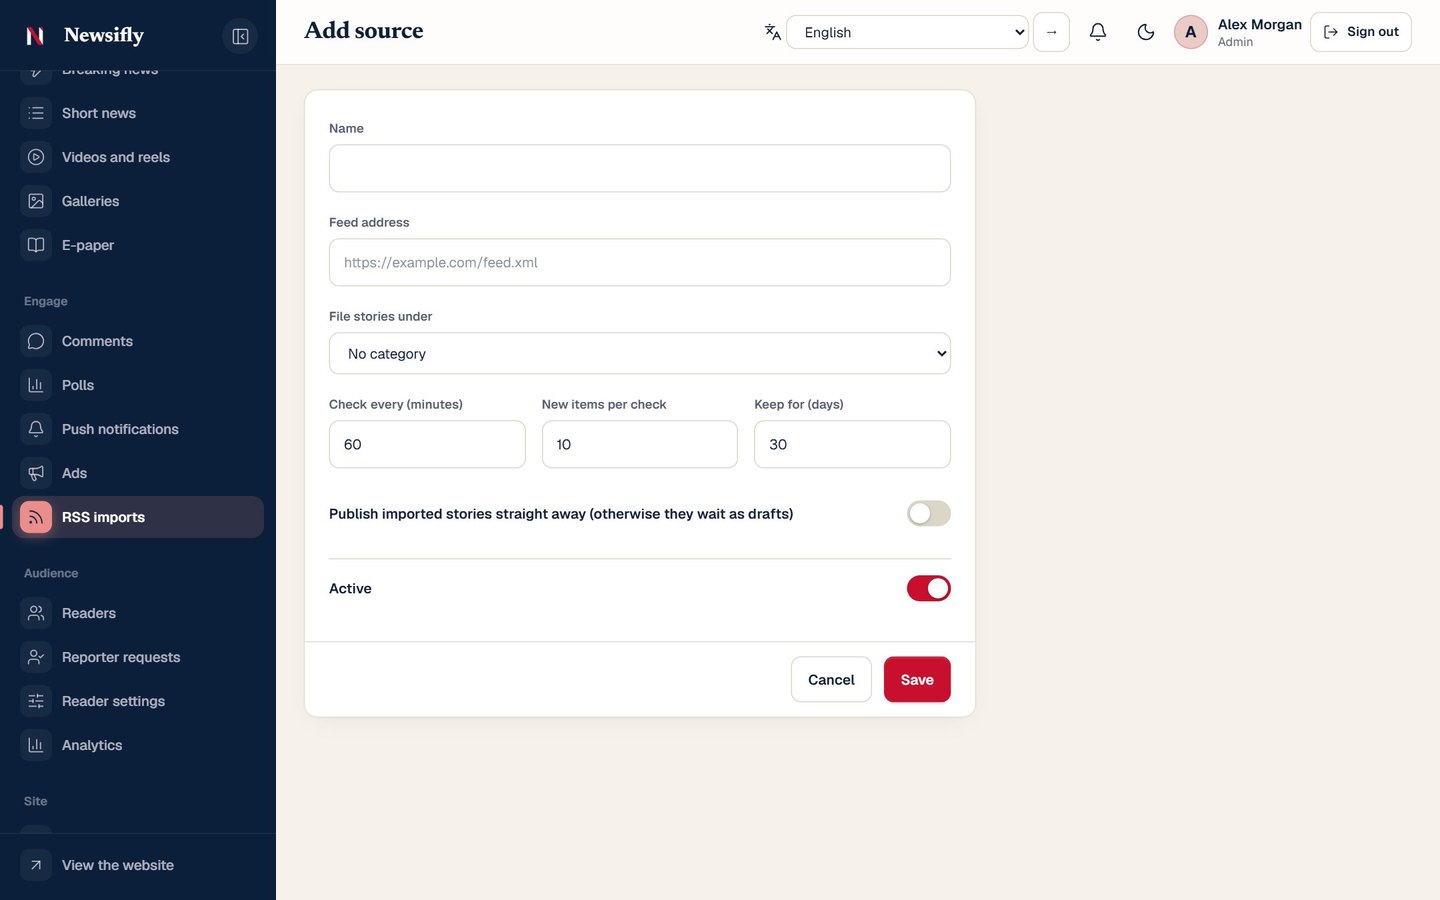
- The scheduler checks feeds every five minutes (cron must be running, see Scheduled tasks) and respects each feed's own interval.
- Each feed has a Purge action to remove what it imported, and old import records are cleaned up automatically.
- Only import content you have the right to use.
Analytics & search
Built-in analytics
Audience → Analytics shows views per day, the top stories, categories and reporters for a period you choose, and exports to CSV. It is counted on your own server.
Google Analytics, Tag Manager, Meta Pixel, Search Console
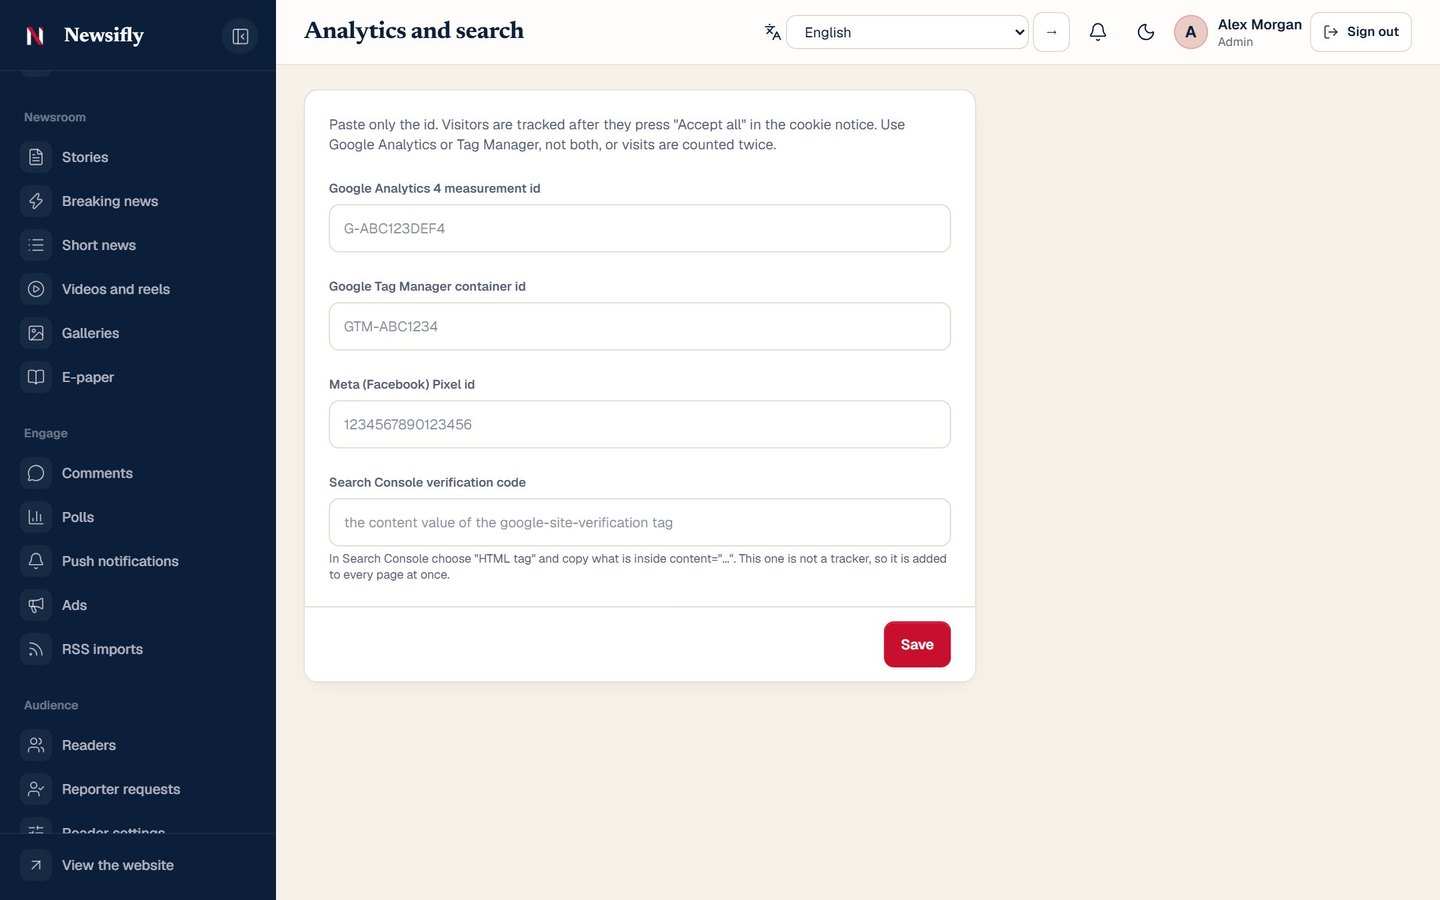
Under Analytics & search in All settings paste your GA4 measurement ID, Tag Manager container ID, Meta Pixel ID and the Search Console verification code. GA4, Tag Manager and Meta Pixel load only after the visitor accepts the cookie notice.
Search engines
- Every story has a title, description, canonical address and social-share tags. Override the title and description per story with Search appearance (see Writing and publishing).
- The site serves
/sitemap.xmland/robots.txtautomatically; submit the sitemap in Google Search Console.
Large photos and videos
Photos are accepted at full camera size and are resized and converted to WebP on the server; videos and PDF editions can be large. The limit that really applies is shown in the admin panel next to each upload field. It comes from PHP: raise upload_max_filesize, post_max_size, memory_limit and max_execution_time in your hosting control panel (the package includes public/.user.ini with suggested values for PHP-FPM or CGI hosting), and in Nginx raise client_max_body_size.
Staff & roles
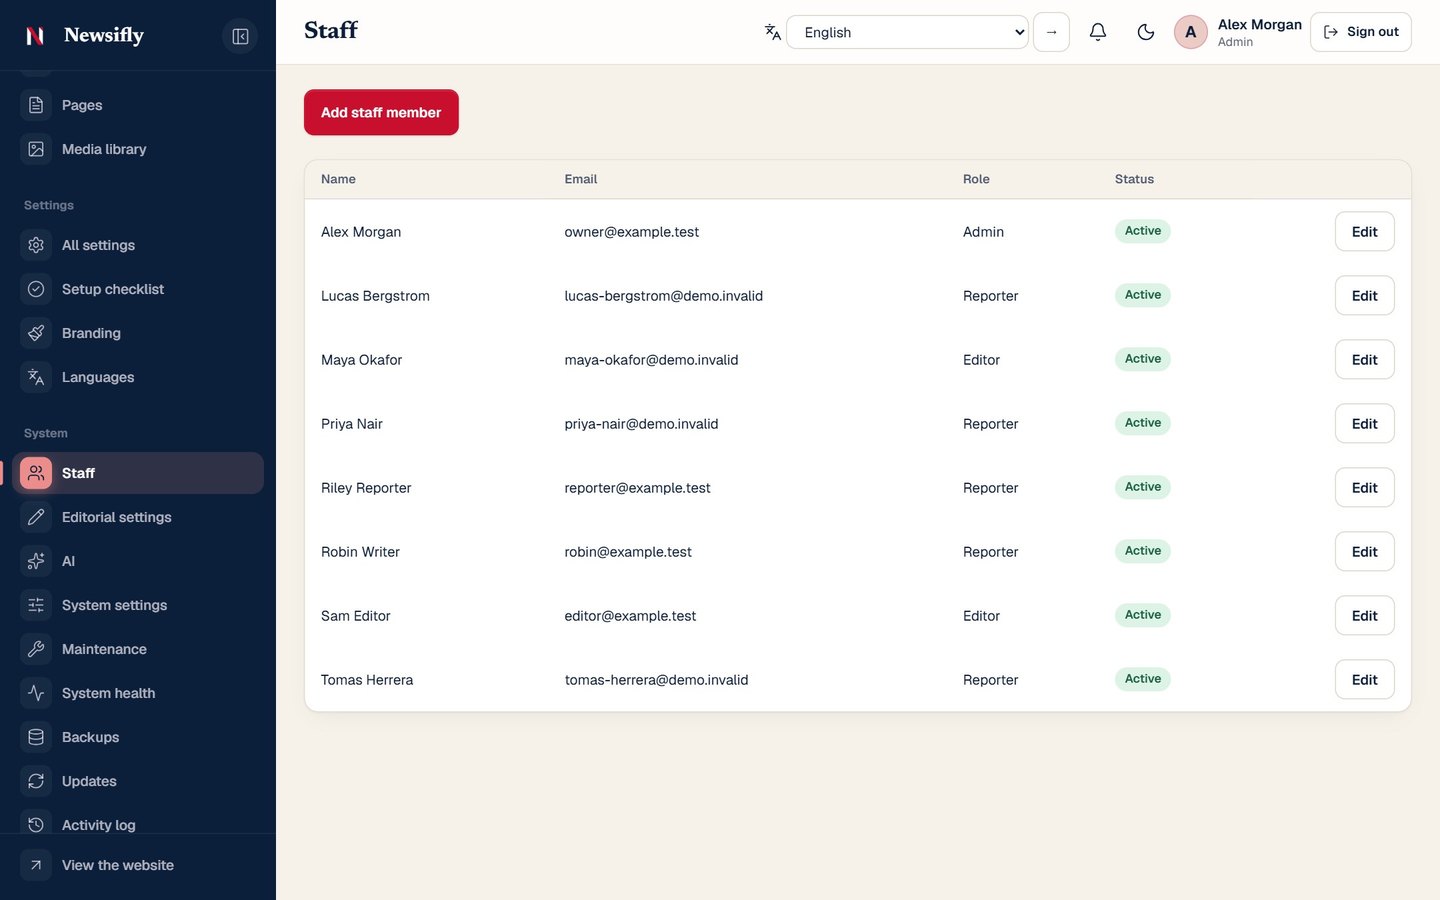
System → Staff → New member creates a team account: Name, Email, Role, Password (10 characters or more), and for reporters a Job title and Bio shown on their reporter page. Active can be switched off to lock someone out without deleting their stories.
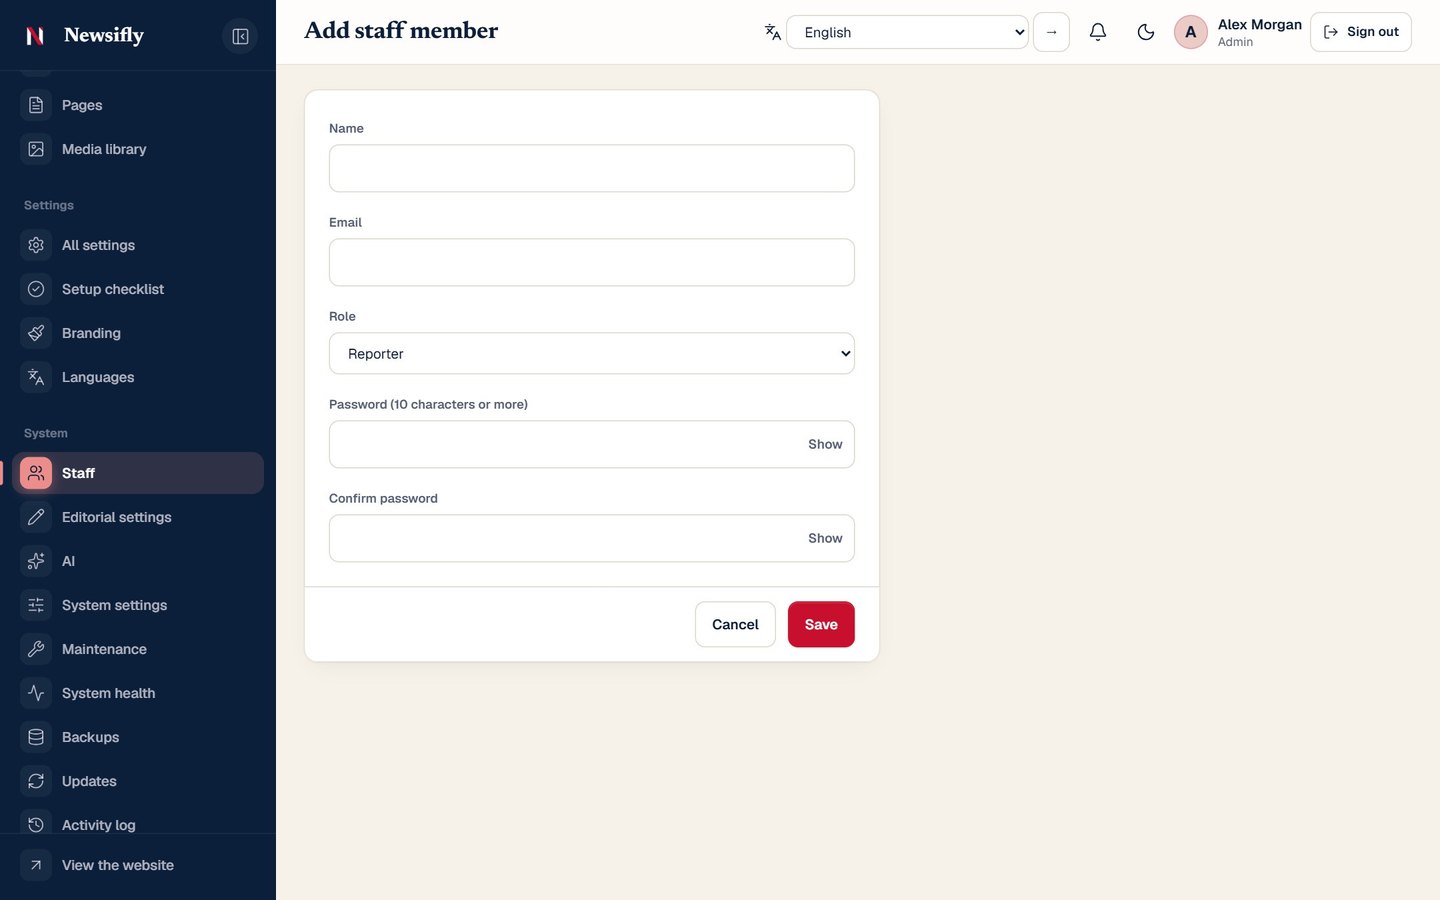
What each role can do
| Ability | Admin | Editor | Reporter | Reader |
|---|---|---|---|---|
| Write stories and edit their own | ✔ | ✔ | ✔ | – |
| Edit any story, publish, unpublish, delete | ✔ | ✔ | – (submit for review) | – |
| Upload to the media library, use the AI helper | ✔ | ✔ | ✔ | – |
| Manage media, categories, tags, pages | ✔ | ✔ | – | – |
| Moderate comments, manage polls, RSS imports | ✔ | ✔ | – | – |
| Send push alerts, view analytics | ✔ | ✔ | – | – |
| Manage ads, staff, approve reporter requests | ✔ | – | – | – |
| Branding, languages, settings, AI settings | ✔ | – | – | – |
| Backups, updates, activity log | ✔ | – | – | – |
| Comment, bookmark, follow, use the app | ✔ | ✔ | ✔ | ✔ |
Readers have no access to the admin panel. Admins can turn on two-factor sign-in for their account under Security.
Your own profile
Every admin, editor and reporter has System → My profile (or click your picture at the top right): change your name, job title and bio, and upload a profile photo (JPG, PNG, WebP or GIF up to 5 MB; a square crop is used). The photo shows in the admin panel, on your reporter page and next to your stories on the website and in the app.
Settings reference
All settings is a hub: a search box ("What do you want to change?") and a card for every area. Type a word like logo, language or push and it takes you to the right page.
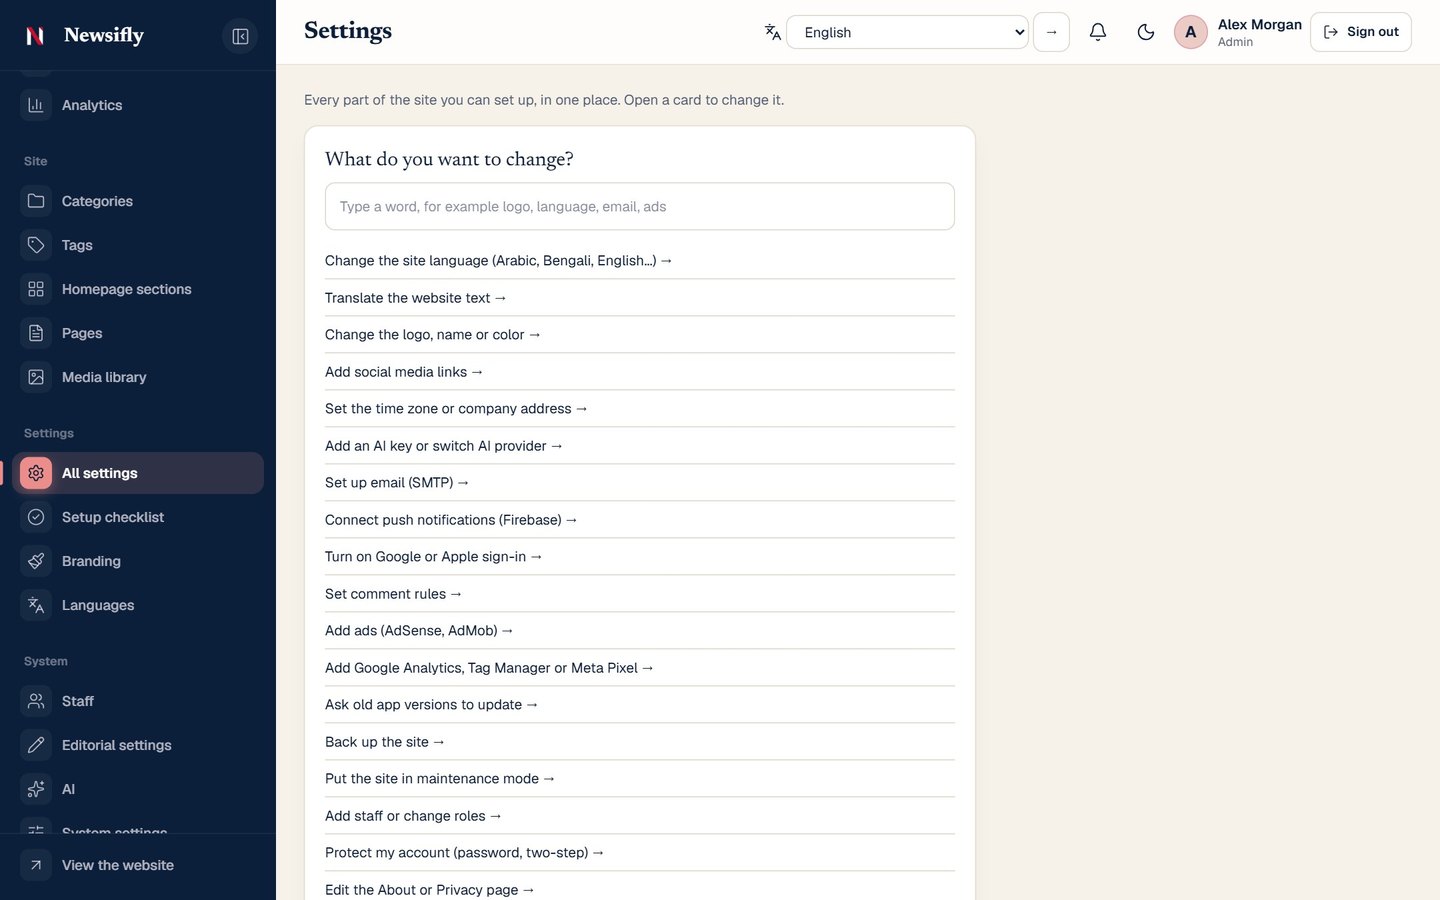
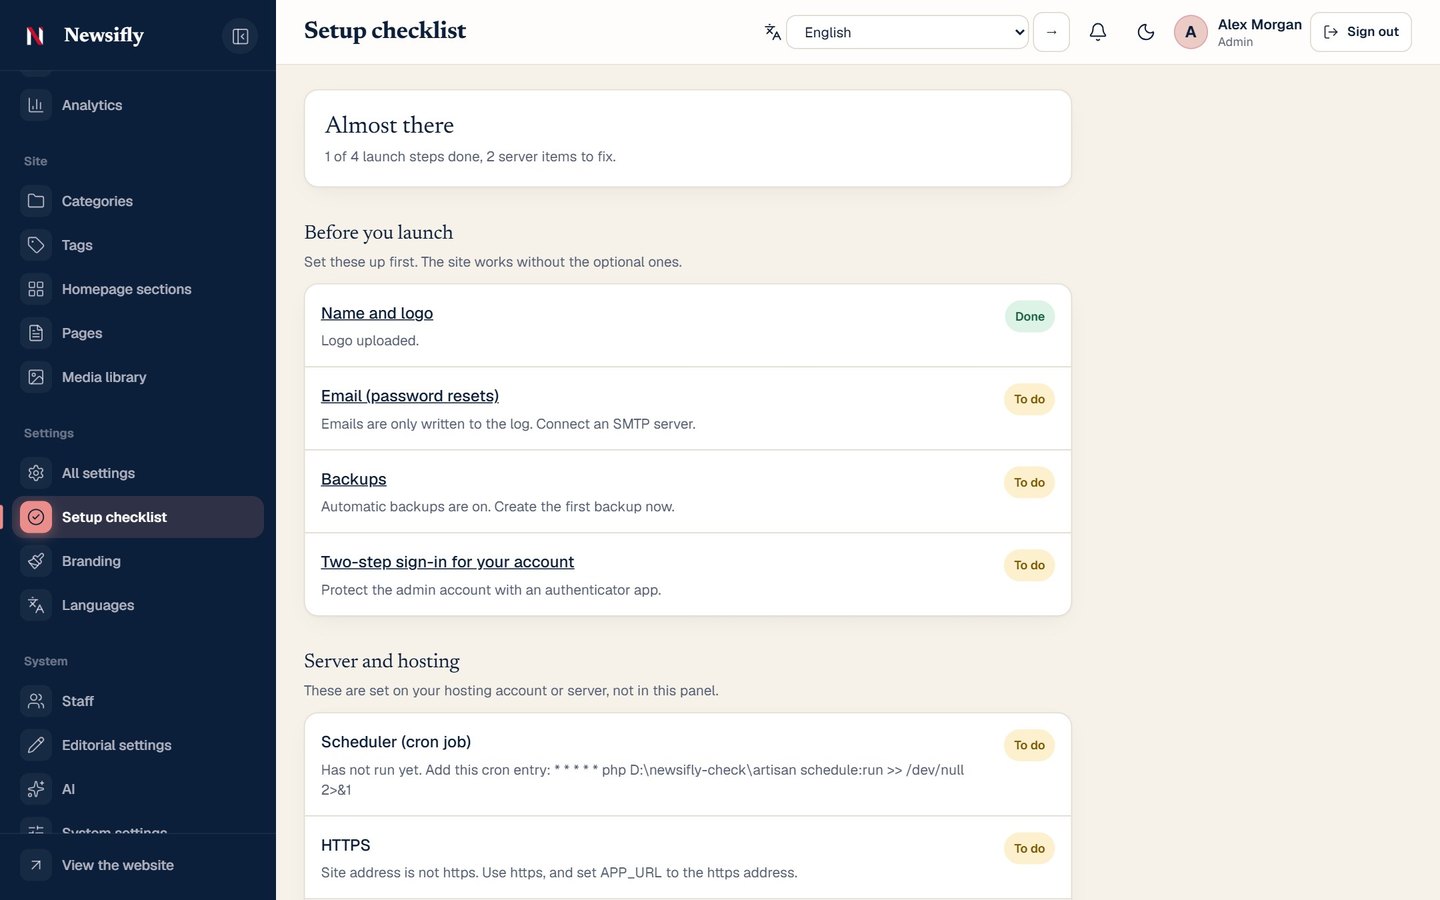
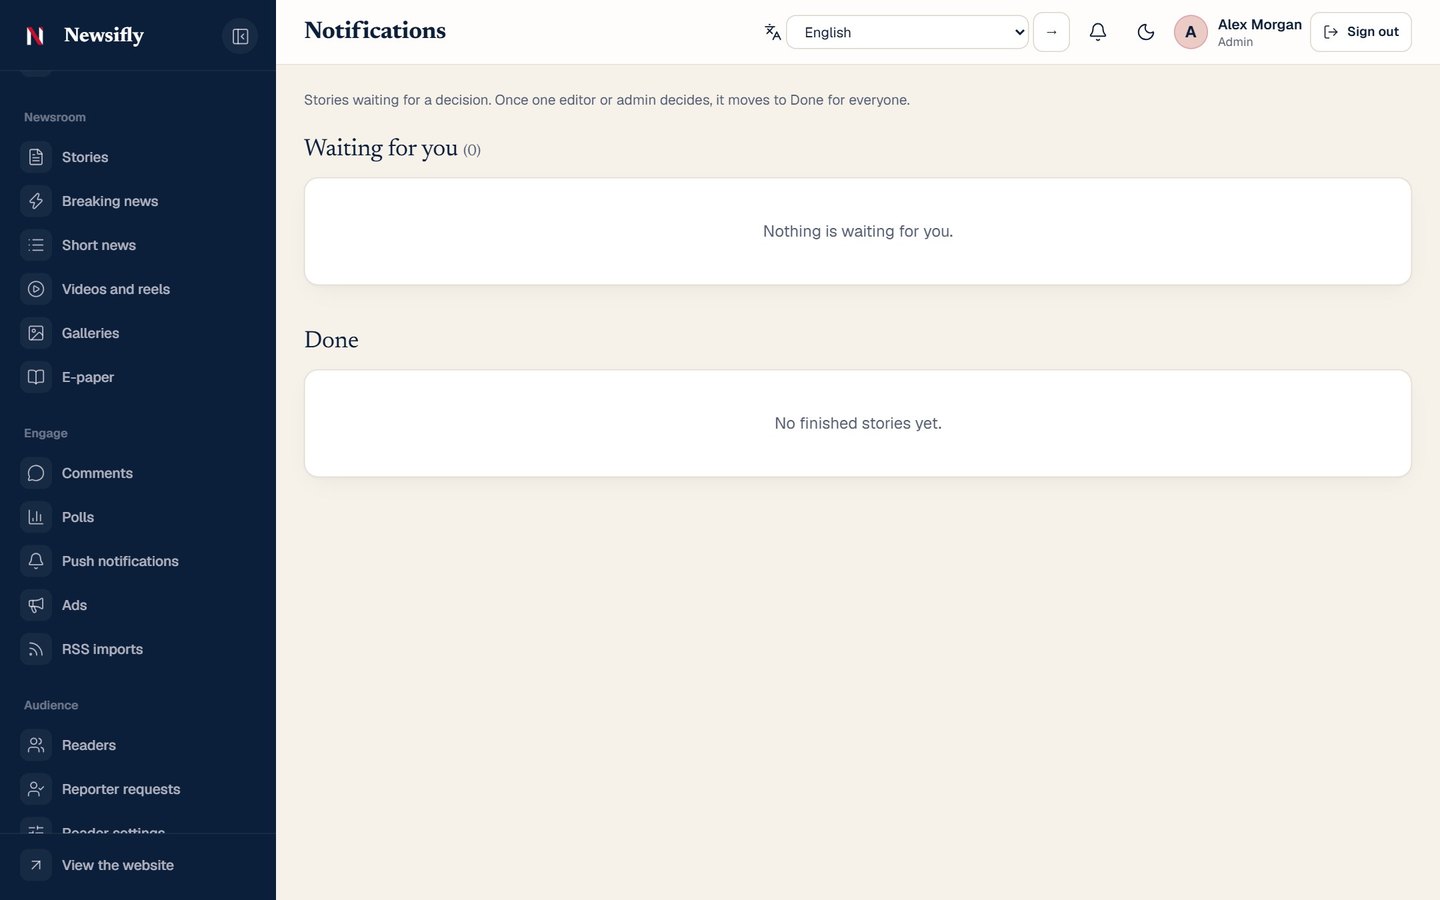
| Area | What you set |
|---|---|
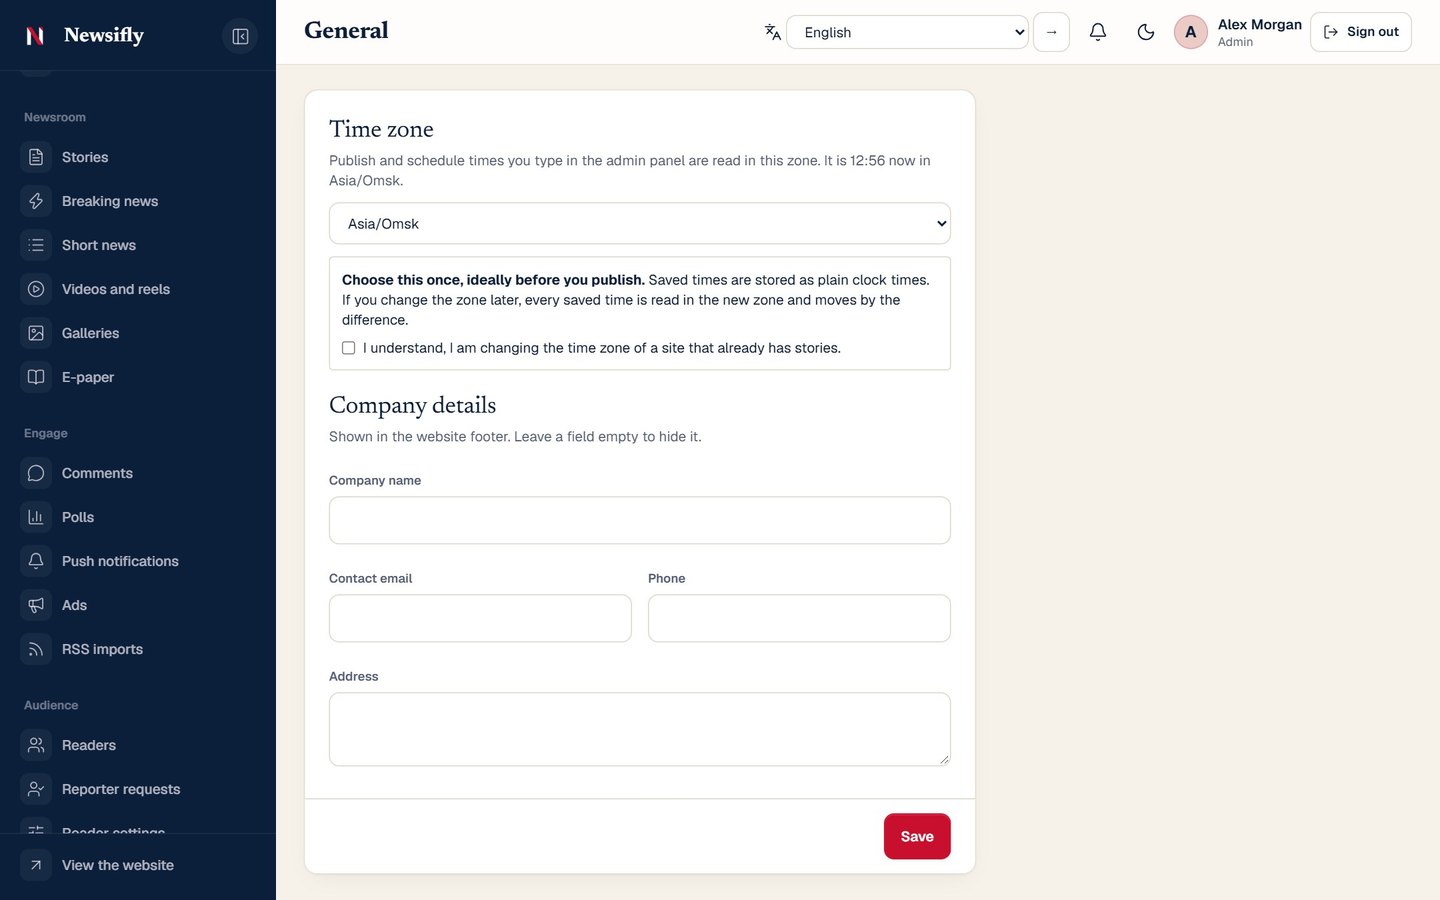
| General | Time zone, company name and contact details shown in the footer. |
| Site language | Switch the whole website to Bangla, English, Arabic or another language in one click. |
| Branding & appearance | Site name, tagline, logo (light and dark), favicon, app icon, splash, brand color, admin menu color, social links, cookie notice. A change shows at once on the website and in the admin panel (name, logo, favicon, colors) and in the app within seconds (top bar, welcome, sign-in and start screens). The icon on the phone's home screen and the system splash are part of the app build: rebuild the app to change those (see App logo). |
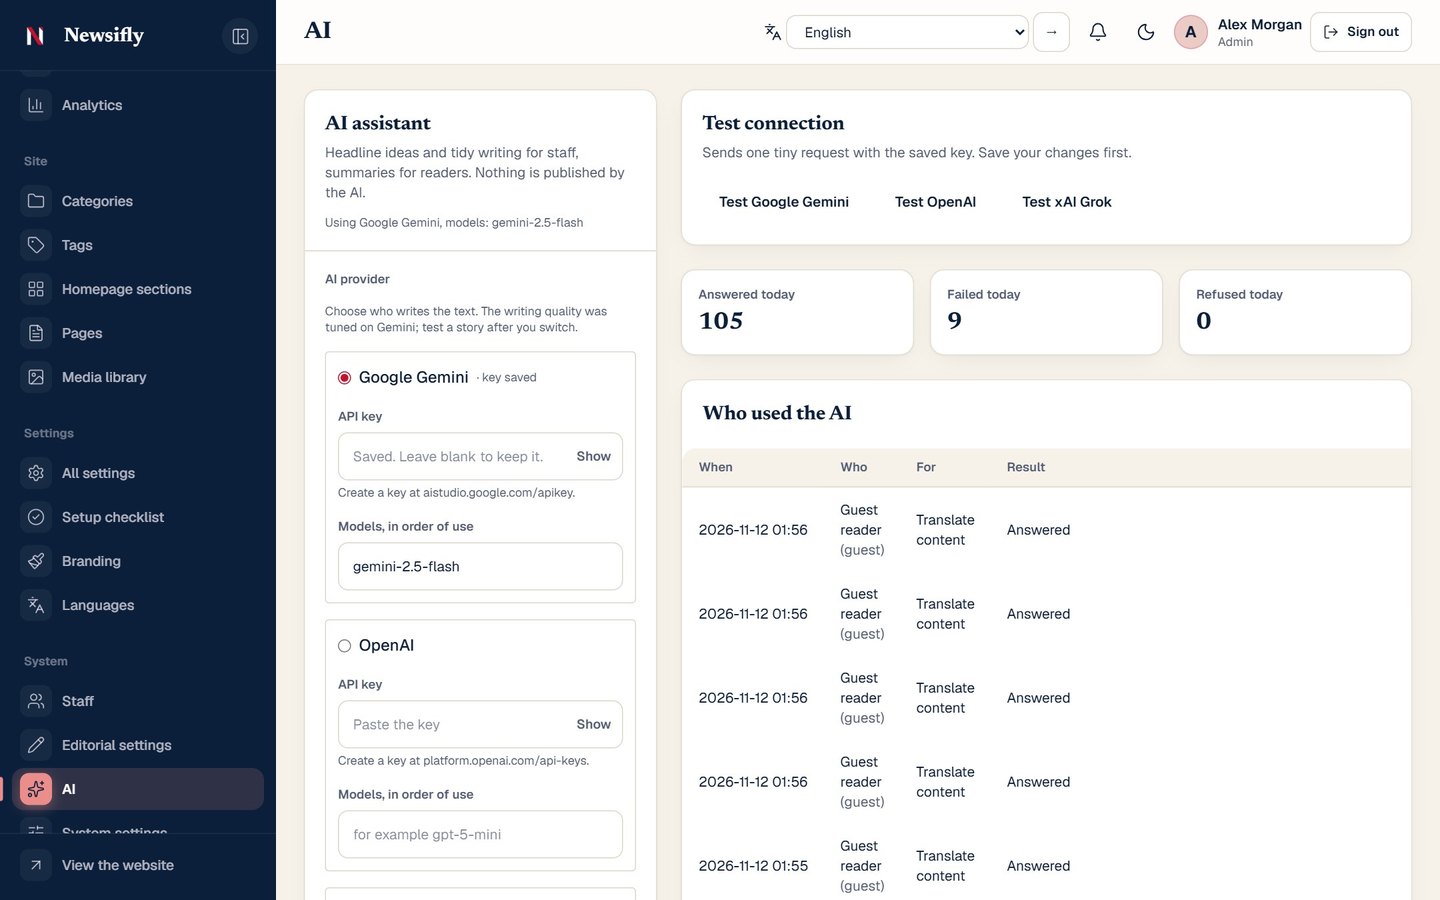
| AI | (details) Provider (Gemini, OpenAI or Grok), keys, models, who may use the writing helper and the reader summaries, and daily limits. |
| Email (SMTP) | Password reset and account emails (see Optional services). |
| Firebase & push | The service-account file and a connection test. |
| Sign-in & comments | Google and Apple sign-in, phone codes, comment rules. |
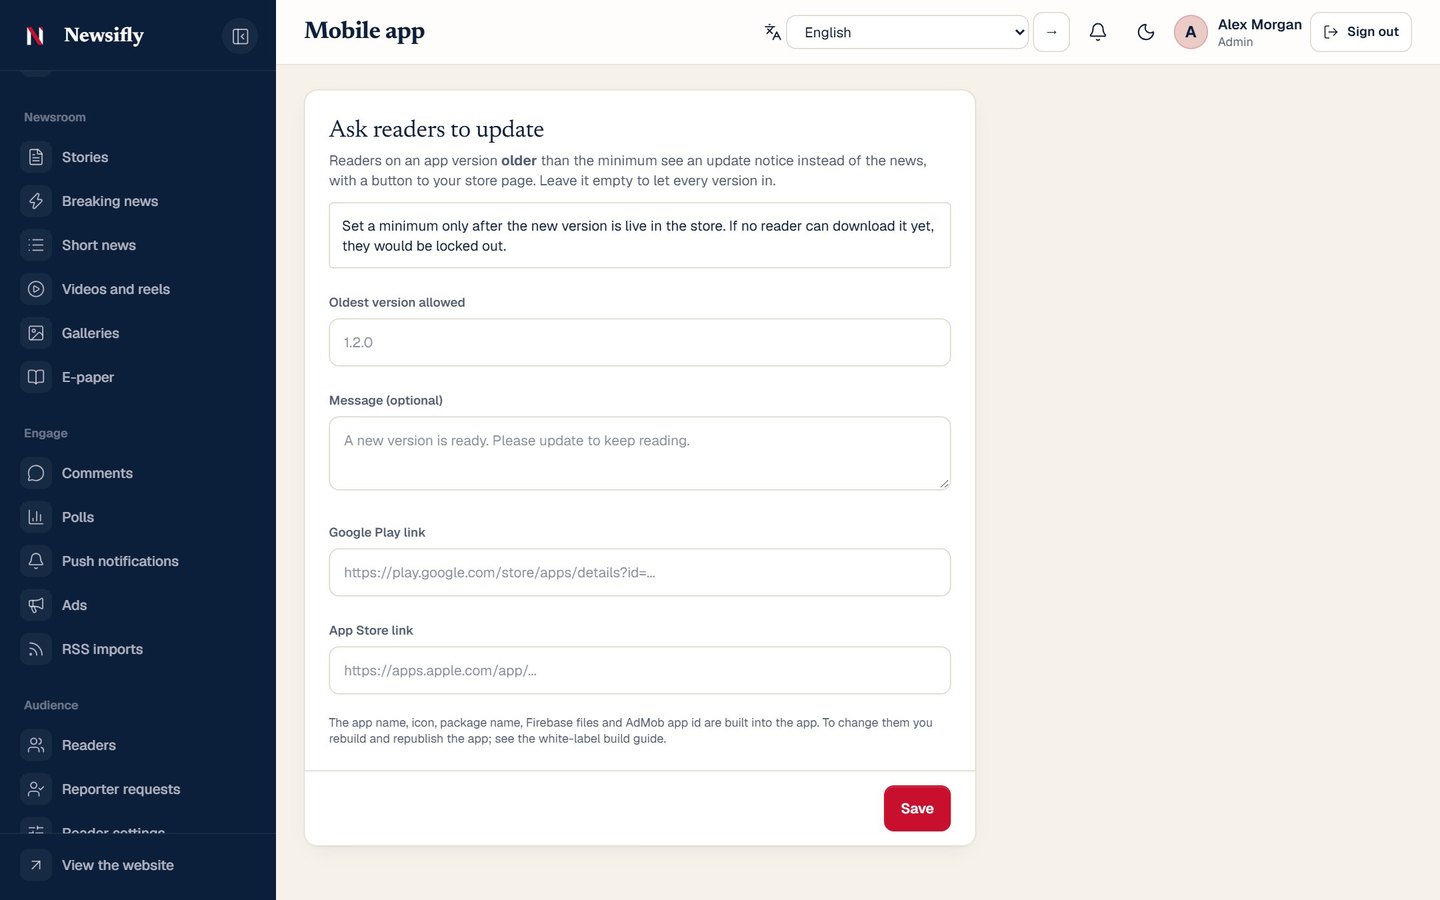
| Mobile app | Ask readers to update an old app version and where to download the new one. |
| Analytics & search | Google Analytics, Tag Manager, Meta Pixel and Search Console. They load only after a visitor accepts cookies. |
| Ads | AdSense, AdMob and the ad placements. |
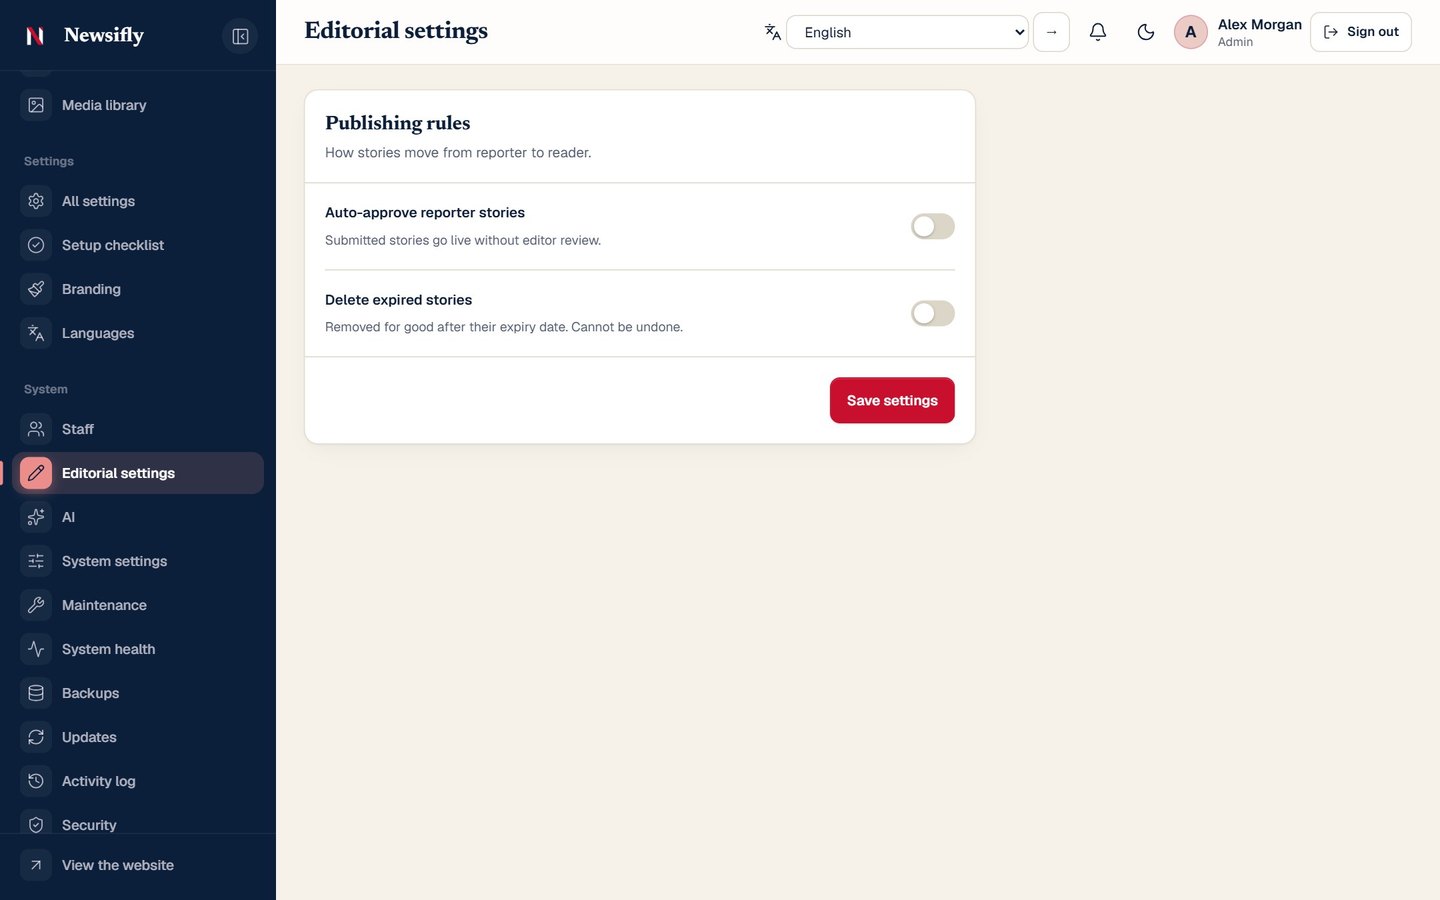
| Editorial workflow | Auto-approve reporter stories (reporters publish without review) and Delete expired stories. |
| Backups, License & updates, Maintenance | Automatic backups, your purchase code and updates, and a notice for visitors while you work. |
Passwords and API keys you save here are stored encrypted. Back up your .env file (especially APP_KEY): without the same key, saved keys cannot be read after a restore.
The website
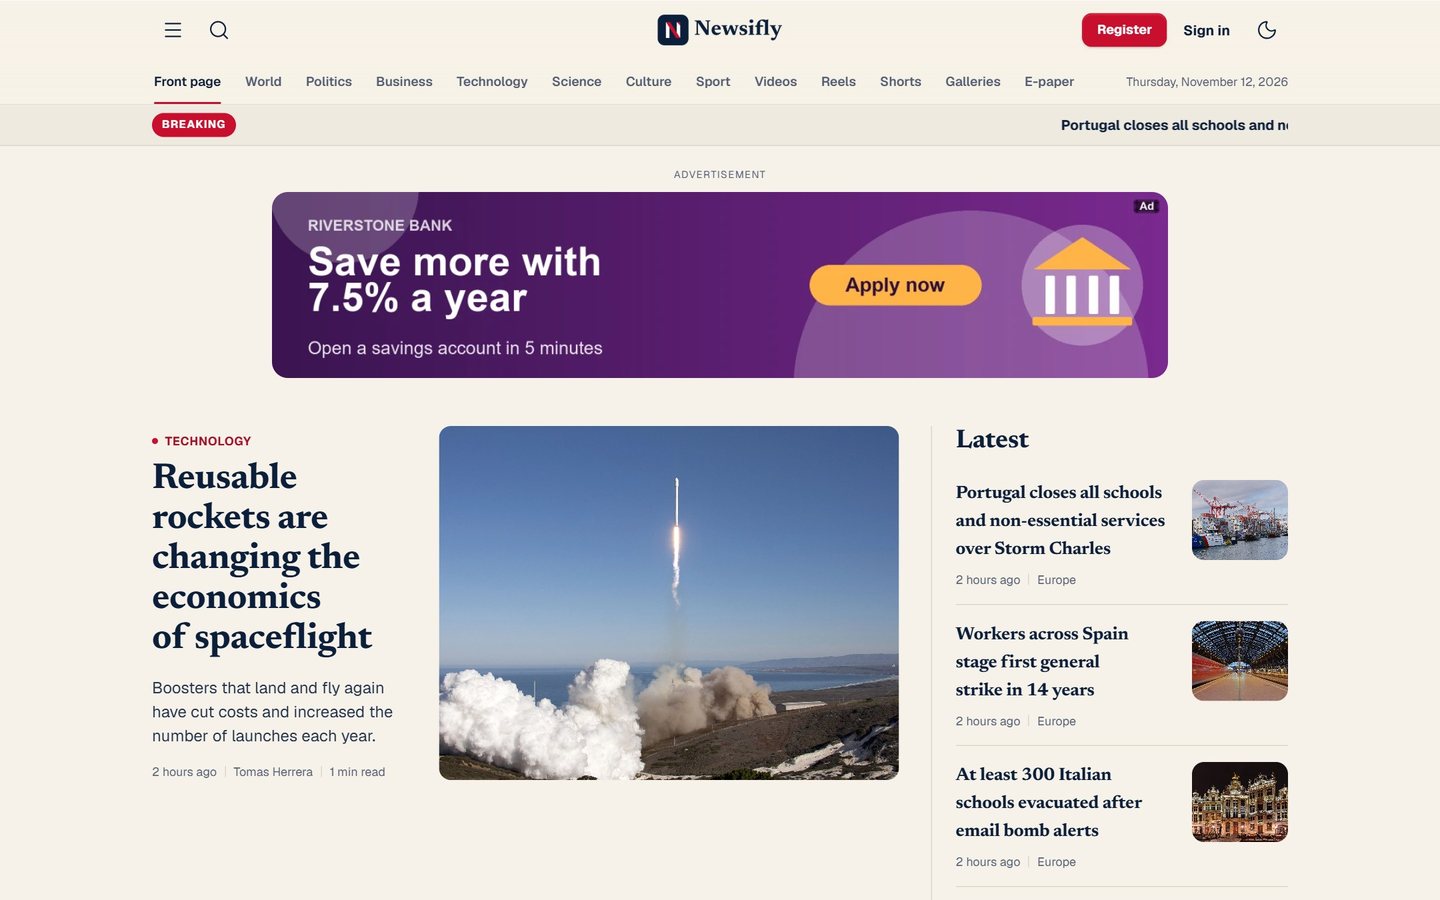
The public website is fast, readable and works on any screen. Readers get a light and a dark theme, reading size, bookmarks, comments, polls, search, push alerts (in the app) and an AI summary or translation of a story. Everything on it, from the logo to the color to the layout, comes from the admin panel.
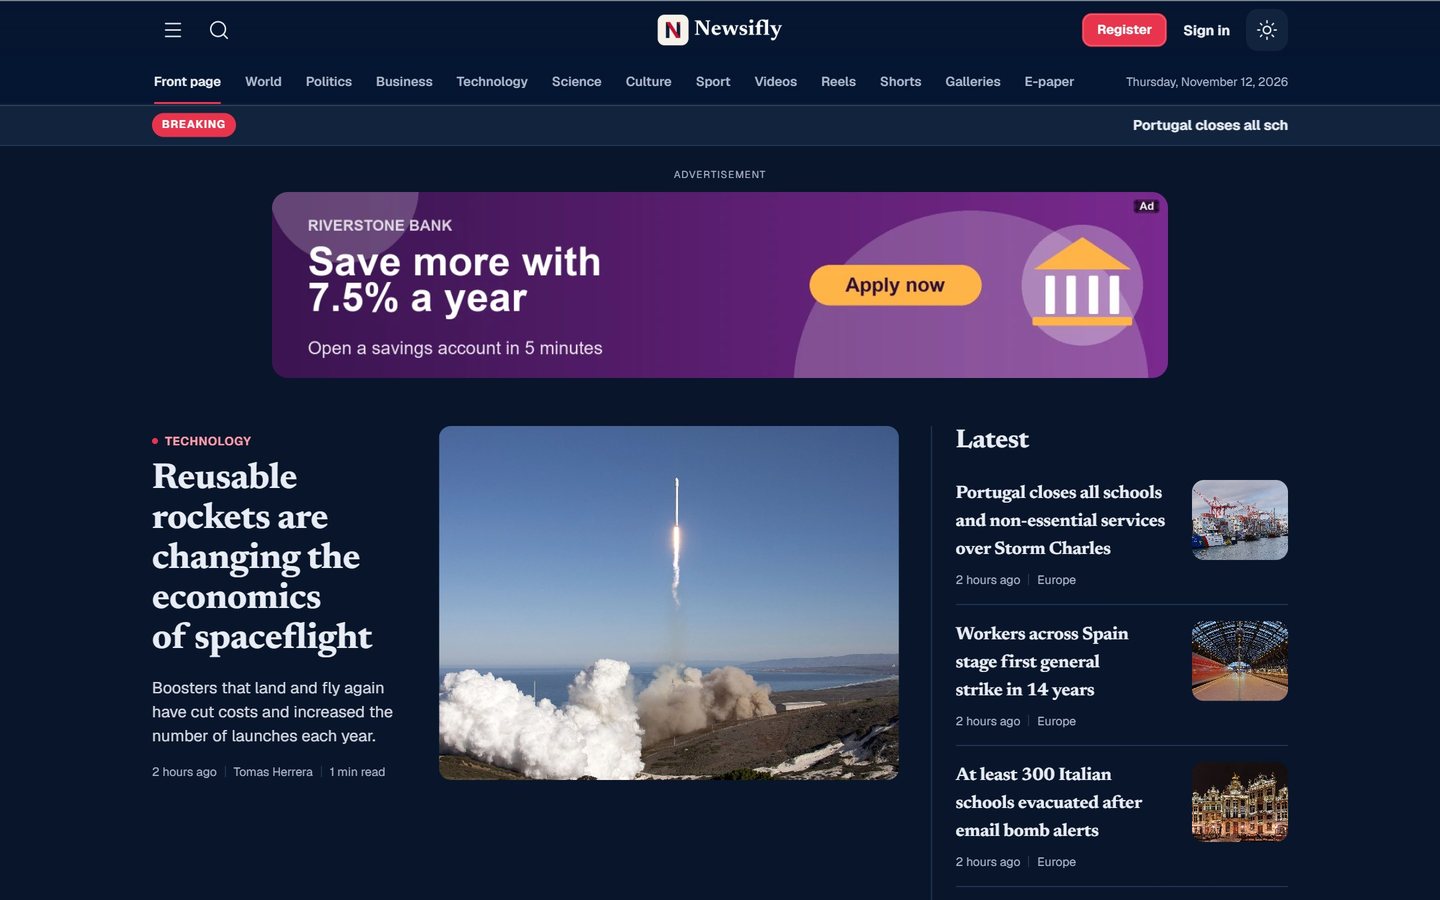
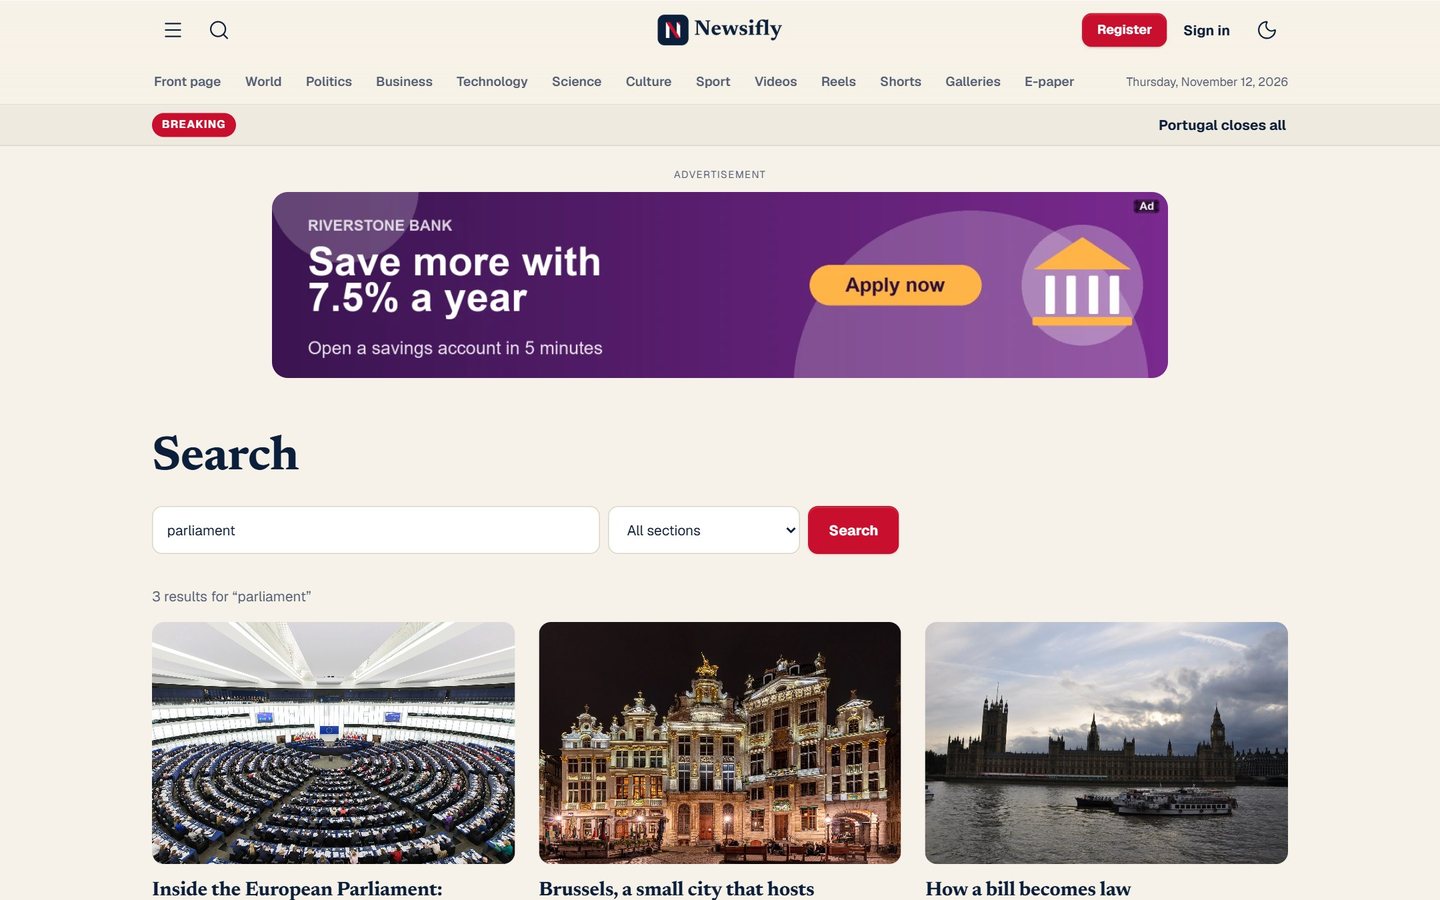
What a reader can do
- Read stories, short news, galleries, reels and videos, and browse the e-paper.
- Register or sign in (email, Google, Apple), bookmark stories, follow topics and comment.
- Switch the language, and the whole site changes, including right to left for Arabic.
The site follows the choices you make in Homepage layouts, Languages and Branding without any code.
The mobile app
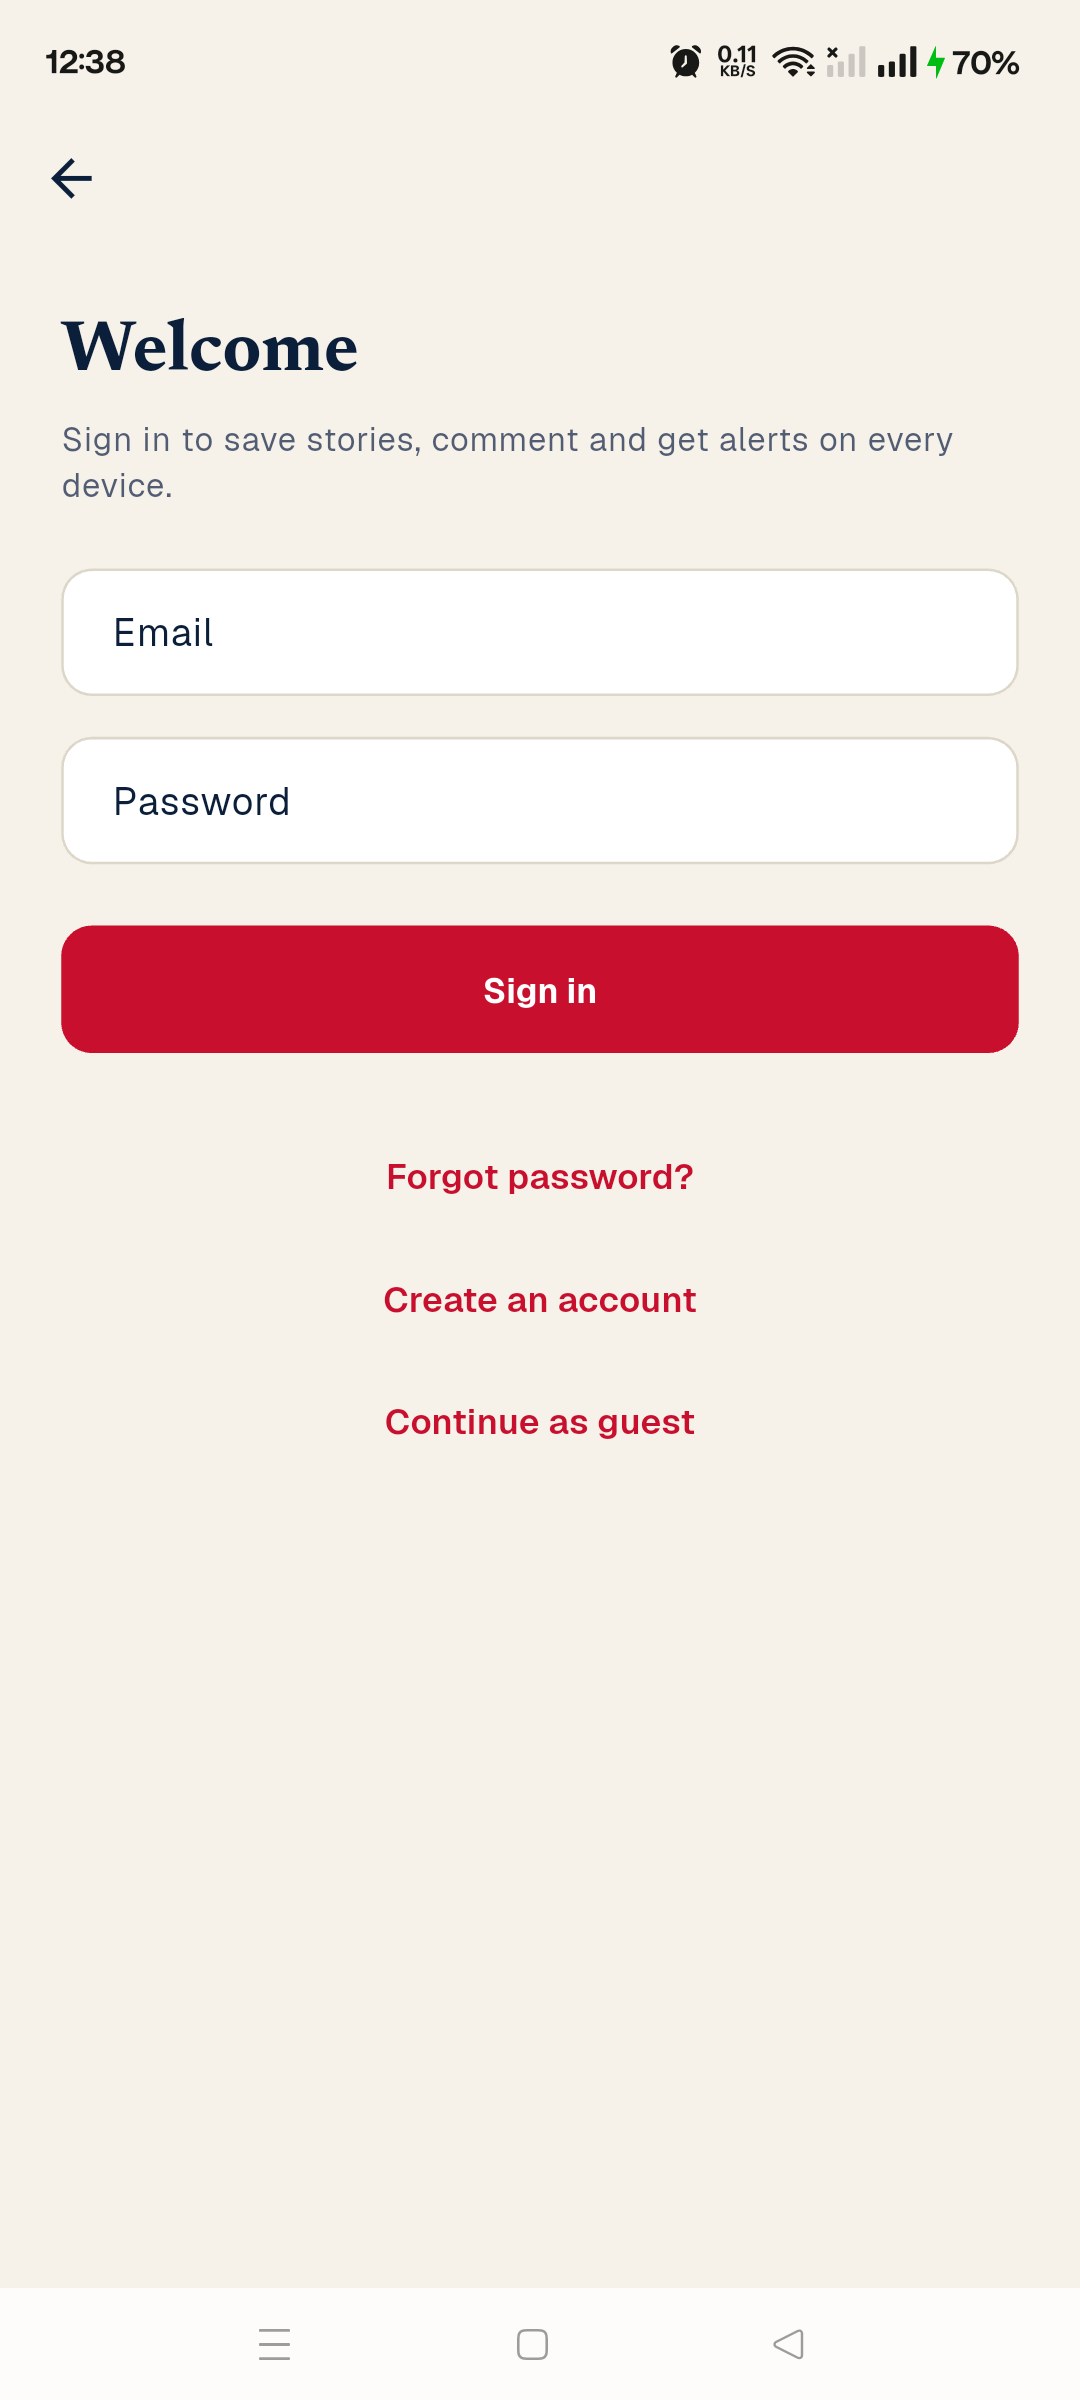
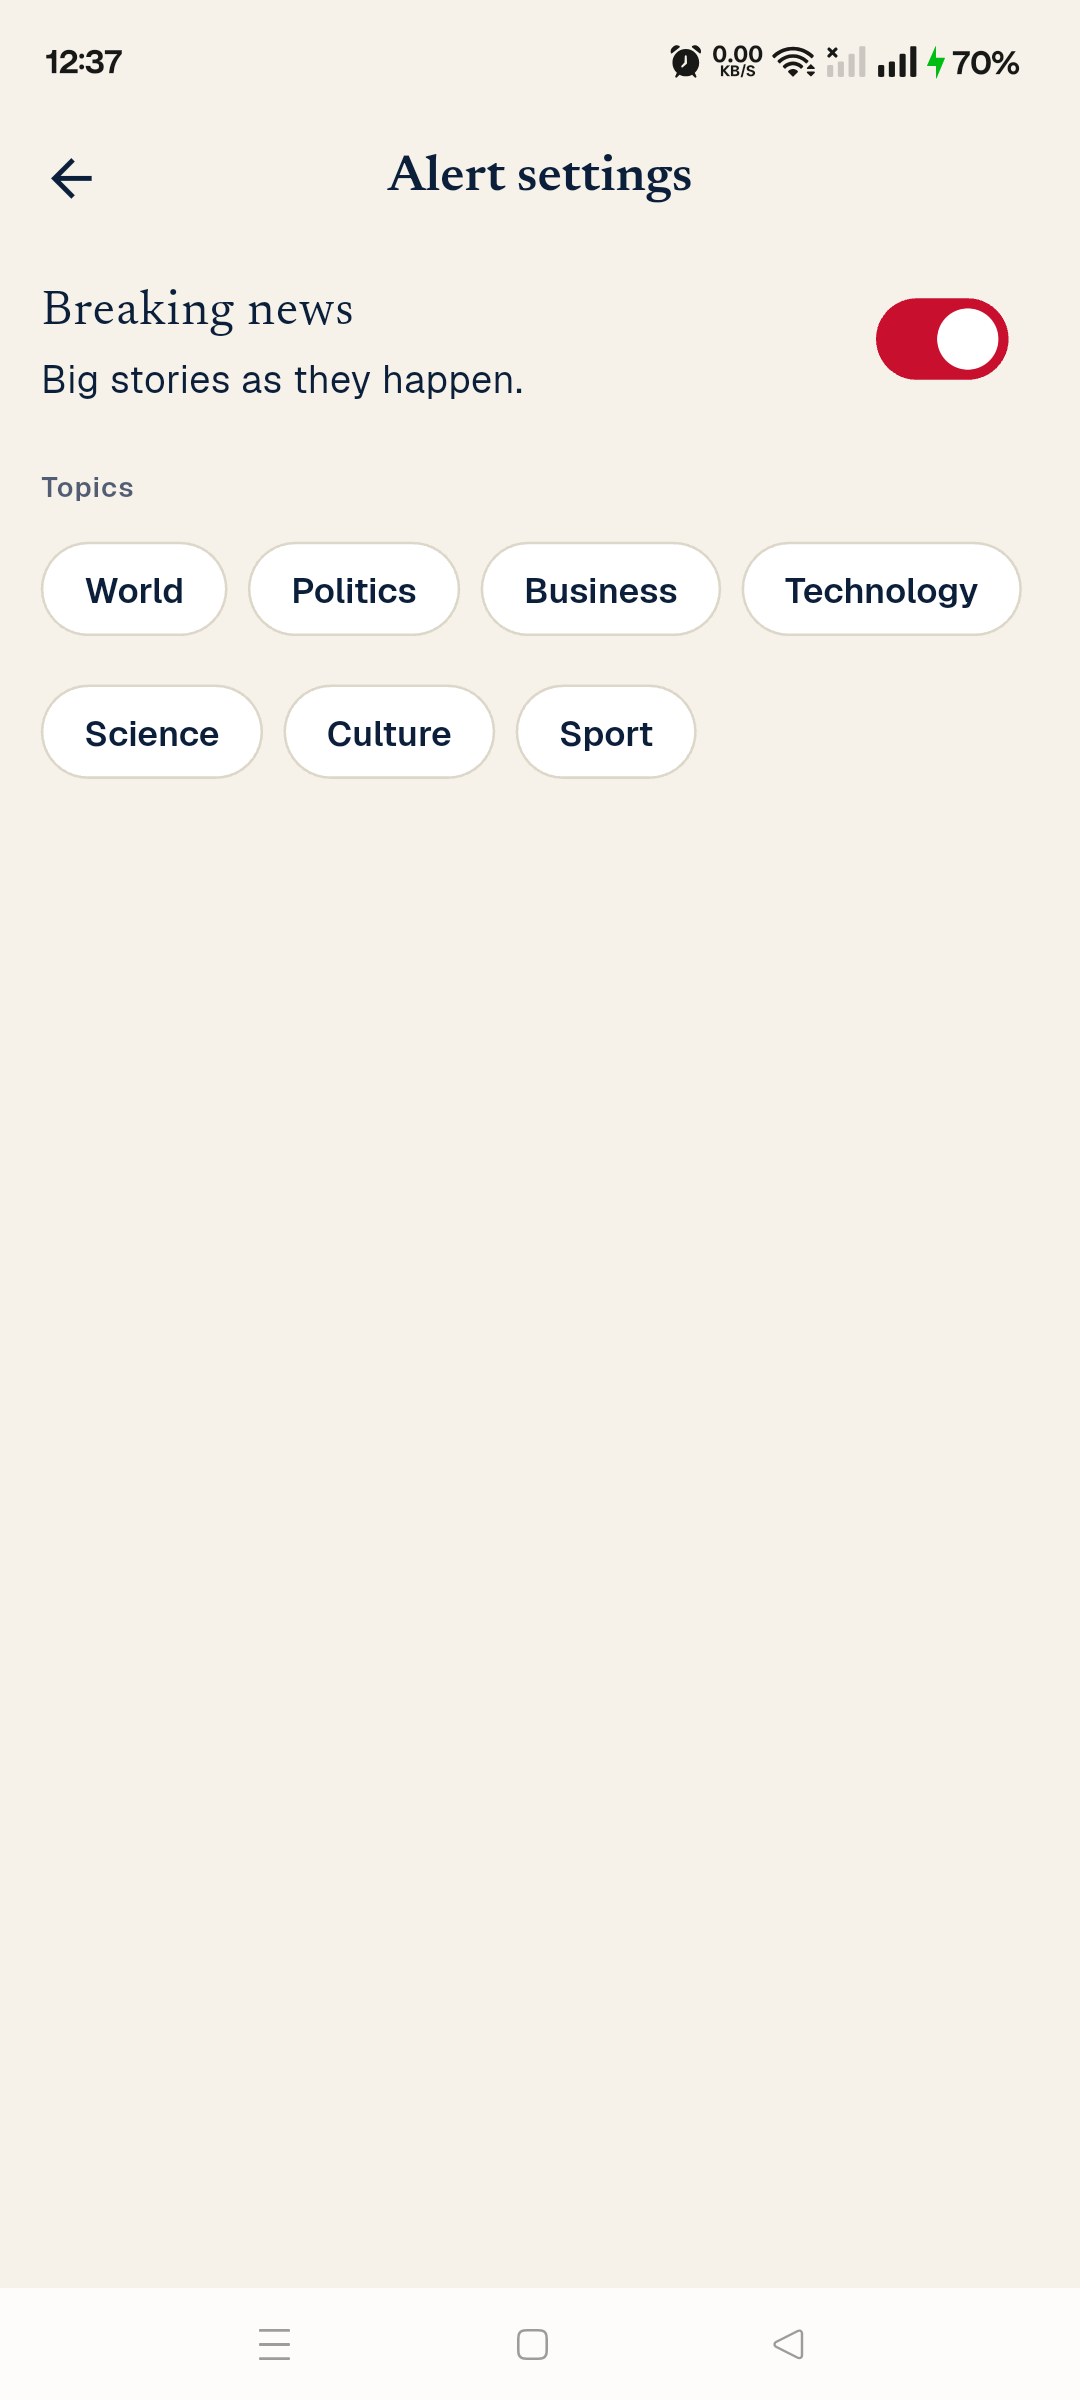
A Flutter app for Android and iOS that reads from your Newsifly website: stories, short news, videos, reels, e-paper, polls, comments, bookmarks, alerts and ads. It needs the Newsifly website (version 1.0 or newer) to talk to. It takes its name, colors, logo, languages, categories and homepage layout from the website and follows a change within about five seconds.
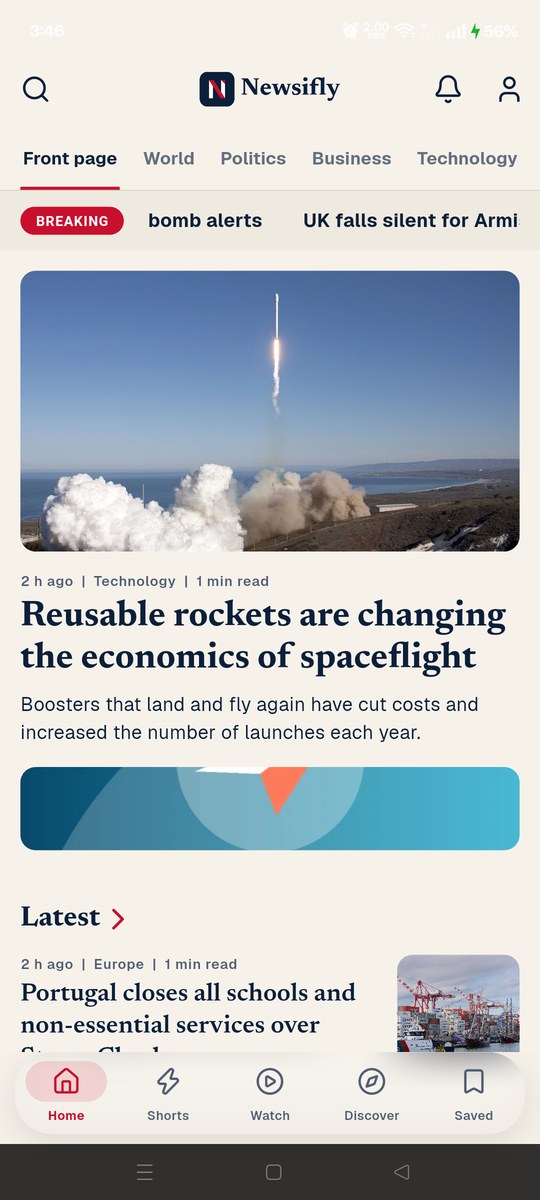
What is in the app
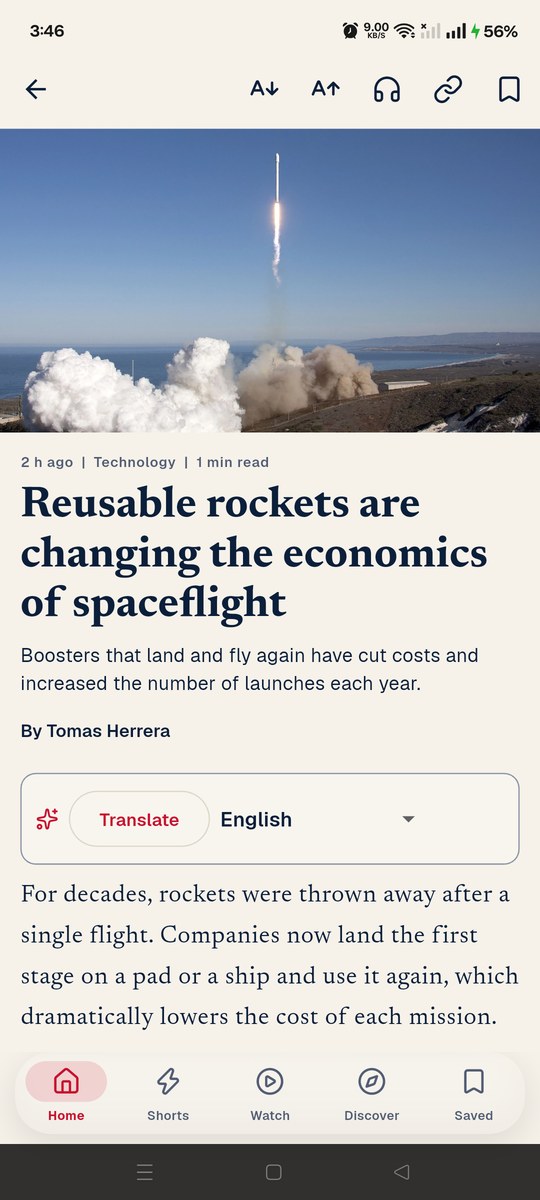
- Home with the breaking strip, the lead story, an ad slot, the latest news, your sections, the most read and a footer. The layout follows your homepage choice.
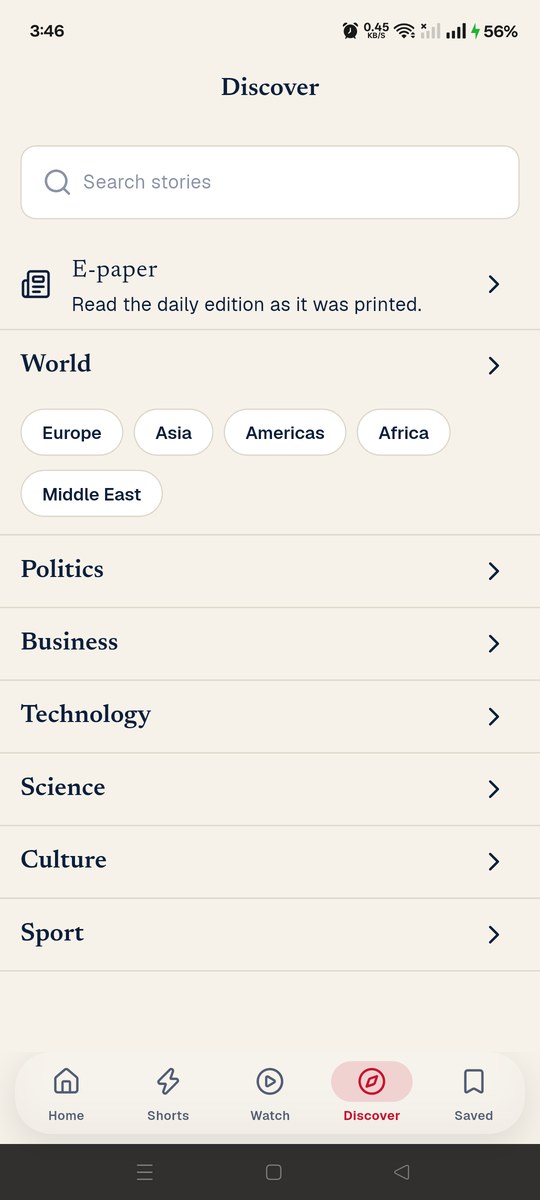
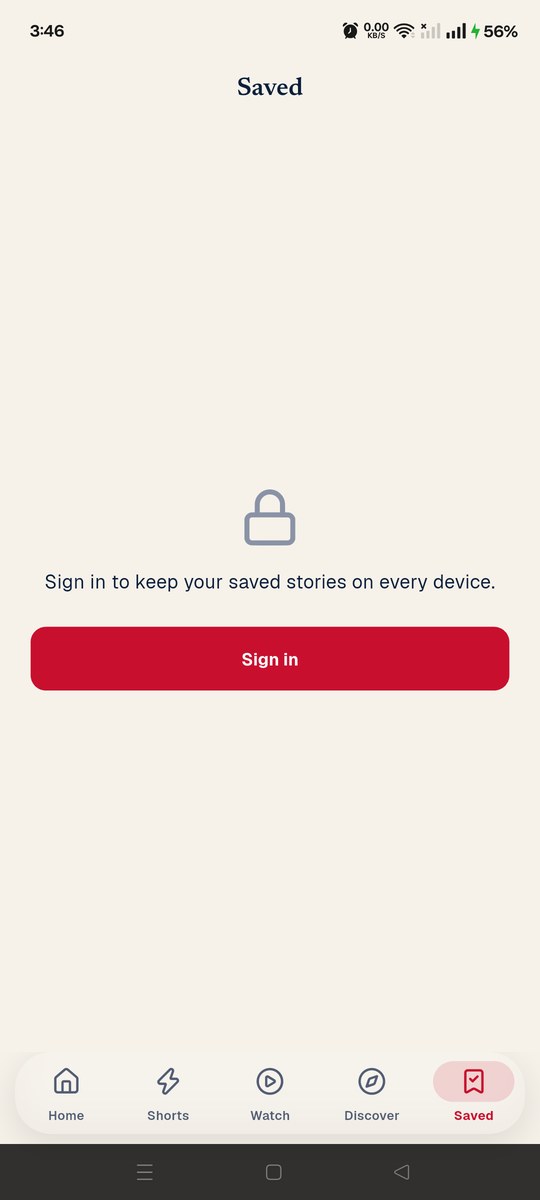
- Shorts, Watch (videos and reels), Discover (search, categories, e-paper) and Saved stories.
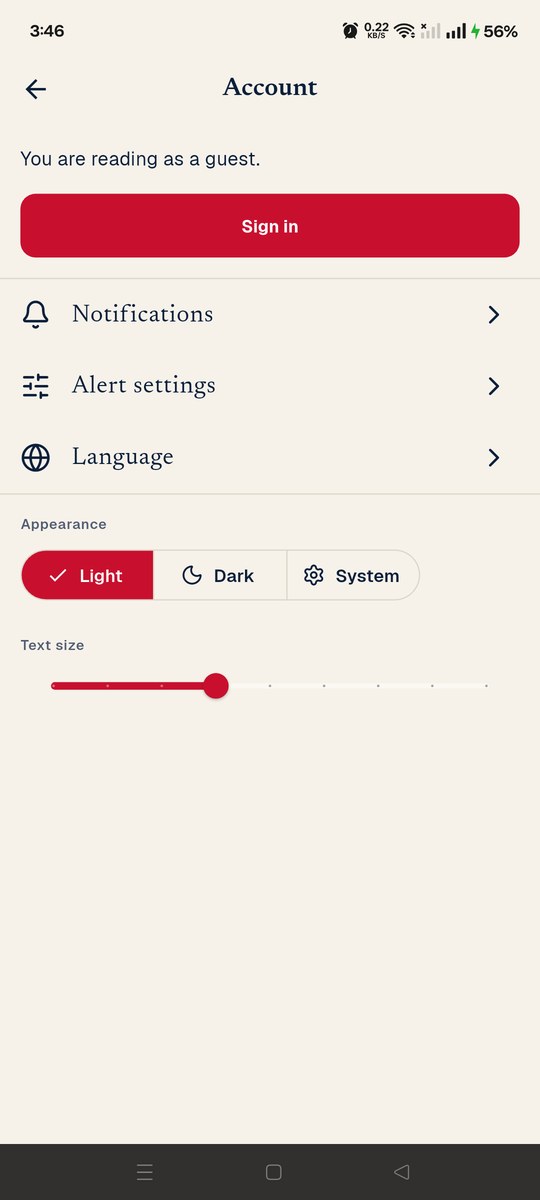
- Account: sign in, alerts, language, light/dark/system theme and reading size.
- For readers in a hurry: text size, listen to a story, share, and an AI summary or translation.
The next sections show how to connect the app to your site, rename it, change its icon, set up push alerts and ads, and build it for the stores.
Quick test
To see the app working before you set up your own site, point it at a Newsifly demo site: copy assets/config/app.env.example to assets/config/app.env, set API_BASE_URL to the address of a demo site, then run flutter run. If you do not have a demo address yet, follow the next section with your own installation.
Connect to your site
- Install the website and turn on the mobile API (it is on by default).
- In the app folder, copy
assets/config/app.env.exampletoassets/config/app.env. - Set
API_BASE_URL=https://your-domain.com/api/v1(no slash at the end). - Run
flutter pub getandflutter run.
The app reads everything else from the site: the name, colors, languages, categories, which sign-in methods and ads are on. You change those in the admin panel, not in the app code.
If you see "The app address is not set", the file assets/config/app.env is missing or empty. If you see "No connection", check the address and that the site answers on /api/v1/config in a browser.
Rename the app and package
The default Android package id (application id) and iOS bundle identifier is com.appifly.newsifly. It is only a placeholder: use an id that belongs to you (your domain written backwards, for example com.mynews.app), because the Play Store and the App Store allow each id only once and it cannot be changed after you publish.
Change the Android package id
In the examples below, the old id is com.appifly.newsifly and the new one is com.mynews.app.
- Open
android/app/build.gradle.ktsand change both lines to the new id:namespace = "com.mynews.app"andapplicationId = "com.mynews.app". - Move the file
android/app/src/main/kotlin/com/appifly/newsifly/MainActivity.ktinto folders that match the new id:android/app/src/main/kotlin/com/mynews/app/MainActivity.kt. Delete the old, now empty folders. - Change the first line of that file to the new id:
package com.mynews.app. - Firebase push: in the Firebase console add an Android app with the new id, download its
google-services.jsonand replace the file inandroid/app/(the old file still namescom.appifly.newsiflyand the build will not match). See Firebase. - Google sign-in: create the Android OAuth client in Google Cloud with the new id and your SHA-1 (see Sign-in).
- Run
flutter clean, thenflutter pub getand build again.
Change the iOS bundle identifier
- Open
ios/Runner.xcworkspacein Xcode, select Runner, then Signing & Capabilities, and change Bundle Identifier. Do this for the Runner target. - Or replace
com.appifly.newsiflywith the new id inios/Runner.xcodeproj/project.pbxproj(it appears for Runner and for the RunnerTests targets, for examplecom.mynews.app.RunnerTests). - Add an iOS app with the new bundle id in Firebase and replace
GoogleService-Info.plistinios/Runner/.
Other things you can rename
| What | Where |
|---|---|
| Name shown under the icon | Android: android:label in android/app/src/main/AndroidManifest.xml. iOS: CFBundleDisplayName and CFBundleName in ios/Runner/Info.plist. (The name inside the app comes from the website, see Colors, name and languages.) |
| Version | The version: line in pubspec.yaml (for example 1.0.0+1: the name, then the build number). Raise the build number for every upload to a store. |
Change the package id before you create the Firebase project, the signing key and the store listing. After you publish, the id cannot be changed.
Logo, icon and splash
- Replace the three images in
assets/brand:icon.png(1024x1024, no transparency),icon_foreground.png(1024x1024, transparent, keep the logo inside the middle two thirds) andsplash.png(768x768, transparent). - Change the colors under
flutter_launcher_iconsandflutter_native_splashinpubspec.yamlif you want other background colors. - Run
dart run flutter_launcher_iconsanddart run flutter_native_splash:create.
The logo inside the app comes from the website: set it in the admin panel under Branding.
Colors, name and languages
The brand color, site name, tagline, languages and categories come from the website. Change them in the admin panel and restart the app. The app has a light and a dark theme and follows the phone's setting unless the reader chooses one. Only English sentences are built in; to add a language, add its sentences to lib/core/localization/app_translations.dart and add the language in the admin panel (mark it right-to-left if needed).
API keys and services
| Service | What you need | Where it goes |
|---|---|---|
| Your website API | The address | assets/config/app.env |
| Firebase (push) | google-services.json and GoogleService-Info.plist, plus the service-account file on the website | App folders, and Admin, System settings |
| AdMob (ads) | Two app ids; banner and full-screen unit ids | App ids in AndroidManifest.xml and Info.plist; unit ids in Admin, Ads |
| Google sign-in | OAuth client ids | Admin, Reader settings; Android SHA-1 in Google Cloud |
| Apple sign-in | Bundle id and the Sign in with Apple capability | Admin, Reader settings; Xcode capability |
None of these is needed to run the app: each feature simply stays off until you set it up.
Push (Firebase)
- Create a project at console.firebase.google.com. Add an Android app with your package id and an iOS app with your bundle id.
- Download
google-services.jsonintoandroid/app/andGoogleService-Info.plistintoios/Runner/(add it to the Runner target in Xcode). - Android: add the line
id("com.google.gms.google-services") version "4.4.2" apply falseto the plugins block ofandroid/settings.gradle.ktsandid("com.google.gms.google-services")to the plugins block ofandroid/app/build.gradle.kts. - iOS: enable Push Notifications and Background Modes (Remote notifications) in Xcode, and upload your APNs key in the Firebase console.
- On the website, open Admin, System settings, and upload the Firebase service-account JSON.
- Rebuild the app. In the app, Account, Alert settings, press Turn on alerts.
Without the two Firebase files the app runs normally and the alert page says that alerts are not set up.
Ads (AdMob)
The app ships with Google's public test ids so ads work out of the box without earning or risking your account. Replace them with your own ids before you publish. There are two kinds of id, and they live in different places:
| Id | Looks like | Where you set it |
|---|---|---|
| AdMob app id, Android | ca-app-pub-0000000000000000~0000000000 (with a ~) | android/app/src/main/AndroidManifest.xml, the android:value of com.google.android.gms.ads.APPLICATION_ID |
| AdMob app id, iOS | same format | ios/Runner/Info.plist, the string under GADApplicationIdentifier |
| Banner and full-screen unit ids, Android and iOS | ca-app-pub-0000000000000000/0000000000 (with a /) | Admin panel, Ads. No code change. |
- Create an AdMob account at admob.google.com and add your Android app and your iOS app. Use the same package id and bundle id you chose in Rename the app and package.
- Copy each app's app id (the one with
~). OpenAndroidManifest.xmland replace the valueca-app-pub-3940256099942544~3347511713with your Android app id. OpenInfo.plistand replaceca-app-pub-3940256099942544~1458002511with your iOS app id. Both values are Google's test ids; if either one is left in place, a release build shows test ads and earns nothing. - In AdMob, create a banner unit and an interstitial (full-screen) unit for each platform. Copy the four unit ids (the ones with
/) into the admin panel under Ads, and set how often a full-screen ad may appear. - In AdMob, Privacy and messaging, set up the consent message for readers in the EU and UK. The app shows it before any ad is requested.
- Build a release (
flutter build apk --releaseorflutter build ipa) and install it on a device. Real ads can take up to an hour to start serving on a new AdMob app; an empty slot at first is normal.
The test unit ids that appear in the source (lib/core/services/ad_coordinator.dart) are used only by debug builds, so you never tap a live ad while developing. Leave them as they are: release builds read your unit ids from the admin panel. Banners you upload yourself in the admin panel (Ads, custom banners) are shown before AdMob banners.
Never tap your own live ads while testing; Google can suspend an account for it. Use a debug build, or add your phone as a test device in AdMob.
Google and Apple sign-in
Google: create OAuth client ids (web, Android with your SHA-1, iOS) in the Google Cloud console and enter the web and app client ids in the admin panel under Reader settings. Apple: enable the Sign in with Apple capability for the app id and enter the bundle id in the admin panel. Phone sign-in needs an SMS service connected on the website.
Release signing
Android
keytool -genkey -v -keystore upload-keystore.jks -keyalg RSA -keysize 2048 -validity 10000 -alias uploadKeep the file and its passwords safe and never share them. Create android/key.properties (it is ignored by Git and must never be uploaded to anyone):
storePassword=your store password
keyPassword=your key password
keyAlias=upload
storeFile=C:/keys/upload-keystore.jks
The Gradle file reads it automatically. Without this file a release build is signed with the debug key, which is fine for testing only.
iOS
Open ios/Runner.xcworkspace in Xcode, select Runner, Signing & Capabilities, choose your Team and keep "Automatically manage signing" on.
Building the app
flutter pub get
flutter build appbundle --release     # Play Store upload (.aab)
flutter build apk --release           # installable file (.apk)
flutter build ipa --release           # App Store (needs a Mac)
Outputs: build/app/outputs/bundle/release/app-release.aab, build/app/outputs/flutter-apk/app-release.apk, build/ios/ipa. Release builds only talk to https addresses, so your website needs a valid certificate.
iOS: team and bundle id
No Apple team is stored in the project. Choose your own in Xcode (Signing & Capabilities). The file ios/Runner/PrivacyInfo.xcprivacy lists what the app collects (name, email, user id for the reader account) and that it does not track; edit it if you add services that collect more. Add notification and sign-in capabilities in Xcode if you use them. The app asks for no camera, photo, microphone or location permission, so there are no usage descriptions to fill in.
Testing on a phone
- USB: enable Developer options and USB debugging on the phone, run
flutter devices, thenflutter run -d <device id>. - A site on your own computer: use
adb reverse tcp:8000 tcp:8000and setAPI_BASE_URL=http://127.0.0.1:8000/api/v1. Plainhttpworks only in debug builds; release builds needhttps. - Wi-Fi: Android blocks plain
httpto other computers even in debug. Useadb reverseor anhttpsaddress (a tunnel service works).
How the code is organized
Every feature follows one rule: screen, controller, repository, data source, API client. Screens only draw; controllers hold state; repositories return plain objects; data sources talk to the server. Folders: lib/core (config, network, theme, services), lib/features/<feature> (data, domain, presentation) and lib/shared (widgets used by several features). The test test/architecture_test.dart fails when the structure is crossed. Run flutter analyze and flutter test after any change.
App troubleshooting
| Problem | Fix |
|---|---|
| "The app address is not set" | Create assets/config/app.env from the example and set API_BASE_URL. |
| "No connection" on a real phone with a local site | Use adb reverse (see Testing on a phone). |
| Release app cannot reach the site | Release builds need https with a valid certificate. |
| No alerts arrive | Check the two Firebase files, the Google services Gradle plugin lines and the service-account file on the website. |
| No ads | Check the unit ids in the admin panel, the AdMob app ids in the native files, and that the reader gave consent. |
| Gradle error about Kotlin incremental caches | Keep the project on the same drive as the pub cache, or keep kotlin.incremental=false in android/gradle.properties. |
flutter analyze shows problems | Run flutter pub get first. |
App outbound connections
The app talks to your own website (always). Only when you switch the matching feature on: Google Firebase Cloud Messaging (alerts), Google AdMob and Google's consent service (ads), Google sign-in, Apple sign-in, and the web address of any YouTube or Vimeo video you embed. Nothing is sent to the author of the software. Fonts and pictures that ship with the app are bundled; nothing is downloaded at start-up except your own site's data.
Full list of packages and licenses: Credits & licenses. See also the AI disclosure.
Scheduled tasks (cron)
Scheduled publishing, queued mail and push messages, RSS import, backups, cleanup and the health heartbeat all run from one cron entry. Add this line (replace the path):
* * * * * php /path/to/newsifly/artisan schedule:run >> /dev/null 2>&1In cPanel, add it under Cron Jobs with the command /usr/local/bin/php /home/user/newsifly/artisan schedule:run. The System health page shows whether cron has run in the last five minutes.
What it runs
| When | Task |
|---|---|
| Every minute | Heartbeat for the health page; publish scheduled stories; process the queue (mail, push, translations) |
| Every 5 minutes | Fetch RSS feeds that are due |
| Hourly | Remove expired stories, if Delete expired stories is on |
| Daily 02:30 | Automatic backup |
| Daily 03:30 | Clean up old RSS import records |
| Daily 03:45 | Clean up old API tokens and logs |
Without cron the site still shows pages, but scheduled stories are not published, mail and push are not sent and backups do not run.
AI and translation
AI is optional. Without a key everything else works; the AI buttons stay hidden or ask you to add a key. Open System → AI.
Setting it up
- Choose a provider: Google Gemini, OpenAI or xAI Grok. Create an API key in that provider's console and paste it. Keys are stored encrypted.
- Check the models (listed in order of use; the next is tried if one fails).
- Switch on the master switch, then decide per role who may use the writing helper.
- Set the daily limits that cap your cost: staff (default 100 requests per day) and readers (default 20).
What AI is used for
- Writing helper in the story editor: headlines, an edited article and notes (see Writing and publishing).
- Search appearance: Suggest with AI writes the SEO title and description.
- Summaries and translation for readers: when switched on, a reader can ask for the key points of a story or a translation in their own language. The summary follows the language of the story.
- Site translation: Languages → Translate everything now translates website text, stories, categories and pages into the chosen language.
AI usage is billed by the provider, not by Newsifly. AI output can contain mistakes: Newsifly keeps numbers exactly and warns about unsupported claims, but an editor must always read a story before publishing.
Optional services
Every service below is optional and set in the admin panel. The site works without them.
| Feature | What you need | Where to set it |
|---|---|---|
| Email (password resets, notices) | SMTP details from your mail provider. “Log only” sends nothing. | System settings |
| Push notifications | A Firebase project and its service-account JSON (the free plan is enough to start) | System settings; Firebase |
| AI writing, summaries, translation | An API key from Google Gemini, OpenAI or xAI Grok (billed by the provider) | AI; AI and translation |
| Google sign-in | A Google OAuth client ID and secret | Reader settings |
| Sign in with Apple | An Apple developer account and a Services ID | Reader settings |
| Phone number sign-in | The one-time-code option switched on | Reader settings |
| Ads | Your own banner images, an AdSense publisher ID, and for the app AdMob IDs | Ads; Ads |
| Analytics | GA4, Tag Manager, Meta Pixel or Search Console codes | Tracking; Analytics & search |
Mobile API
The API lives under /api. The folder main/public/docs/api in your download (online at /docs/api/) contains an OpenAPI file, a Postman collection and a short guide. To let a browser app on another domain call it, list that domain in the CORS_ALLOWED_ORIGINS value of your .env file, separated by commas. Mobile apps do not need this.
API reference
Base address: https://your-site.example/api/v1. Files in this folder: openapi.json (OpenAPI 3.0) and postman_collection.json.
Basics
- Every answer is JSON. Send
Accept: application/json(the server forces it). - Language:
Accept-Language: bnor?lang=bn. The answer carriesContent-Language. Stories are returned in that language when the site has more than one active language. - Lists are paginated:
?page=2&per_page=20(at most 30, at most 60 for e-paper). They return{ "data": [...], "meta": { "page", "per_page", "total", "last_page" } }. - Errors:
{ "message": "...", "errors": { "field": ["..."] } }. Codes: 401 sign in needed, 403 not allowed, 404 not found or not public, 409 already done, 422 invalid input, 429 too many requests, 503 maintenance. - While the site is in maintenance mode every call answers 503 with
Retry-After, except for staff tokens.
Start up
GET /config: site name, colors, logos, languages, which sign-in methods are on, AdMob ids, push topic names, pages, categories. Cache it, refresh on app start.- Show onboarding (language, topics), then
GET /home.
Signing in
All of these return { token, token_type: "Bearer", expires_in_days, user }. Keep the token in secure storage and send it as Authorization: Bearer <token>.
POST /auth/register,POST /auth/login: email and password (10+ characters).POST /auth/googlewith the Googleid_token(the client id must be listed in Admin, Reader settings).POST /auth/applewith the Appleidentity_token(andnameon the first sign in).POST /auth/otp/request,POST /auth/otp/verify: phone number in international format. Available only when the admin switched phone sign-in on and connected an SMS service (config.auth.phone_otp).- Tokens last 90 days from the last use; a reader keeps at most 10 devices.
POST /auth/logoutsigns out one device,POST /auth/logout-allevery device,GET /me/deviceslists them.
Guests
Reading needs no account. Guests can vote in polls by sending a stable random X-Guest-Id header (16 to 64 letters, digits or dashes, created once per install) and can register a push token with POST /devices.
Push notifications
The app registers its FCM token with POST /devices and subscribes to topics itself: all, breaking, category-{id}, author-{id}, location-{slug} (names also in config.push). The server sends to topics from the admin panel and automatically for breaking stories. GET /notifications is the in-app inbox.
Ads
AdMob unit ids come from config.ads.admob; show a full-screen ad every config.ads.interstitial_every stories. Custom banners: GET /ads/{placement} (app_home_banner, app_article_bottom, app_interstitial) returns image and click_url; POST the click URL when tapped and open the returned target_url.
Rules the server enforces
- Drafts, pending and scheduled stories are never public; only their author or an editor with a token can open them.
- Reading is open; saving, commenting, reacting, deleting your own data need a token. You can only change your own bookmarks, comments and devices.
- Sensitive actions are POST: sign in, password change, account deletion, push registration.
- Limits per minute: 120 reads, 30 writes, sign in 30 per address and 5 per email or phone.
- No endpoint returns passwords, tokens, API keys, internal notes or other readers' email addresses.
Offline reading
Story detail has body_html (for rendering) and body_text (for text to speech). Cache them on the device.
Files
- openapi.json (OpenAPI 3.0)
- postman_collection.json (saves the token after sign-in)
Outbound connections
Newsifly contacts external services only when you enable the matching feature: SMTP server (mail), Google Firebase Cloud Messaging (push), Google Gemini (AI meta), Google and Apple sign-in servers, the RSS feeds and link addresses you add yourself, and the Unsplash image server (images.unsplash.com), which is contacted only when you run the sample-content seeder to download its 16 photographs. Nothing is sent to the author of the software and there is no tracking. Fonts and scripts are served from your own server.
Backups
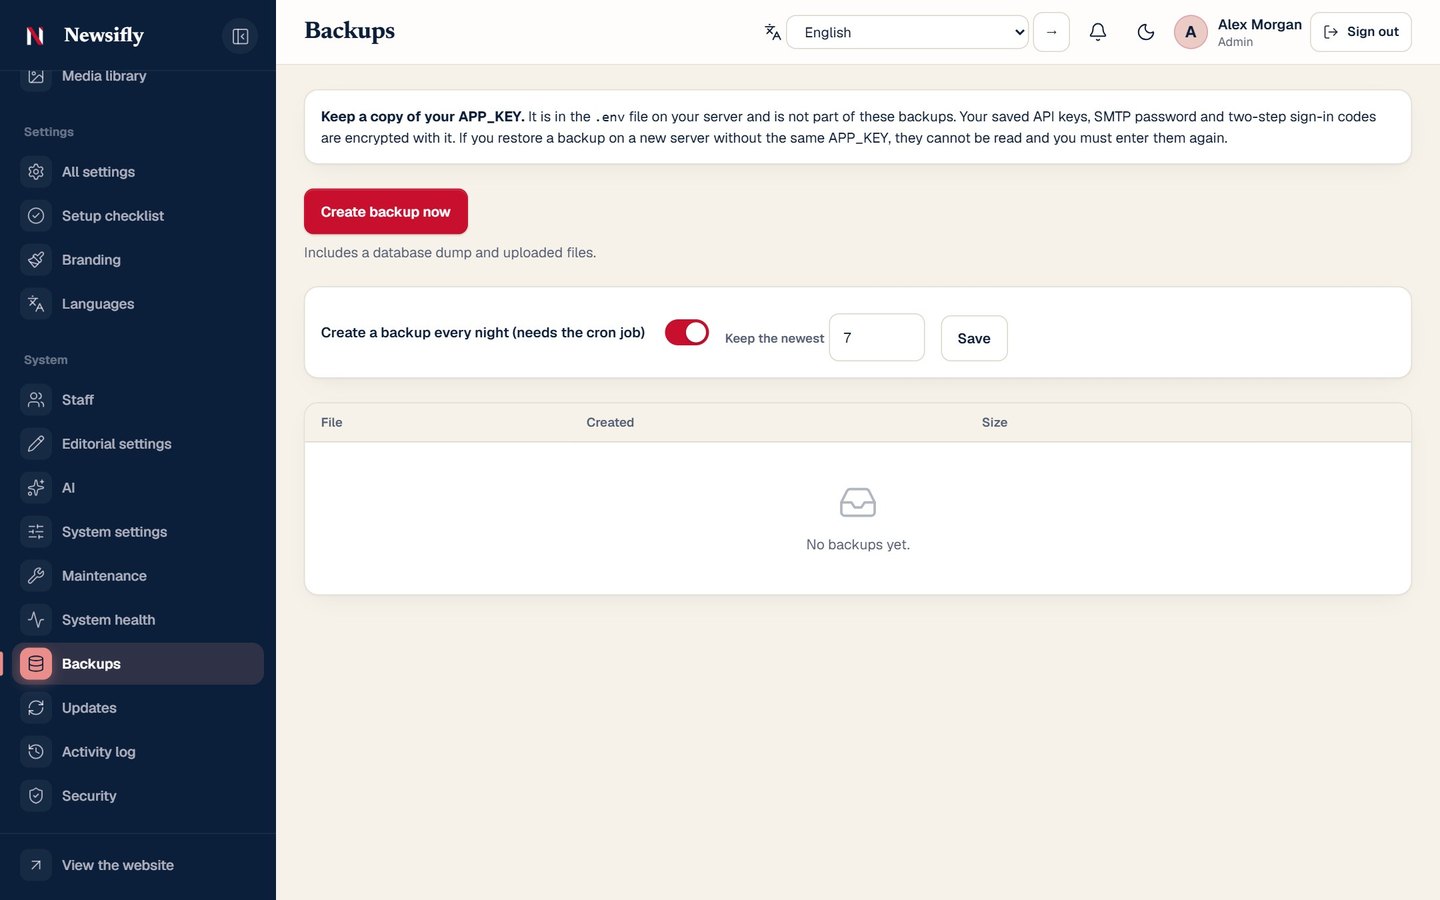
Backups creates a zip with a database export and your uploaded files. Download it and keep a copy off the server. A backup is made every night at 02:30 when cron is set up (switch it off or change how many to keep under Backups; the oldest are deleted), when you press the button, and before every update.
Updating
- Download the new update package from CodeCanyon.
- Open System, Updates, upload the update zip and press Check. Newsifly verifies the file list and checksums and shows the version change.
- Tick the confirmation that you have a backup and press Apply. A backup is also made automatically, the site goes into maintenance mode, files are replaced and database changes are run.
- If anything fails, the previous files are restored and the new database changes are undone. The message names the backup that was made.
The updater never touches .env, uploaded files or your settings.
System health
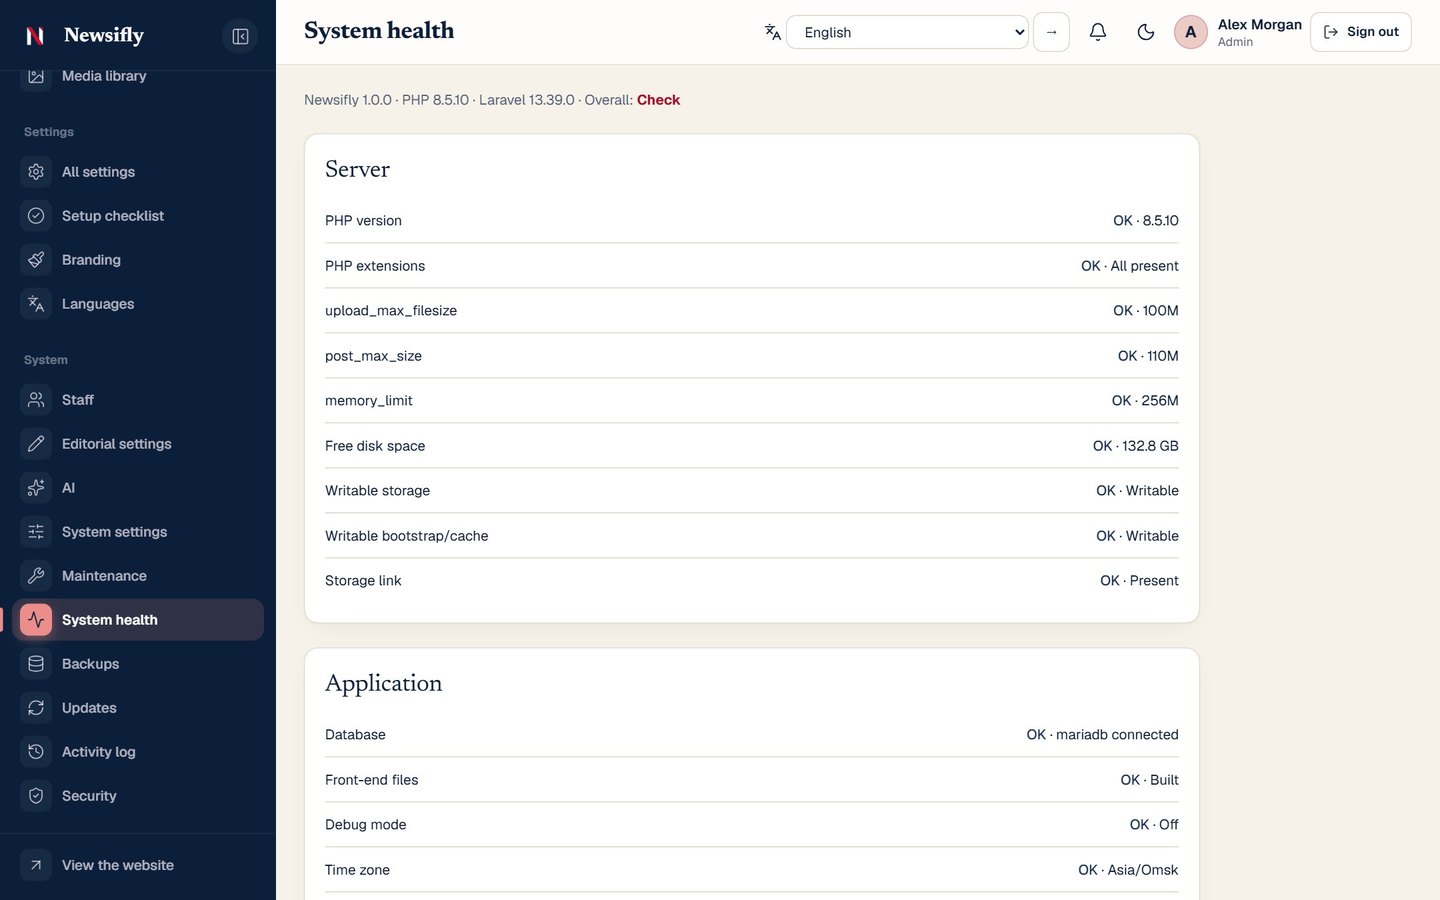
System, Health checks PHP version and extensions, upload limits, folder permissions, the storage link, database, front-end build, debug mode, HTTPS, mail, cron, queue, failed jobs and backups. Problems also appear in the Needs attention box on the dashboard.
Security notes
- Keep
APP_DEBUG=falseon a live site (the installer sets this). - Use HTTPS and enable two-factor sign-in for administrators.
- Passwords and API secrets you save in the admin panel are stored encrypted.
- The server fetches remote URLs (RSS, link previews) only from public addresses.
- Back up before every update and test updates on a copy first if the site is busy.
Maintenance mode
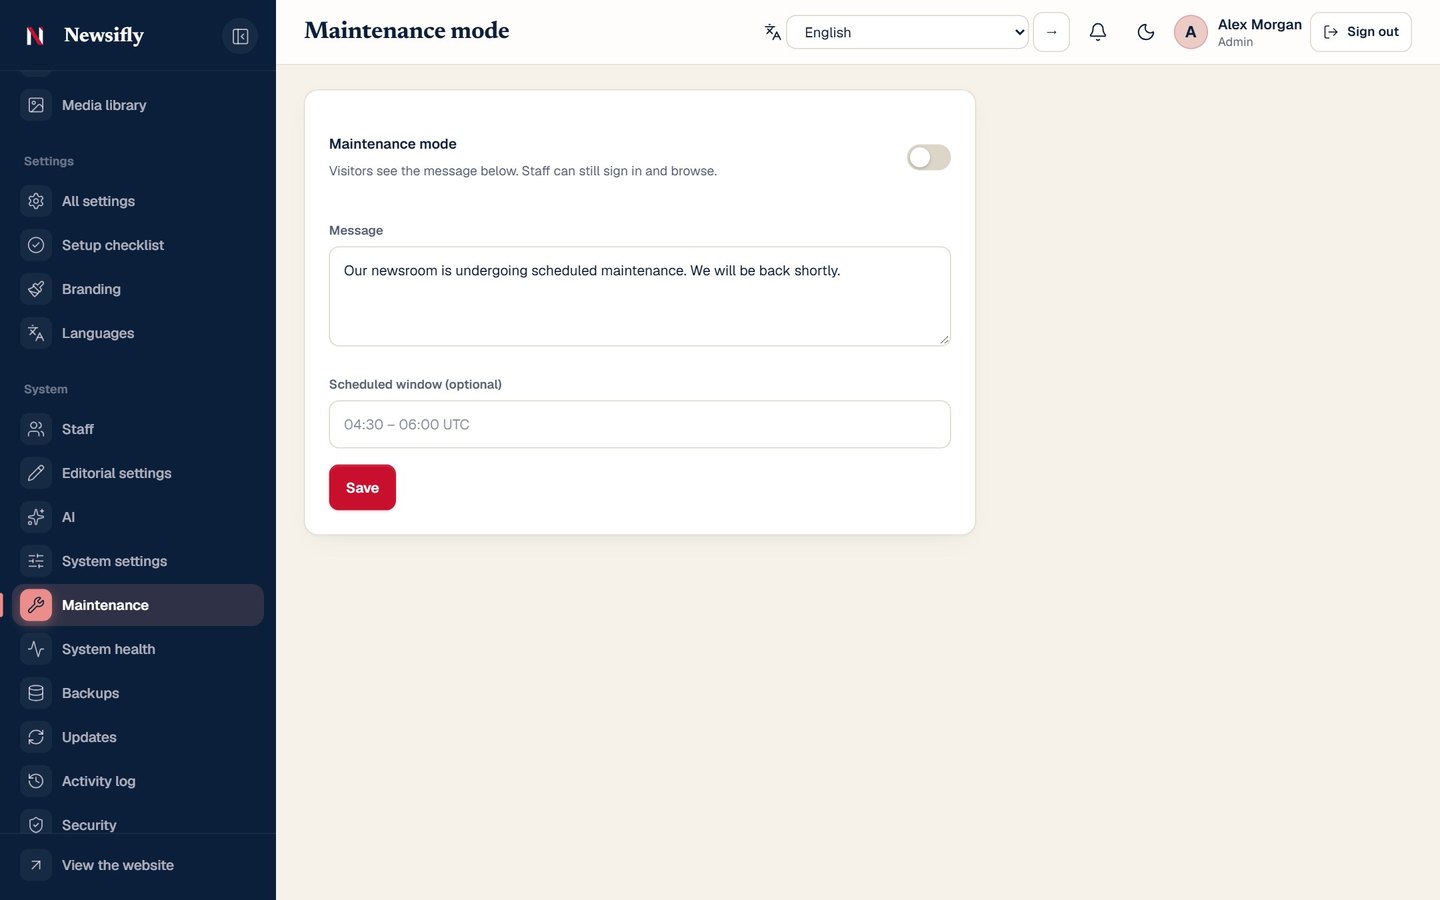
While you update or fix something, show visitors a friendly notice instead of a half-working site. Open System → Maintenance, write the message and either switch it on now or set a scheduled window. While it is on, the website and the app show the message; the admin panel stays open for you.
Troubleshooting
| Problem | Fix |
|---|---|
| Blank page or "Something went wrong" | Check that storage and bootstrap/cache are writable and read storage/logs/laravel.log. |
| Uploaded images are missing | Create the storage link: php artisan storage:link. If your host forbids links, ask them to link public/storage to storage/app/public. |
| Scheduled articles are not published | Cron is not running. See the cron section. |
| Emails do not arrive | Check the mail settings and send a test message; look at the failed jobs count on the health page. |
| Large uploads fail | Raise upload_max_filesize and post_max_size in PHP settings. |
Changed .env has no effect | Run php artisan config:clear. |
Go-live checklist
APP_ENV=productionandAPP_DEBUG=falsein.env.- HTTPS on the website and the API (the app and push alerts need it).
- The sample content is removed (
php artisan newsifly:demo --remove) and your administrator has a strong password and two-step sign-in (Admin → Security). - The
public/installfolder is deleted, andstorage/app/installedexists. Never delete that file on a live site. - The cron entry is running (System health shows the last run).
- Mail works: send yourself a password reset.
- Branding is done: logo, favicon, color, social links; the footer pages (About, Privacy, Terms) are written.
- Backups are on (nightly) and you keep a copy of the files and your
.envsomewhere else. - Firebase and AdMob use your own accounts; the app is built with your own package id and signed with your own key.
CORS_ALLOWED_ORIGINSlists only the sites that call the API from a browser (the app does not need it).- Upload limits are high enough for your photos and videos (see Large photos and videos).
- Your legal pages are reviewed by someone who knows the law where you publish.
FAQ
Can I use it without the mobile app?
Yes. The website and the admin panel work on their own. Add the app when you want to publish it in the stores.
Which languages are included?
Bangla, English and Arabic ship in full, for the website, the admin panel and the app; Arabic switches the layout to right to left. Add any other language under Languages and edit or translate every sentence.
Do I need an AI key?
No. The writing helper, reader summaries and AI translation stay off until you add a key (Gemini, OpenAI or Grok). The site works fully without them.
Can I change the colors and the logo?
Yes, under Branding: the logo (light and dark), favicon, brand color and the color of the admin menu. The app picks the same colors up from the website.
How do I change how the front page looks?
Open Homepage sections and click one of the five layouts. The website changes at once and the app follows within seconds. See Homepage layouts.
Can readers write stories?
A reader can ask to become a reporter; you approve the request under Reporter requests. Reporters write, and an editor reviews and publishes.
How do I make a story breaking news?
Open Breaking news, tick the story's headline and press Publish as breaking news. See Breaking news.
Are there live streams?
Live streams are switched off in this version. Videos, reels, YouTube and Facebook links and uploads are all included.
How do I update?
Download the new package, open System → Updates, upload the update zip and follow the steps. A backup is made first. See Updating.
My host does not allow exec(). What now?
Ask the host to enable it, or install from the command line (Option B).
Known limitations
Honest notes on what this version does not do, so nothing surprises you.
- Live streams are switched off for now.
- The story editor uses Markdown with a toolbar and live preview, not a WYSIWYG editor.
- The purchase code is checked for its format only; it is not verified against Envato.
- Search is database full-text search: very short words and common stop words are ignored, and results are newest first.
- Pictures are always converted to WebP; very old browsers without WebP are not supported.
- Authors cannot withdraw a story once it is submitted; an editor sends it back.
- Readers cannot edit a comment (delete and repost); replies are one level deep.
- Account deletion is immediate; there is no grace period.
- Push, AI, SMTP and AdSense were tested with test doubles; real accounts may need small settings changes.
- AI model names change over time; the list is editable under AI.
- YouTube embeds load from
youtube-nocookie.comand contact Google when the page opens; reels use click to play. Mention this in your privacy page. - RSS imports text and a link only; import only feeds you may use.
- Scheduled tasks need the cron entry; without it nothing is published on time, sent or imported.
Support
What is included
- Help with questions about how Newsifly works and how to use its features.
- Reports of bugs and errors that you can reproduce with a clean install.
- Help with a problem in the item's code, and with the documentation if something is unclear.
- Updates for the version you bought, while the item is maintained.
What is not included
- Installing or configuring your server, domain, DNS or SSL.
- Changes to the design or code for your own needs, and custom features.
- Problems with third-party services: Firebase, AdMob, AdSense, AI providers, SMTP, app stores. Their own support helps with those.
- Fixing a site after code changes you made.
Before you ask
Check Troubleshooting and System health in the admin panel, and read storage/logs/laravel.log. When you write, include the page or step, what you expected, what happened, your PHP version and any error text. Support is given through the item's comments on the marketplace where you bought it.
Changelog
v1.0.0: Initial release
- Website, admin panel and JSON API on Laravel 13, and a Flutter app for Android and iOS.
- Stories with a Markdown editor, scheduling, review workflow, breaking news and translations.
- Videos, reels, short news, galleries, e-paper, polls, comments, bookmarks and search.
- Bangla, English and Arabic in full, with right-to-left support, a translation manager and AI translation.
- Five homepage layouts that the website and the app both follow.
- AI writing helper and reader summaries (Gemini, OpenAI or Grok, optional).
- Ads on the website and in the app, push alerts, RSS imports and analytics.
- Branding: logo, colors and admin menu color; a collapsible admin menu.
- Web installer, backups, safe updater, system health and security settings with two-step sign-in.
Credits & licenses
Newsifly is built on the open-source packages below. Each keeps its own license. The tables are generated from composer.lock, package-lock.json and pubspec.lock.
Fonts: Newsreader, Geist and Hind Siliguri (SIL Open Font License 1.1) in the app and on the website; Inter and JetBrains Mono (SIL Open Font License 1.1) in this documentation. Icons: the website, the admin panel and the app use the Lucide icon set (ISC license, lucide.dev); the license text is in the license folder of the download. Sample content: the sample pictures and the app icon are drawn by the software. When you run the seeder (php artisan db:seed --class=DemoSeeder), 16 photographs are downloaded from Unsplash under the Unsplash License (free for commercial use) and stored on your server as sample content; removing the sample content deletes them. The three short sample clips are bundled in database/demo-assets.
PHP packages (website, admin panel and API)
| Package | Version | License |
|---|---|---|
| brick/math | 1.0.0 | MIT |
| carbonphp/carbon-doctrine-types | 3.2.1 | MIT |
| dflydev/dot-access-data | v3.0.3 | MIT |
| doctrine/inflector | 2.1.1 | MIT |
| doctrine/lexer | 3.0.3 | MIT |
| dragonmantank/cron-expression | v3.6.1 | MIT |
| egulias/email-validator | 4.0.4 | MIT |
| fruitcake/php-cors | v1.4.0 | MIT |
| graham-campbell/result-type | v1.2.0 | MIT |
| guzzlehttp/guzzle | 8.5.0 | MIT |
| guzzlehttp/promises | 3.1.0 | MIT |
| guzzlehttp/psr7 | 3.4.0 | MIT |
| guzzlehttp/uri-template | v2.0.1 | MIT |
| laravel/framework | v13.42.0 | MIT |
| laravel/prompts | v0.3.27 | MIT |
| laravel/serializable-closure | v2.2.0 | MIT |
| laravel/tinker | v3.0.2 | MIT |
| league/commonmark | 2.10.7 | BSD-3-Clause |
| league/config | v1.2.0 | BSD-3-Clause |
| league/flysystem | 3.36.0 | MIT |
| league/flysystem-local | 3.35.3 | MIT |
| league/mime-type-detection | 1.17.0 | MIT |
| league/uri | 7.10.0 | MIT |
| league/uri-interfaces | 7.10.0 | MIT |
| monolog/monolog | 3.12.1 | MIT |
| nesbot/carbon | 3.15.1 | MIT |
| nette/schema | v1.4.0 | BSD-3-Clause, GPL-2.0-only, GPL-3.0-only |
| nette/utils | v4.1.6 | BSD-3-Clause, GPL-2.0-only, GPL-3.0-only |
| nikic/php-parser | v5.9.0 | BSD-3-Clause |
| nunomaduro/termwind | v2.4.1 | MIT |
| phpoption/phpoption | 1.10.0 | Apache-2.0 |
| psr/clock | 1.0.0 | MIT |
| psr/container | 2.0.2 | MIT |
| psr/event-dispatcher | 1.0.0 | MIT |
| psr/http-client | 1.0.3 | MIT |
| psr/http-factory | 1.1.0 | MIT |
| psr/http-message | 2.0 | MIT |
| psr/log | 3.0.2 | MIT |
| psr/simple-cache | 3.0.0 | MIT |
| psy/psysh | v0.12.24 | MIT |
| ramsey/collection | 2.1.1 | MIT |
| ramsey/uuid | 4.9.4 | MIT |
| symfony/clock | v8.1.9 | MIT |
| symfony/console | v8.1.11 | MIT |
| symfony/css-selector | v8.1.10 | MIT |
| symfony/deprecation-contracts | v3.8.1 | MIT |
| symfony/error-handler | v8.1.10 | MIT |
| symfony/event-dispatcher | v8.1.5 | MIT |
| symfony/event-dispatcher-contracts | v3.8.1 | MIT |
| symfony/finder | v8.1.11 | MIT |
| symfony/http-foundation | v8.1.11 | MIT |
| symfony/http-kernel | v8.1.11 | MIT |
| symfony/mailer | v8.1.10 | MIT |
| symfony/mime | v8.1.10 | MIT |
| symfony/polyfill-ctype | v1.37.0 | MIT |
| symfony/polyfill-intl-grapheme | v1.43.3 | MIT |
| symfony/polyfill-intl-idn | v1.43.0 | MIT |
| symfony/polyfill-intl-normalizer | v1.43.0 | MIT |
| symfony/polyfill-mbstring | v1.43.3 | MIT |
| symfony/polyfill-php80 | v1.43.0 | MIT |
| symfony/polyfill-php82 | v1.43.0 | MIT |
| symfony/polyfill-php84 | v1.43.0 | MIT |
| symfony/polyfill-php85 | v1.43.0 | MIT |
| symfony/polyfill-php86 | v1.43.0 | MIT |
| symfony/polyfill-time | v1.42.0 | MIT |
| symfony/polyfill-uuid | v1.43.0 | MIT |
| symfony/process | v8.1.10 | MIT |
| symfony/routing | v8.1.11 | MIT |
| symfony/service-contracts | v3.8.1 | MIT |
| symfony/string | v8.1.10 | MIT |
| symfony/translation | v8.1.11 | MIT |
| symfony/translation-contracts | v3.8.1 | MIT |
| symfony/uid | v8.1.9 | MIT |
| symfony/var-dumper | v8.1.10 | MIT |
| tijsverkoyen/css-to-inline-styles | v2.4.0 | BSD-3-Clause |
| vlucas/phpdotenv | v5.8.0 | BSD-3-Clause |
| voku/portable-ascii | 2.1.1 | MIT |
Front-end packages (website)
| Package | Version | License |
|---|---|---|
| @fontsource-variable/geist | 5.3.0 | OFL-1.1 |
| @fontsource-variable/newsreader | 5.3.0 | OFL-1.1 |
| @fontsource/hind-siliguri | 5.3.0 | OFL-1.1 |
| hls.js | 1.7.4 | Apache-2.0 |
| pdfjs-dist | 6.5.438 | Apache-2.0 |
Dart and Flutter packages (mobile app, direct dependencies)
| Package | Version | License |
|---|---|---|
| cached_network_image | 4.0.6 | MIT |
| cupertino_icons | 1.0.9 | MIT |
| dio | 5.11.1 | MIT |
| firebase_core | 5.1.0 | BSD |
| firebase_messaging | 17.0.1 | BSD |
| flutter_dotenv | 6.0.1 | MIT |
| flutter_launcher_icons | 0.14.4 | MIT |
| flutter_lints | 6.0.0 | BSD |
| flutter_native_splash | 2.4.8 | MIT |
| flutter_secure_storage | 11.2.0 | BSD |
| flutter_tts | 4.2.5 | MIT |
| flutter_widget_from_html_core | 0.17.4 | MIT |
| get | 4.7.3 | MIT |
| google_mobile_ads | 9.2.0 | Apache-2.0 |
| google_sign_in | 7.2.0 | BSD |
| image_picker | 1.2.4 | BSD |
| lucide_icons_flutter | 4.0.3 | MIT |
| path_provider | 2.1.6 | BSD |
| pdfx | 2.11.0 | MIT |
| shared_preferences | 2.5.6 | BSD |
| shimmer | 4.0.0 | BSD |
| sign_in_with_apple | 8.2.0 | MIT |
| url_launcher | 6.3.3 | BSD |
| video_player | 2.14.1 | BSD |
| webview_flutter | 4.14.1 | BSD |
AI disclosure
AI tools were used to create this item. We state this plainly so you know what you are buying.
| Part of the item | Was AI used? | How |
|---|---|---|
| Source code (Laravel website, admin panel and API, and the Flutter app) | Yes | Much of it was written with an AI coding assistant. |
| Documentation (this document) | Yes | Written and edited with an AI coding assistant. |
| Graphics (the layouts of the preview and screenshot images in the item listing) | Yes | Designed and laid out with the help of an AI coding assistant. The screenshots inside them show the real product. |
The tool used was an AI coding assistant (Claude, made by Anthropic). The author directed the work, reviewed it, tested it (the package has automated tests for the website, admin panel, API and app) and is responsible for all of it.
AI features inside the product
Separate from how Newsifly was made, the product has optional AI helpers: an AI writing helper, reader summaries and translation. They are off until you add your own key from Google Gemini, OpenAI or xAI Grok in Admin → AI, and every other feature works without them. When you switch them on, the text you send is processed by the provider you chose, under that provider's terms (see Outbound connections).